We recommend playing back multichannel audio (5.1-channel or more) to feel surround sound produced by the unit.
Playing back a BD/DVD
1
Turn on the BD/DVD player.
2
Press HDMI 1 to select “HDMI 1” as the
input source.
3
Start playback on the BD/DVD player.
4
Press STRAIGHT repeatedly to select
“STRAIGHT”.
When “STRAIGHT” (straight decode) is enabled, each
speaker produces each channel audio signal directly
(without sound field processing).
5
Press VOLUME to adjust the volume.
This completes the basic setup procedure.
When surround sound is not heard, or no sound is output from a
specific speaker, see “Troubleshooting” in the Owner’s Manual.
Français
7
The Yamaha Parametric room Acoustic Optimizer (YPAO) function detects speaker connections, measures the distances from them to your listening position(s), and
then automatically optimizes the speaker settings, such as volume balance and acoustic parameters, to suit your room.
Note the following regarding YPAO measurement
• Test tones are output at high volume and may surprise or frighten small children.
• Test tone volume cannot be adjusted.
• Keep the room as quiet as possible.
• Stay in a corner of the room behind the listening position so that you do not become
an obstacle between speakers and the YPAO microphone.
• Do not connect headphones.
Optimizing the speaker settings automatically (YPAO)
1
Press RECEIVER (z) to turn on the unit.
2
Turn on the TV and switch the TV input to
display video from the unit (HDMI OUT
jack).
3
Turn on the subwoofer and set the volume
to half. If the crossover frequency is
adjustable, set it to maximum.
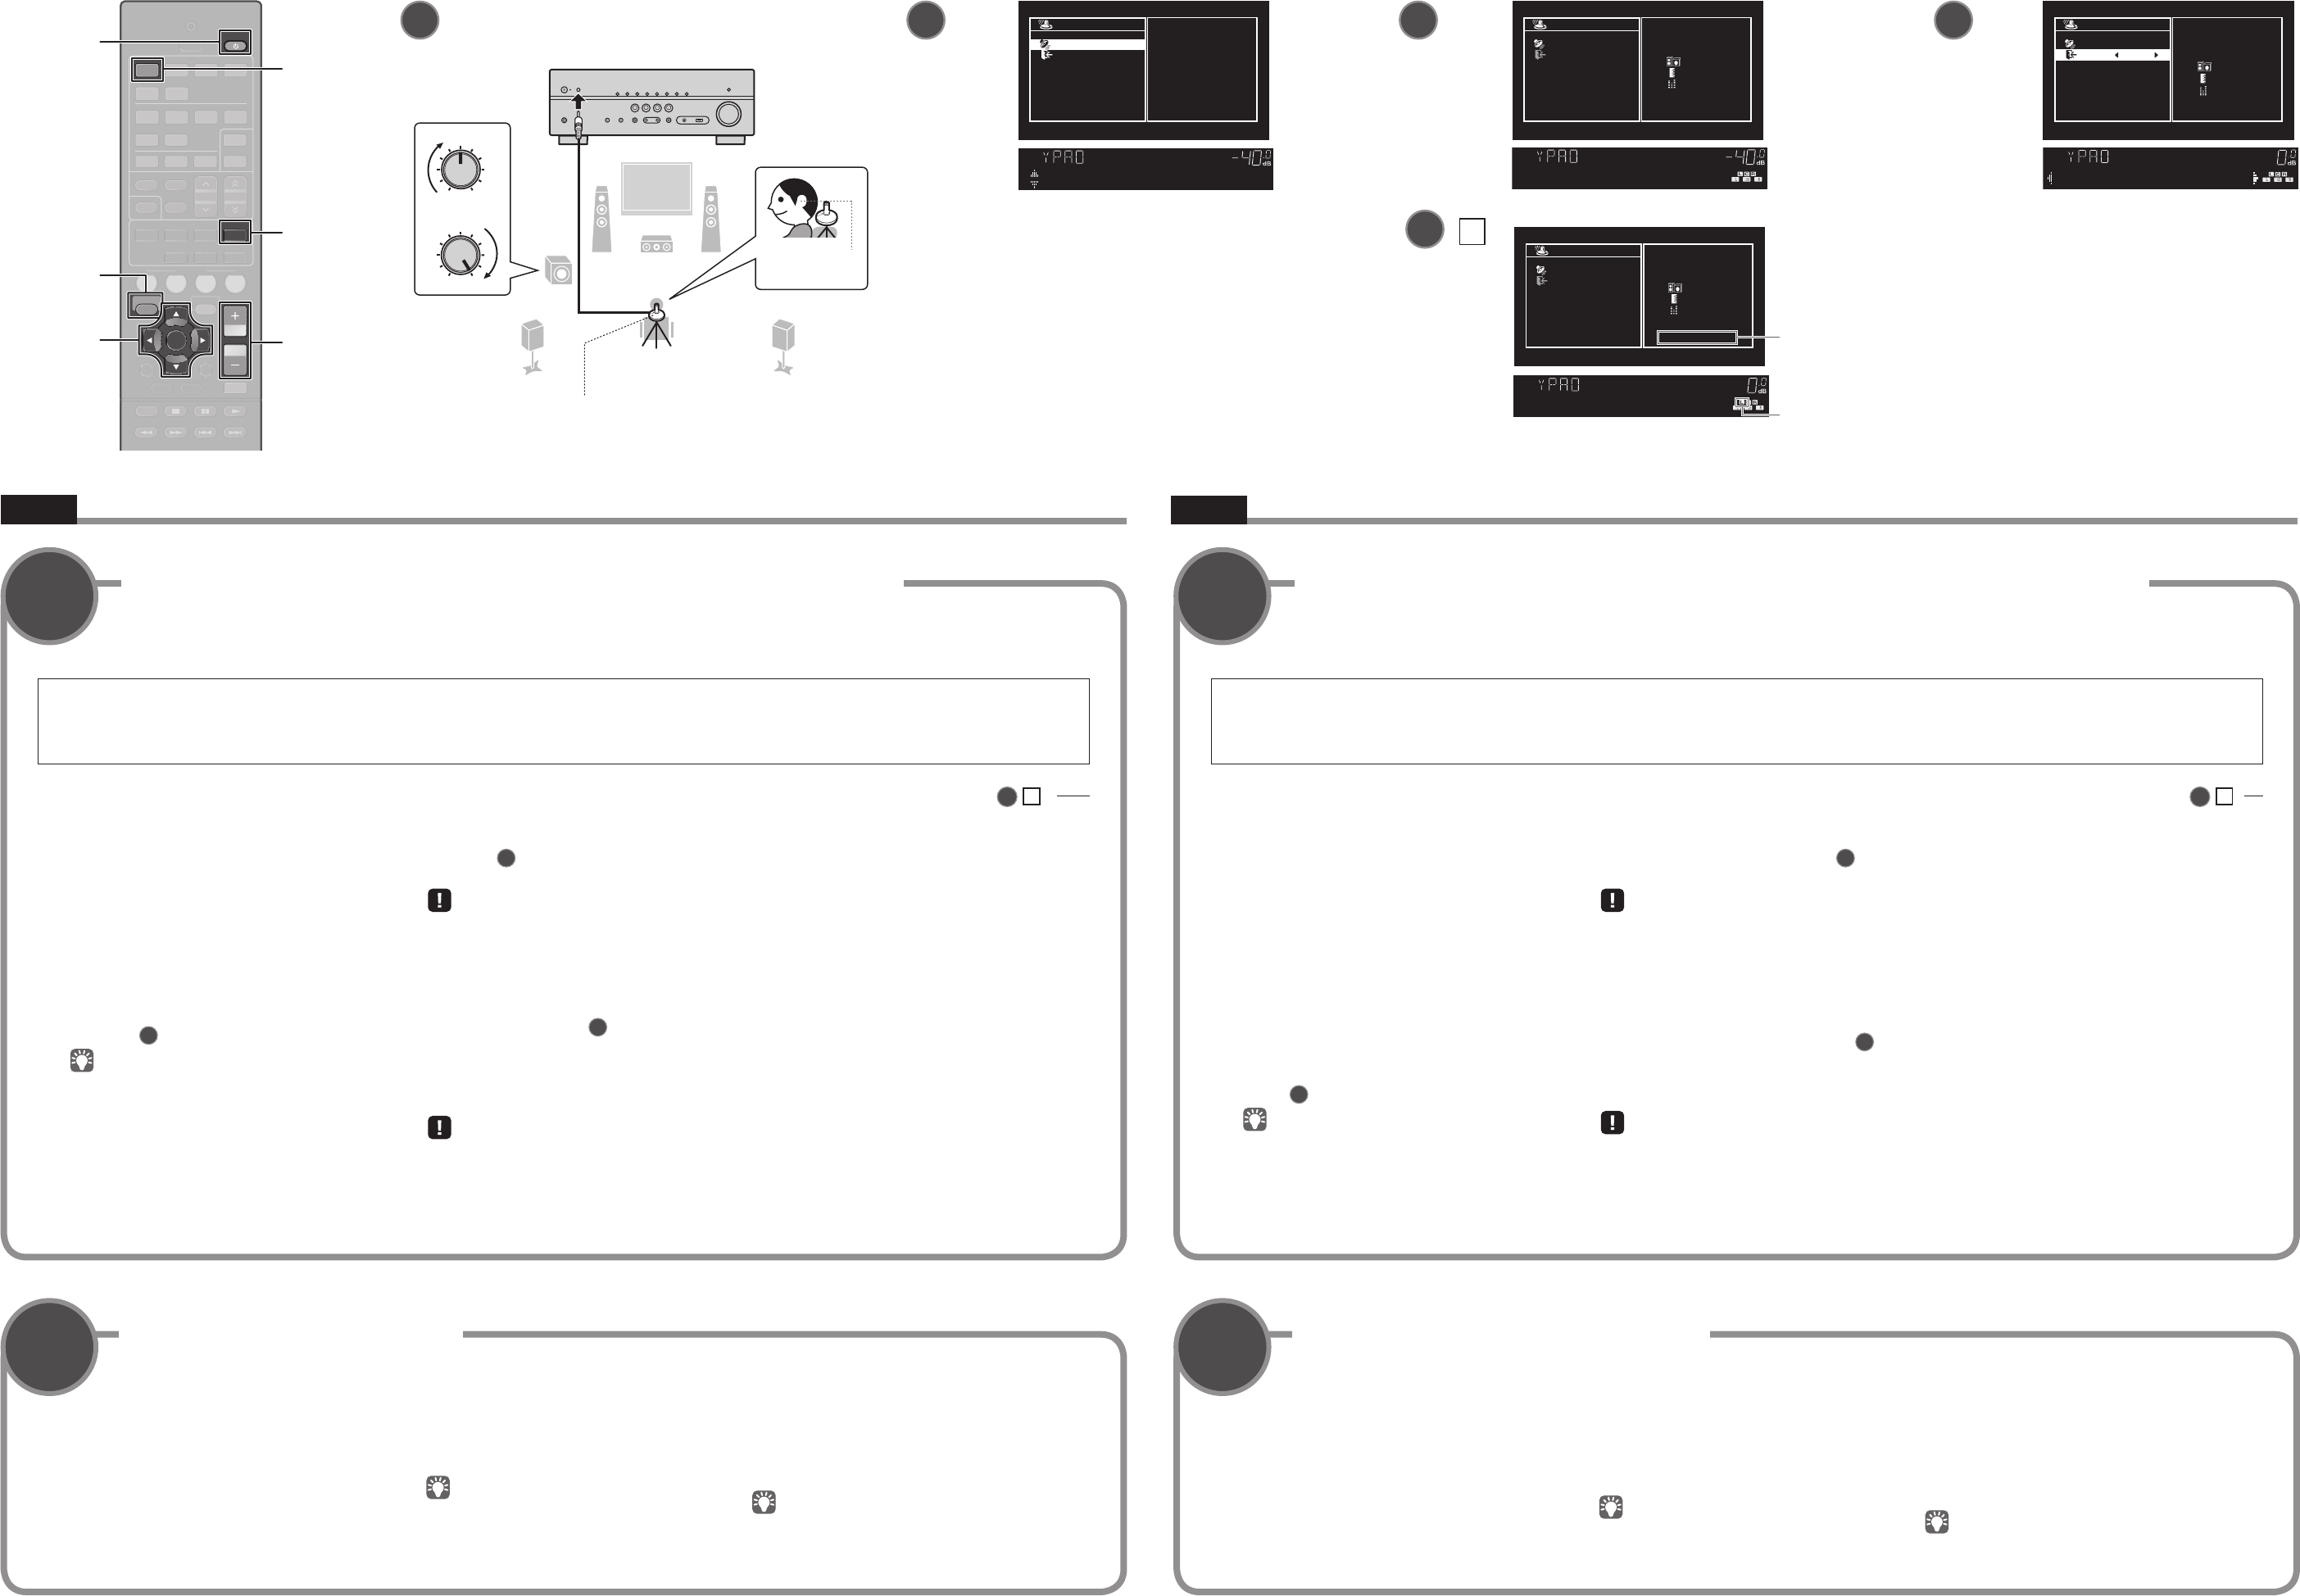
4
Place the YPAO microphone at your
listening position and connect it to the
YPAO MIC jack on the front panel.
The screen
7
-4 appears.
Place the YPAO microphone at your listening position
(same height as your ears). We recommend the use of
a tripod as a microphone stand. You can use the tripod
screws to stabilize the microphone.
5
To start the measurement, press SETUP.
The measurement will start in 10 seconds.
It takes about 3 minutes to measure.
The screen
7
-5 appears on the TV when the
measurement finishes.
• If any error message (such as E-1) or warning message
(such as W-2) appears, see “Error messages” or
“Warning messages” in the Owner’s Manual.
• If the warning message “W-1:Out of Phase” appears,
see “If “W-1:Out of Phase” appears”.
6
Use the cursor keys (e/r) to select
“SAVE” (Save) (screen
7
-6) and press
ENTER.
7
Disconnect the YPAO microphone from the
unit.
Do not leave the YPAO microphone in a place where it will
be exposed to direct sunlight or high temperature for an
extended period of time.
This completes optimization of the speaker settings.
Follow the procedure below to check the speaker
connections.
1
The speaker indicator in the front display will blink for
a problem speaker.
2
Check cable connections (+/-) for the problem
speaker.
If the speaker is connected incorrectly:
Turn off the unit, reconnect the speaker cable, and then
try YPAO measurement again.
If the speaker is connected correctly:
Depending on the type of speakers or room environment,
this message may appear even if the speakers are
connected correctly.
In this case, ignore the message and proceed to step 6.
If “W-1:Out of Phase” appears (
7
-
A
)
7
-
A
1234
56
FM
INFO
MEMORY
AM
PRESET
TUNING
SCENE
RETURN
TOP
MENU
POP-UP
MENU
VOLUME
BD
DVD
TV
NET
RADIO
MUTE
DISPLAY
ENTER
TRANSMIT
RECEIVER
HDMI
AV
SLEEP
AUXUSB
56
NET
ZONE B
ZONE A
MOVIEMUSIC
SUR. DECODESTRAIGHT
ENHANCER
BASS
DIRECT
MODE
SETUP
OPTION
2341
HDMI 1
RECEIVER z
SETUP
ENTER
Cursor keys
Touches de
curseur
STRAIGHT
VOLUME
12
3
9
54
VOLUME
CROSSOVER/
HIGH CUT
MINMAX
MINMAX
Ear height
Hauteur d’oreille
YPAO microphone
Microphone YPAO
Listening position
Position d’écoute
The unit
L’unité
Warning message
Message d’avertissement
Problem speaker (blinks)
Enceinte défectueuse (clignote)
8
À présent, lisons un disque BD/DVD.
Nous vous recommandons de lire le son multivoie (5.1 voies ou plus) pour sentir le son d’ambiance émis par l’unité.
Lecture d’un disque BD/DVD
1
Allumez le lecteur de disques BD/DVD.
2
Appuyez sur HDMI 1 pour sélectionner
«HDMI 1» comme source d’entrée.
3
Lancez la lecture sur le lecteur de disques
BD/DVD.
4
Appuyez à plusieurs reprises
sur STRAIGHT pour sélectionner
«STRAIGHT».
Lorsque «STRAIGHT» (décodage direct) est activé,
chaque enceinte produit directement le signal audio de sa
propre voie (sans traitement du champ sonore).
5
Appuyez sur VOLUME pour régler le
volume.
Ceci termine la procédure de configuration de base.
Si vous n’entendez pas le son d’ambiance ou si aucun son n’est
émis d’une enceinte spécifique, voir «Guide de dépannage»
dans le Mode d’emploi.
7
La fonction Yamaha Parametric room Acoustic Optimizer (YPAO) permet de détecter les raccordements des enceintes et de mesurer la distance entre ces
dernières et la position d’écoute. Elle optimise ensuite automatiquement les réglages des enceintes tels que les paramètres d’équilibre du volume et les paramètres
acoustiques qui conviennent à la pièce.
Veuillez noter les points suivants concernant la mesure YPAO
• Les signaux tests étant émis à un volume élevé, ils peuvent surprendre ou effrayer
les jeunes enfants.
• Le volume du signal test ne peut pas être réglé.
• Faites en sorte que la pièce soit le plus calme possible.
• Restez dans un coin de la pièce derrière la position d’écoute afin de ne pas faire
obstacle entre les enceintes et le microphone YPAO.
• Ne raccordez pas d’écouteurs.
Optimisation automatique des réglages d’enceintes (YPAO)
1
Appuyez sur RECEIVER (z) pour mettre
l’unité sous tension.
2
Mettez le téléviseur sous tension et
changez la source d’entrée an d’afficher
l’image à partir de l’unité (prise HDMI
OUT).
3
Allumez le caisson de graves et réglez
le volume à moitié. Si la fréquence de
coupure est réglable, réglez-la sur la valeur
maximale.
4
Placez le microphone YPAO sur la position
d’écoute et branchez-le sur la prise YPAO
MIC sur le panneau avant.
L’écran
7
-4 apparaît.
Placez le microphone YPAO à votre position d’écoute
(à hauteur d’oreilles). Nous conseillons l’utilisation d’un
trépied comme support de microphone. Lorsque vous
utilisez un trépied, utilisez les vis de ce dernier pour
stabiliser le microphone.
5
Pour lancer la mesure, appuyez sur SETUP.
La mesure commence dans les 10secondes.
La mesure dure environ 3minutes.
Lorsque la mesure est terminée, l’écran
7
-5
apparaît sur le moniteur TV.
• Si un message d’erreur (comme E-1) ou un
message d’avertissement (comme W-2) apparaît,
voir «Messages d’erreur» ou «Messages
d’avertissement» dans le Mode d’emploi.
• Si le message d’avertissement «W-1:Out of Phase»
apparaît, voir «Si «W-1:Out of Phase» apparaît».
6
Utilisez les touches du curseur (e/r) pour
sélectionner «SAVE» (Save) (écran
7
-6)
et appuyez sur ENTER.
7
Débranchez le microphone YPAO de l’unité.
Ne laissez pas le microphone YPAO dans un endroit
où il sera exposé aux rayons directs du soleil ou à une
température élevée pendant une période prolongée.
L’optimisation des réglages d’enceintes est maintenant
terminée.
Procédez comme indiqué ci-dessous pour vérifier les
raccordements des enceintes.
1
Le témoin d’enceinte sur l’afficheur de la face avant
clignote en cas d’enceinte défectueuse.
2
Contrôlez les raccordements des câbles (+ et -) de
l’enceinte défectueuse.
Si l’enceinte est mal raccordée:
Éteignez l’unité, rebranchez le câble d’enceinte, puis
réessayez la mesure YPAO.
Si l’enceinte est bien raccordée:
Selon le type d’enceintes ou l’environnement, ce
message peut apparaître, même si les enceintes sont
correctement raccordées.
Dans ce cas, ignorez le message et passez à l’étape 6.
Libble takes abuse of its services very seriously. We're committed to dealing with such abuse according to the laws in your country of residence. When you submit a report, we'll investigate it and take the appropriate action. We'll get back to you only if we require additional details or have more information to share.
Product:
Forumrules
To achieve meaningful questions, we apply the following rules:
First, read the manual;
Check if your question has been asked previously;
Try to ask your question as clearly as possible;
Did you already try to solve the problem? Please mention this;
Is your problem solved by a visitor then let him/her know in this forum;
To give a response to a question or answer, do not use this form but click on the button 'reply to this question';
Your question will be posted here and emailed to our subscribers. Therefore, avoid filling in personal details.
Register
Register getting emails for Yamaha RX-V477 at:
new questions and answers
new manuals
You will receive an email to register for one or both of the options.
Get your user manual by e-mail
Enter your email address to receive the manual of Yamaha RX-V477 in the language / languages: English, French as an attachment in your email.
The manual is 0,86 mb in size.
You will receive the manual in your email within minutes. If you have not received an email, then probably have entered the wrong email address or your mailbox is too full. In addition, it may be that your ISP may have a maximum size for emails to receive.
If you have not received an email with the manual within fifteen minutes, it may be that you have a entered a wrong email address or that your ISP has set a maximum size to receive email that is smaller than the size of the manual.
The email address you have provided is not correct.
Please check the email address and correct it.
Your question is posted on this page
Would you like to receive an email when new answers and questions are posted? Please enter your email address.