Getting Started Playback Specifications
ENGLISH
NOTE
Always switch on your audio input sources such
as CD players first, then your mixer, and finally any
amplifiers. When turning off, always reverse this
operation by turning off amplifiers, then your mixer,
and then input units.
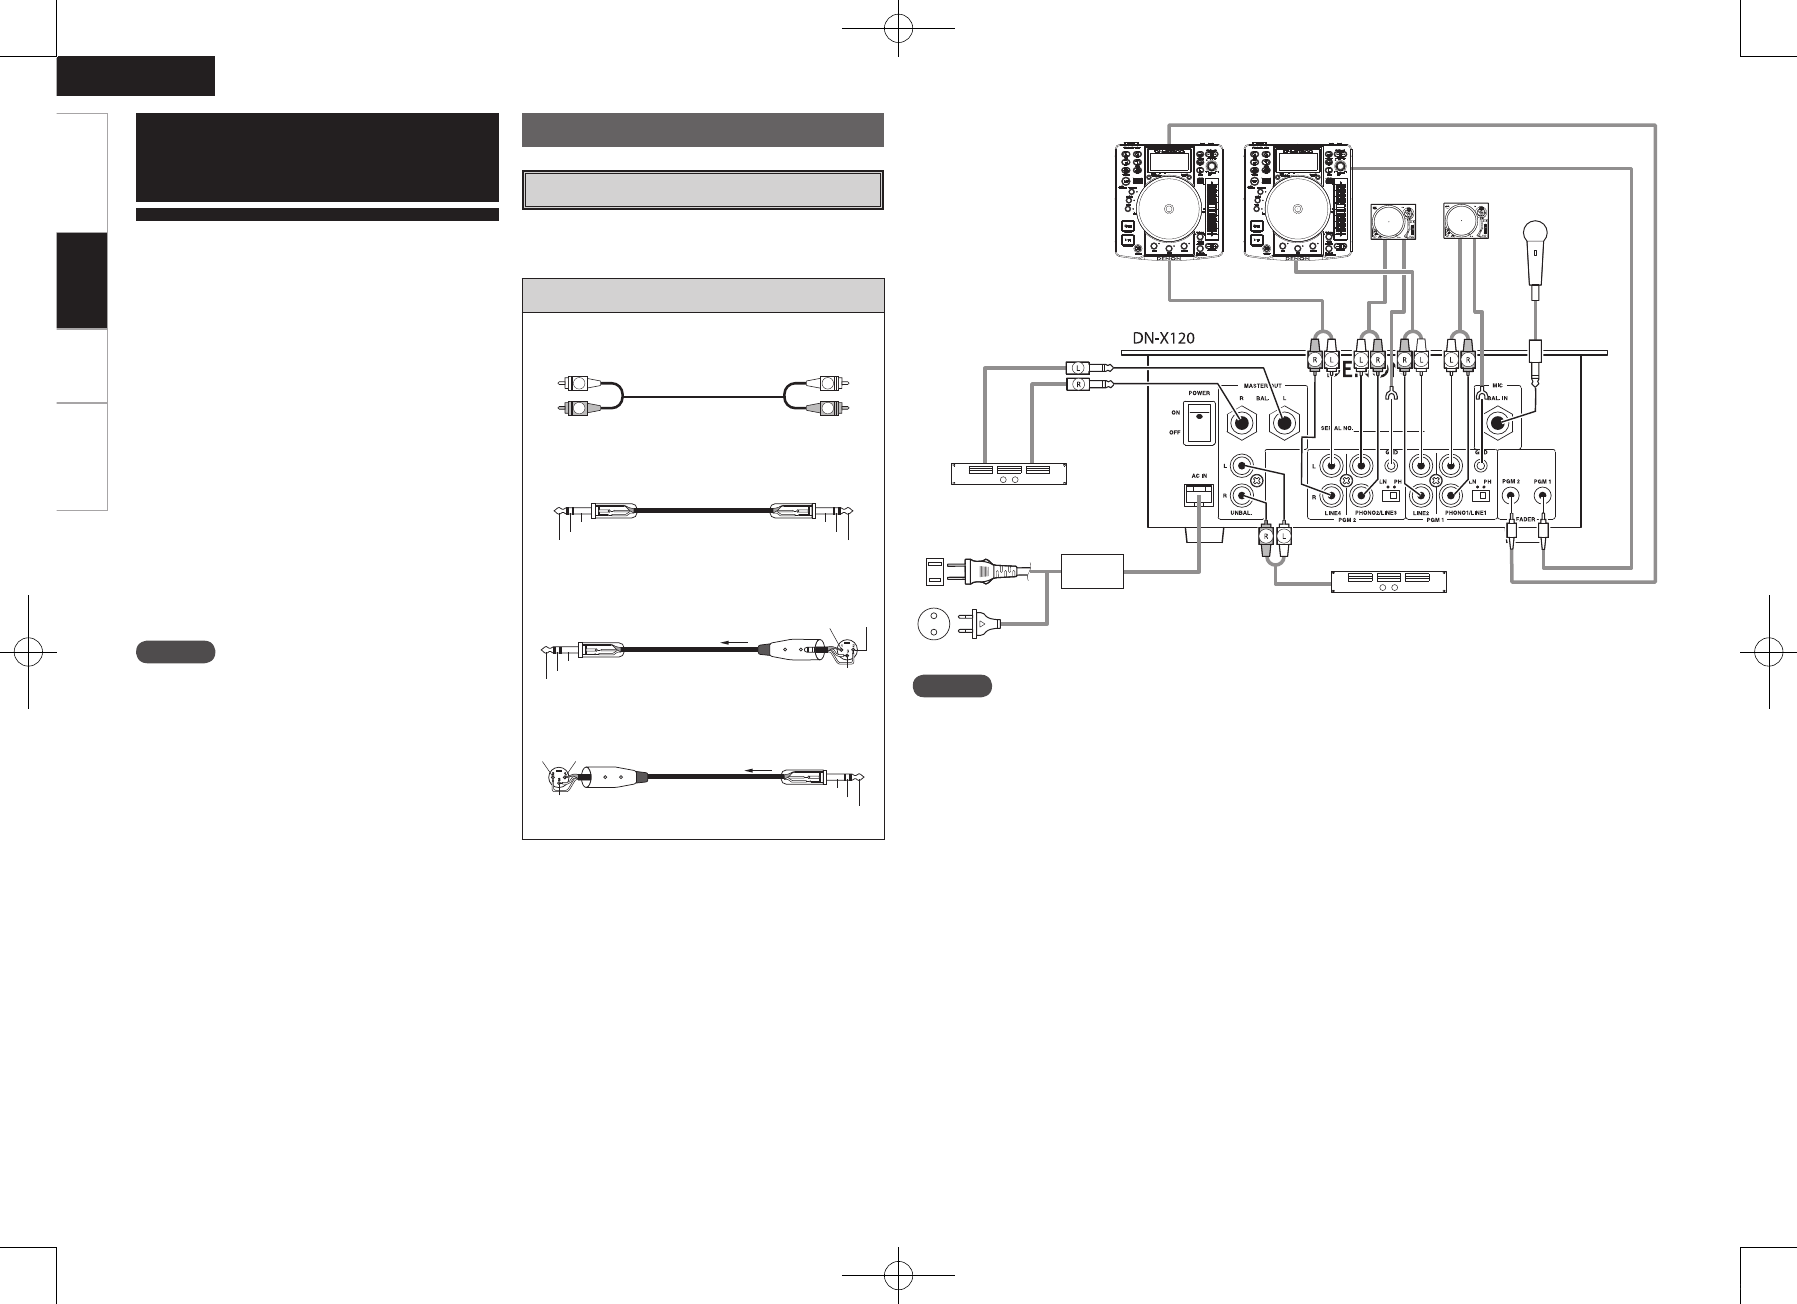
Refer to the connection diagram below.
1. Make certain AC power is off while making
connections.
2. Quality cables make a big difference in fidelity
and punch. Use high-quality, audio cables.
3. Do not use excessively long cables. Be sure
plugs and jacks are securely fastened. Loose
connections cause hum, noise, or intermittents
that could damage your speakers.
4. Connect all stereo input sources. Then connect
any effects into the stereo effect, if used. Connect
your microphone(s) and monitor headphones.
Make sure all faders are at “zero” and the unit is
off. Take care to connect only one cable at a time.
Pay attention to L and R position of jacks, on both
the DN-X120 and outboard gear.
5. Connect the stereo outputs to the power
amplifier(s) and/or tape deck(s) and/or MD
recorder(s) and/or CD recorder(s). Plug the DN-
X120 into AC power outlet.
Connections
Audio cables
For RCA PINJACK
Unbalanced
RCA pin pulag
For BALANCED MASTER OUT
Balanced Balanced (1/4” TS)
For MIC
Balanced (1/4” TRS) Balanced
XLR3-11C
For BALANCED MASTER OUT
Balanced Balanced (1/4” TS)
XLR3-12C
Cables Used for Connections
Select the cables according to the equipment being
connected.
Preparations
Sleeve=GND
Ring=Cold
Tip=Hot
Sleeve=GND
Ring=Cold
Tip=Hot
1=GND
Turntable 2
Main unbalanced power amplifier
Main balanced power amplifier
1/4” TRS
mono jack
Turntable 1
3.5 mm stereo mini cord
3.5 mm stereo mini cord
Balanced
microphone
CD player
1/4” TRS jack
AC ADAPTOR
To power outlet
CD player
AA-26 : for AC 120V
AA-27 : for AC 230V
AA-26 or
AA-27
NOTE
Use specified attached AC adaptor only.
Sleeve=GND
Ring=Cold
Tip=Hot
1=GND2=Hot
3=Cold
2=Hot
Sleeve=GND
Ring=Cold
Tip=Hot
3=Cold
Connections
b The attached AC adaptor is exclusively for use
with this unit.
Never connect to other devices.