FTS96 / PV96| Montage- en gebruiksaanwijzing voor ABUS universeel bijzetslot
FTS96 / PV96
FTS96 / PV96
1 x
1
Queste
I. Istruzioni gener IV. Attrezzi
II. Possibilità d´impie V Istruzioni di mont
III. Contenuto de VI. Uso
I. Istruzioni gener
La sicur
DIN 1-«
confN ». La FTS96 garVostr
Secondo DIN si consiglia di mont
una sicur
Anche la polizia e le comp
Si può ottener
monta
essere a
materi
Per e
maneggio indebit
II. Possibilità
La F
ed è
l’inte(ill. 1). Si può montare la F
su legno, pl
o verso sinistr Di solito la F
sul batte
Se le possibilità di fiss
espanso e finestr
dall’este
supplementar(malta bullone V
Allo scopo utilizzarbullone o come alternativ
caso di telil Per lo IM100 serve una malta
adatt
III. Contenut
o x
r
r
Denne v
I. Generel i IV
II. Anve V. Montering
I. Generel in
V
1
indtr -1 anbefales de
rr. vindue). Dette
r
e
II. Anvendelsesmulig
gængse (fig.
V
(felsesanker eller
kompoundmørtel). ABUS f
ABUS f
(plastvinduer).
Til
r, der fr
III. P
á x
1 x
2
1 x
3
1 x
4
1 x
5
1 x
6
1 x
7
8 x
8
2 x
9
2 x
10
3 x
11
2 x
12
per
viti
Ø
in legno e pla
senza inserto met
punta d
in alluminio e plastic
con inserto metallico
punta d
4,
3,
4,
3,
5,5 m
4,2 mm
IV. At rezzi da
• caccia
• caccia
• tarpano
• lima, segr ci
Tabella di t
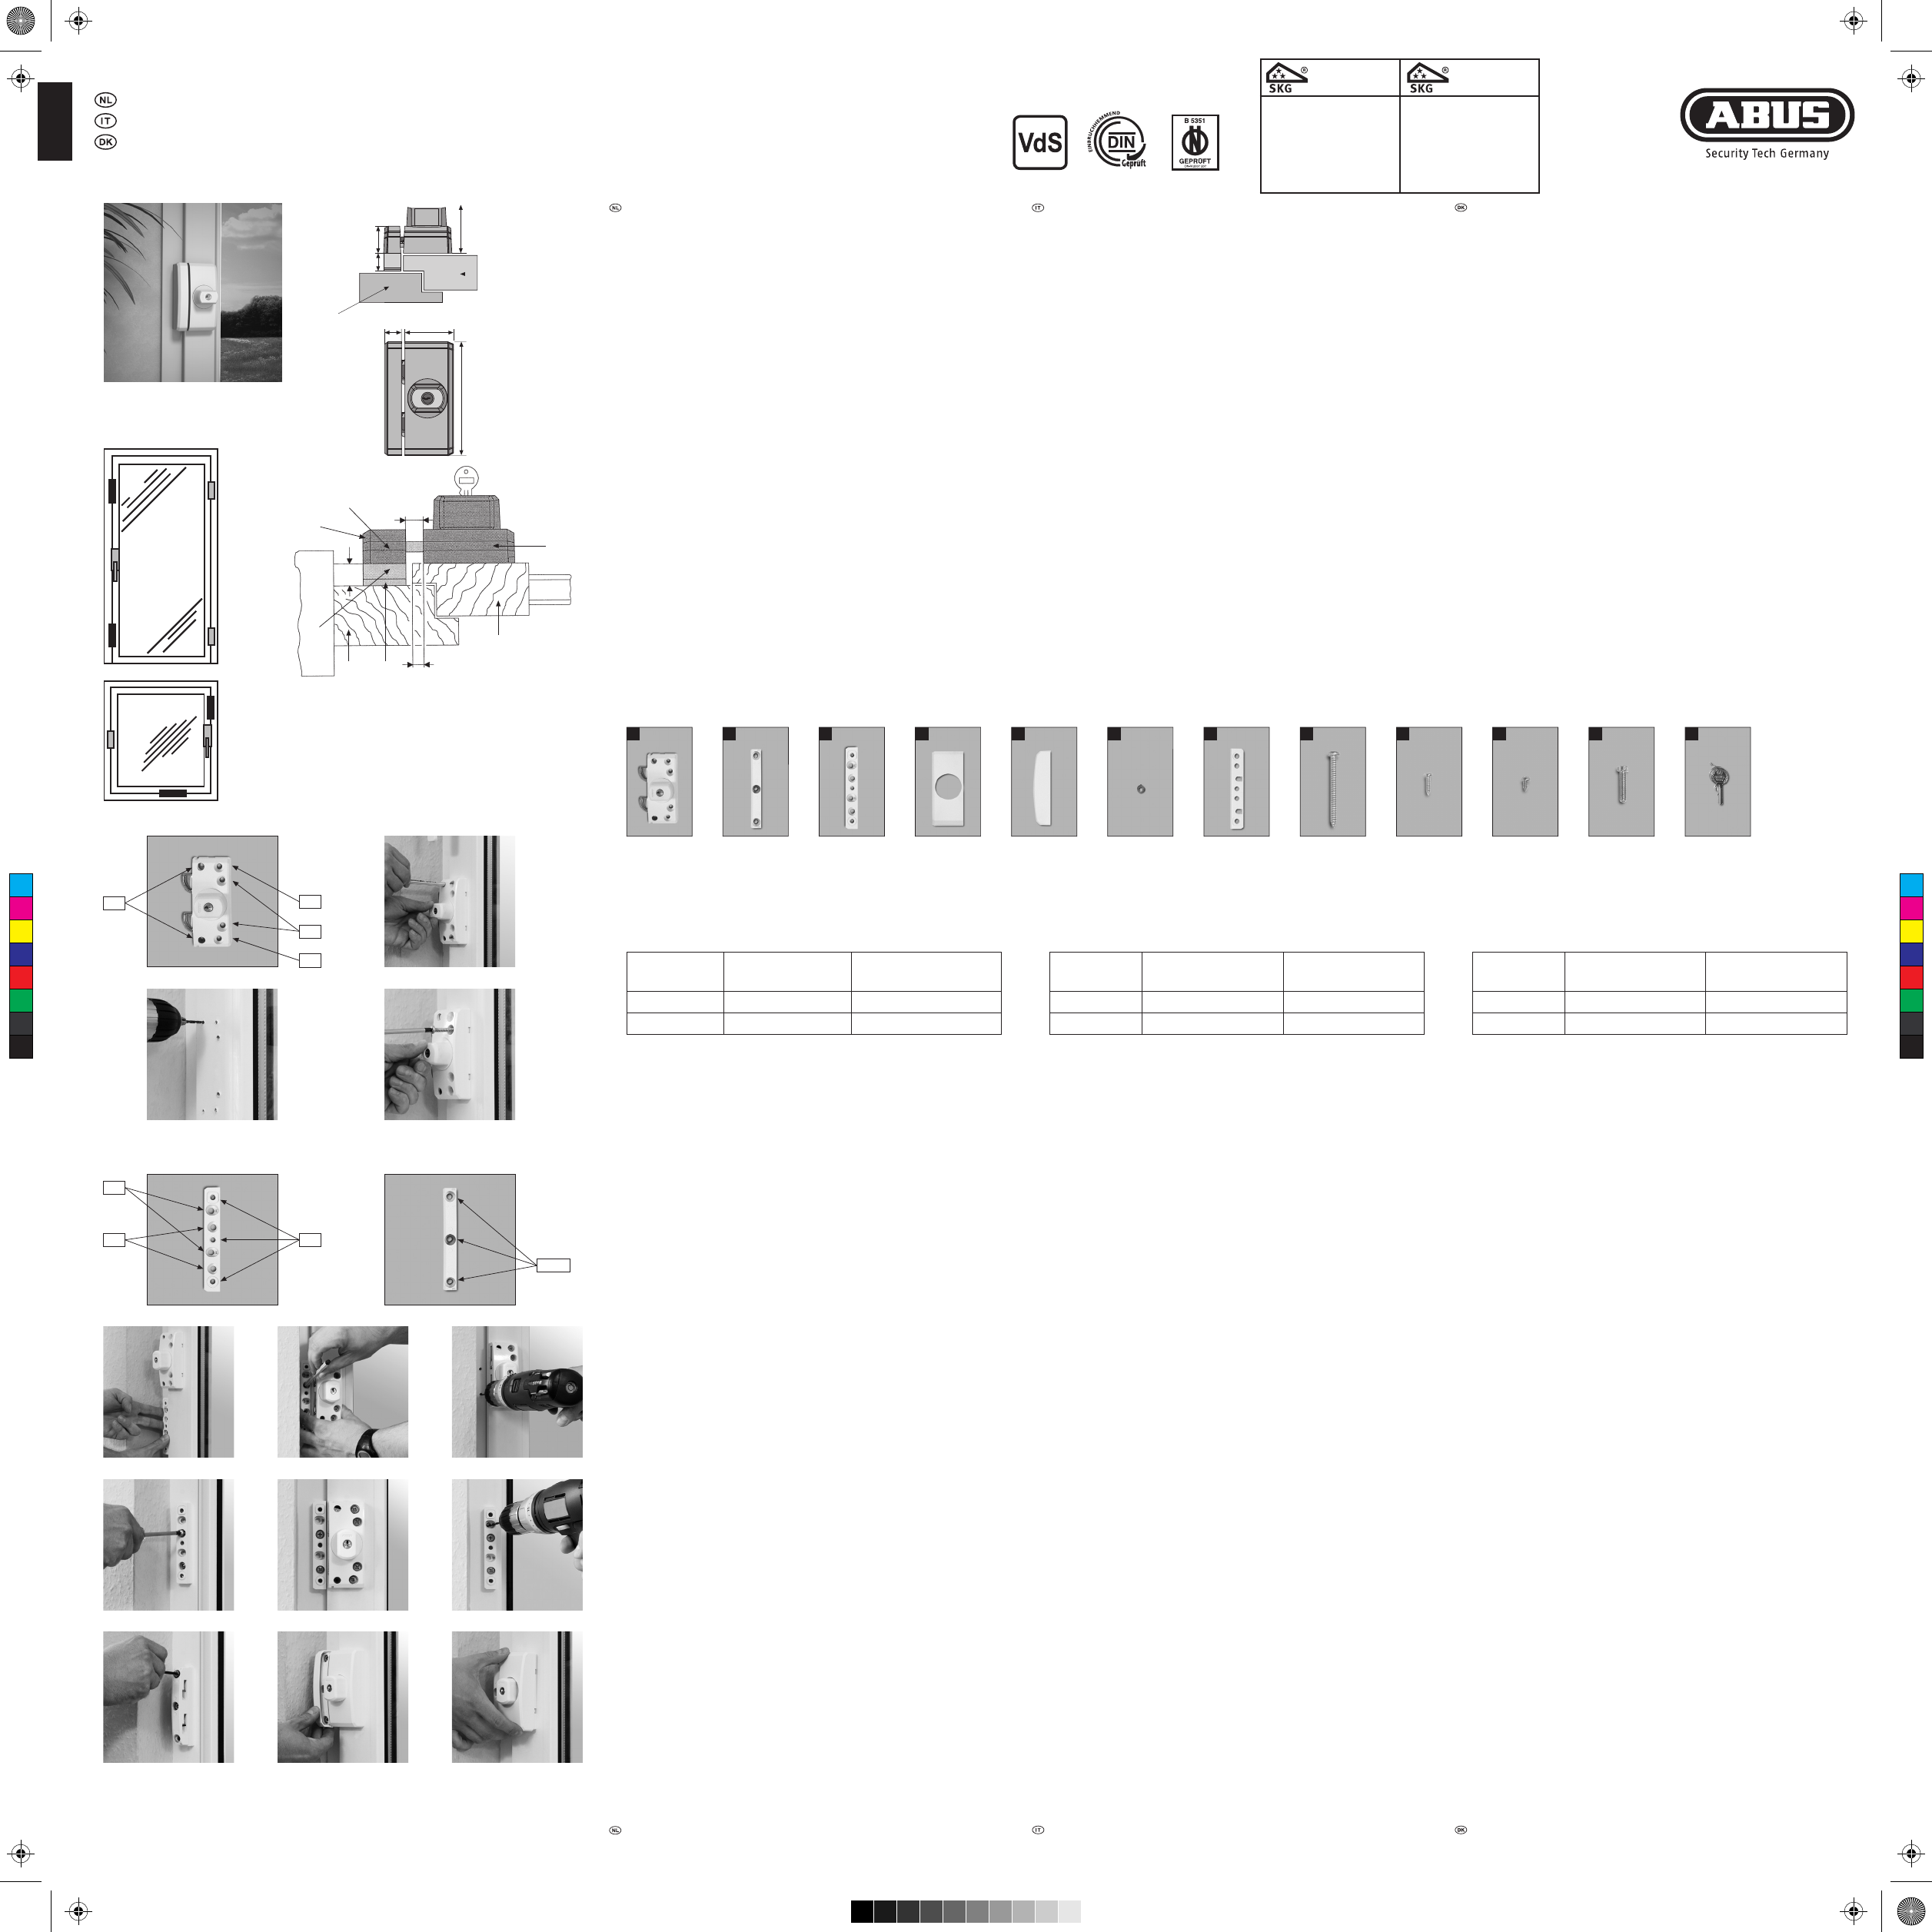
V. Istruzioni per
Avve
rfettamente.
2. V 1 esist
3. L
adattat
4. Ev
Se necessarrciar
Quando si tr
Monta
Togliere il coper chie
di incastr
Tenere la scatola de
DisegnarE e F G) e
tr
AvvitA (secondo altezza d’i
4,2 x6 mm o 4,2 xF (G ) viti
5,4 7).
Monta
Scatola della s
livello (vedi ill. 3) Per
serr
eo gli spessori (ill. 7).
Altezze d a 14 mm [con listello da avv
spessori (ill. 7)].
Avvito4 mm) centr
par
attenzioQ ill. 3
DisegnarA (vedi ill. 8,2 e tabella tr
Se necessa4 mm) mettere sotto il list
avvitA vvit.0).
Trapanare atC con la stess
obliquamente rispe
si può trC le due r
cuneo (ill. 6) (v. +5).
Nei fori C avvitare alt
Rimuovr c
punti di inc
Avvit
al listello (ill. 3) (v. 16).
ltezz 13 mm (s
Rimuovr c
punti di inc
Tenere la cass
par
DisegnarD1 a D3 (vedi ill.2
(vedi tabe
Se necess
saldamen
Controllare il I chia
quando si chiudono nella c
Per 4 + 5)
incastr Per il et r!
VI. Uso
FTS96 si può c
Per apri
voor
schro
Ø
zonder
boor Ø
met
boor Ø
4,
3,
4,
3,
5,5 m
4,2 mm
IV. M reedschap
•
• Sleufschroe
• Boormachine
• V
Boortabel
V. Montage-inst
Belangrijk
1. Voor de mont
Stel evt. het be
.
4. V
of glas besch
Montag
ver
v. de
Boorpositie E en FG
boortabel).
E
4,2 x
boorF ( G4 + 7).
Monta
T
Hier
Opdekmaat 14 mm
Montageplaat (3) (14 mm) in het midden op dez
.
positie vQ . 3).
Boorgaten A ,2 en boortabel).
> 1
en m.b.v 0).
toepassen.
De schuine scC
Wv.
opvulrC. +5).
In de boorC nog meer schr
af ver
Sluitplaat (2
Opdekmaat 13 mm
af ver
Boorpositie D1 tot D3 .2) en voorbor
v. 3 schroeve
5,
Werkinrole
lopen.
Bij de 4 + 5 rop druk
Bij de !
VI. Gebru
v
Voor
Deze
I. Algemeen IV. Gereedschap
II. T V. Montage-i
III. V
I. Algemeen
De FTS96 biedt be
II. Toepassingsmo
uitge
III. Verpa
1 x, 2, 4, 8 mm
1
1
6. 2 wigvormig 1
1 2 sleutel
IV. M
• Målebånd o.li
•
• Kæ r
•
•
Boretabel
V. M
Vigtige
r
r ., passer med dit
r
glasrudernår du borer
Monter
Tr
E og F G . 7) og
bor fo
Til boringer A x6 mm eller
Til boringer F ( G)
4 +
Monter
Tr
T
F 14 mm
1
r
Q
A,
12 og boretabe
Ved behov forr14 mm) med
.0).
C i r
C . +5).
C.
Tr
.6).
F13 mm (evt. med underlag).
Tr
D1til D3 .2), og bor for
Ved behov forr
Afpr
Ved monTryk de 4 + 5)
Ved mon!
VI. Be
T
uden metalindlæ
I aluminium og plast
med metalindlæ
4,
3,
4,
3,
5,5 m
4,2 mm
T
.
©
ABUS
| 58292W
Ci si riser
Per err.
©
ABUS
| 58292W
r .
©
ABUS
| 58292W
.
1
. / 1
Monta
. /6
S
Scatola della
serratur
A B
C
Montageplaat
Listello da a
D 1-3
Cassa de
serratur
. / 1
. / 1
FAS
FAS
FTS
FTS
FAS
FTS
FTS
F
G
E
G
. /5
Monta
. / 10
. / 1
. /2
å
0 29 mm
Deur - Raam / P
La parte smuss
H
. / 4
. / 7
. / 1
. / 1
. / 1
. / 1
3
2
1
. / 3
2
. / 9
. / 8
Raam
Battente
D re
Telaio
Ramme
5
28
max.
120
5 3
Q
N
O
3
G
P
1
2
3
G
N
O
P
Q
www.abus.com
*
Toepassi
RC2 / 3 minuten
Toepassin
RC3 / 5 minuten
Hout:
Zie instructie
Kunststo f met staal v
Zie instructie
Kunststo f zonder verster kin
Met a ne o f IM10 0 cheh ane
Met aa
Zi
Alti d met B er
C
M
Y
CM
MY
CY
CMY
K
FTS96_FTS96E_NLIDK_390299_AJ_20180315.pdf 1 28.08.19 08:51