9
Ex
UK – T fur increas the back s of t Tripp
T
Glider
recomm
while
Baby
The
the
that you
posi
a sof
under
Please
“
that w
be level, st
being
into,
sur[ Une] , e.g. some tile
for
As
1. Place yo
a pie
2. Remove the or sho rear glider and dispose of it.
This glider will not be
glider subse
per
3. P
sure it is level with the unde
If
Glider
4. Att
highcha
mum e
5. When you no longer require the additi
the
forem
replacemen
•
NEV
•
NEV
•
NEV
it is not in t
Tripp®
” “ Trapp
Tripp
Tripp
Tripp
Tripp Trapp® “
®Tripp Trapp
”. Tripp
: Tripp
Tripp Trapp®1
2
3
®Tripp
®Tripp Trapp 4
®Tripp Trapp
5
Tripp Trapp® "
Tripp Trapp®
BG – За да се уве с н за час на
детск с с масичк T Trapp® за не е с
ден смен
Преп
T
или
У
жения (
пот
ния
с е по в м к и пре маса с
рит
Моля, с
с
„...де с с масичка Tripp Trapp® н да се
пос
да се п наз Повърх тря да бъ равна,
с
черг
би мо
за В T T Грапави
повърх (неравни подов нап ня подов с
пло
T
Пос
1. Пос Ваше T
обър
него, з
2. Отс
лете. Този
комп
(за п
3. Пос
на
на на крак
мес
гач нф у
4. Прик удължени плъз към де с с
масичк
жение осиг макси на дей на
пл
5. Кога
положе
нос
ние, или го заменет
е вк
•
НИКОГА не изпо
бе
•
НИКОГА не ос
•
НИКОГА не позво
ското с
пре
CN Simp
儿童椅
儿童椅
加
T
带或 Tri
T
的
建
儿童椅
可
请
“
无
水
毛
深
童椅
瓷
T
T
1
在
2
种
已
结
3
与
果
片
4
T
以
5
的
位置
长
•
T
•
•
位置
CN Traditi
高
T
滑
T
您
T
裝位置
我
果
有可
重要
另
「
止
並
線
面不
糙
亦不
腳椅
安
1
子
2.
防滑
短防
的
3.
T
意
加
4.
T
方
防滑
5.
安全
代後
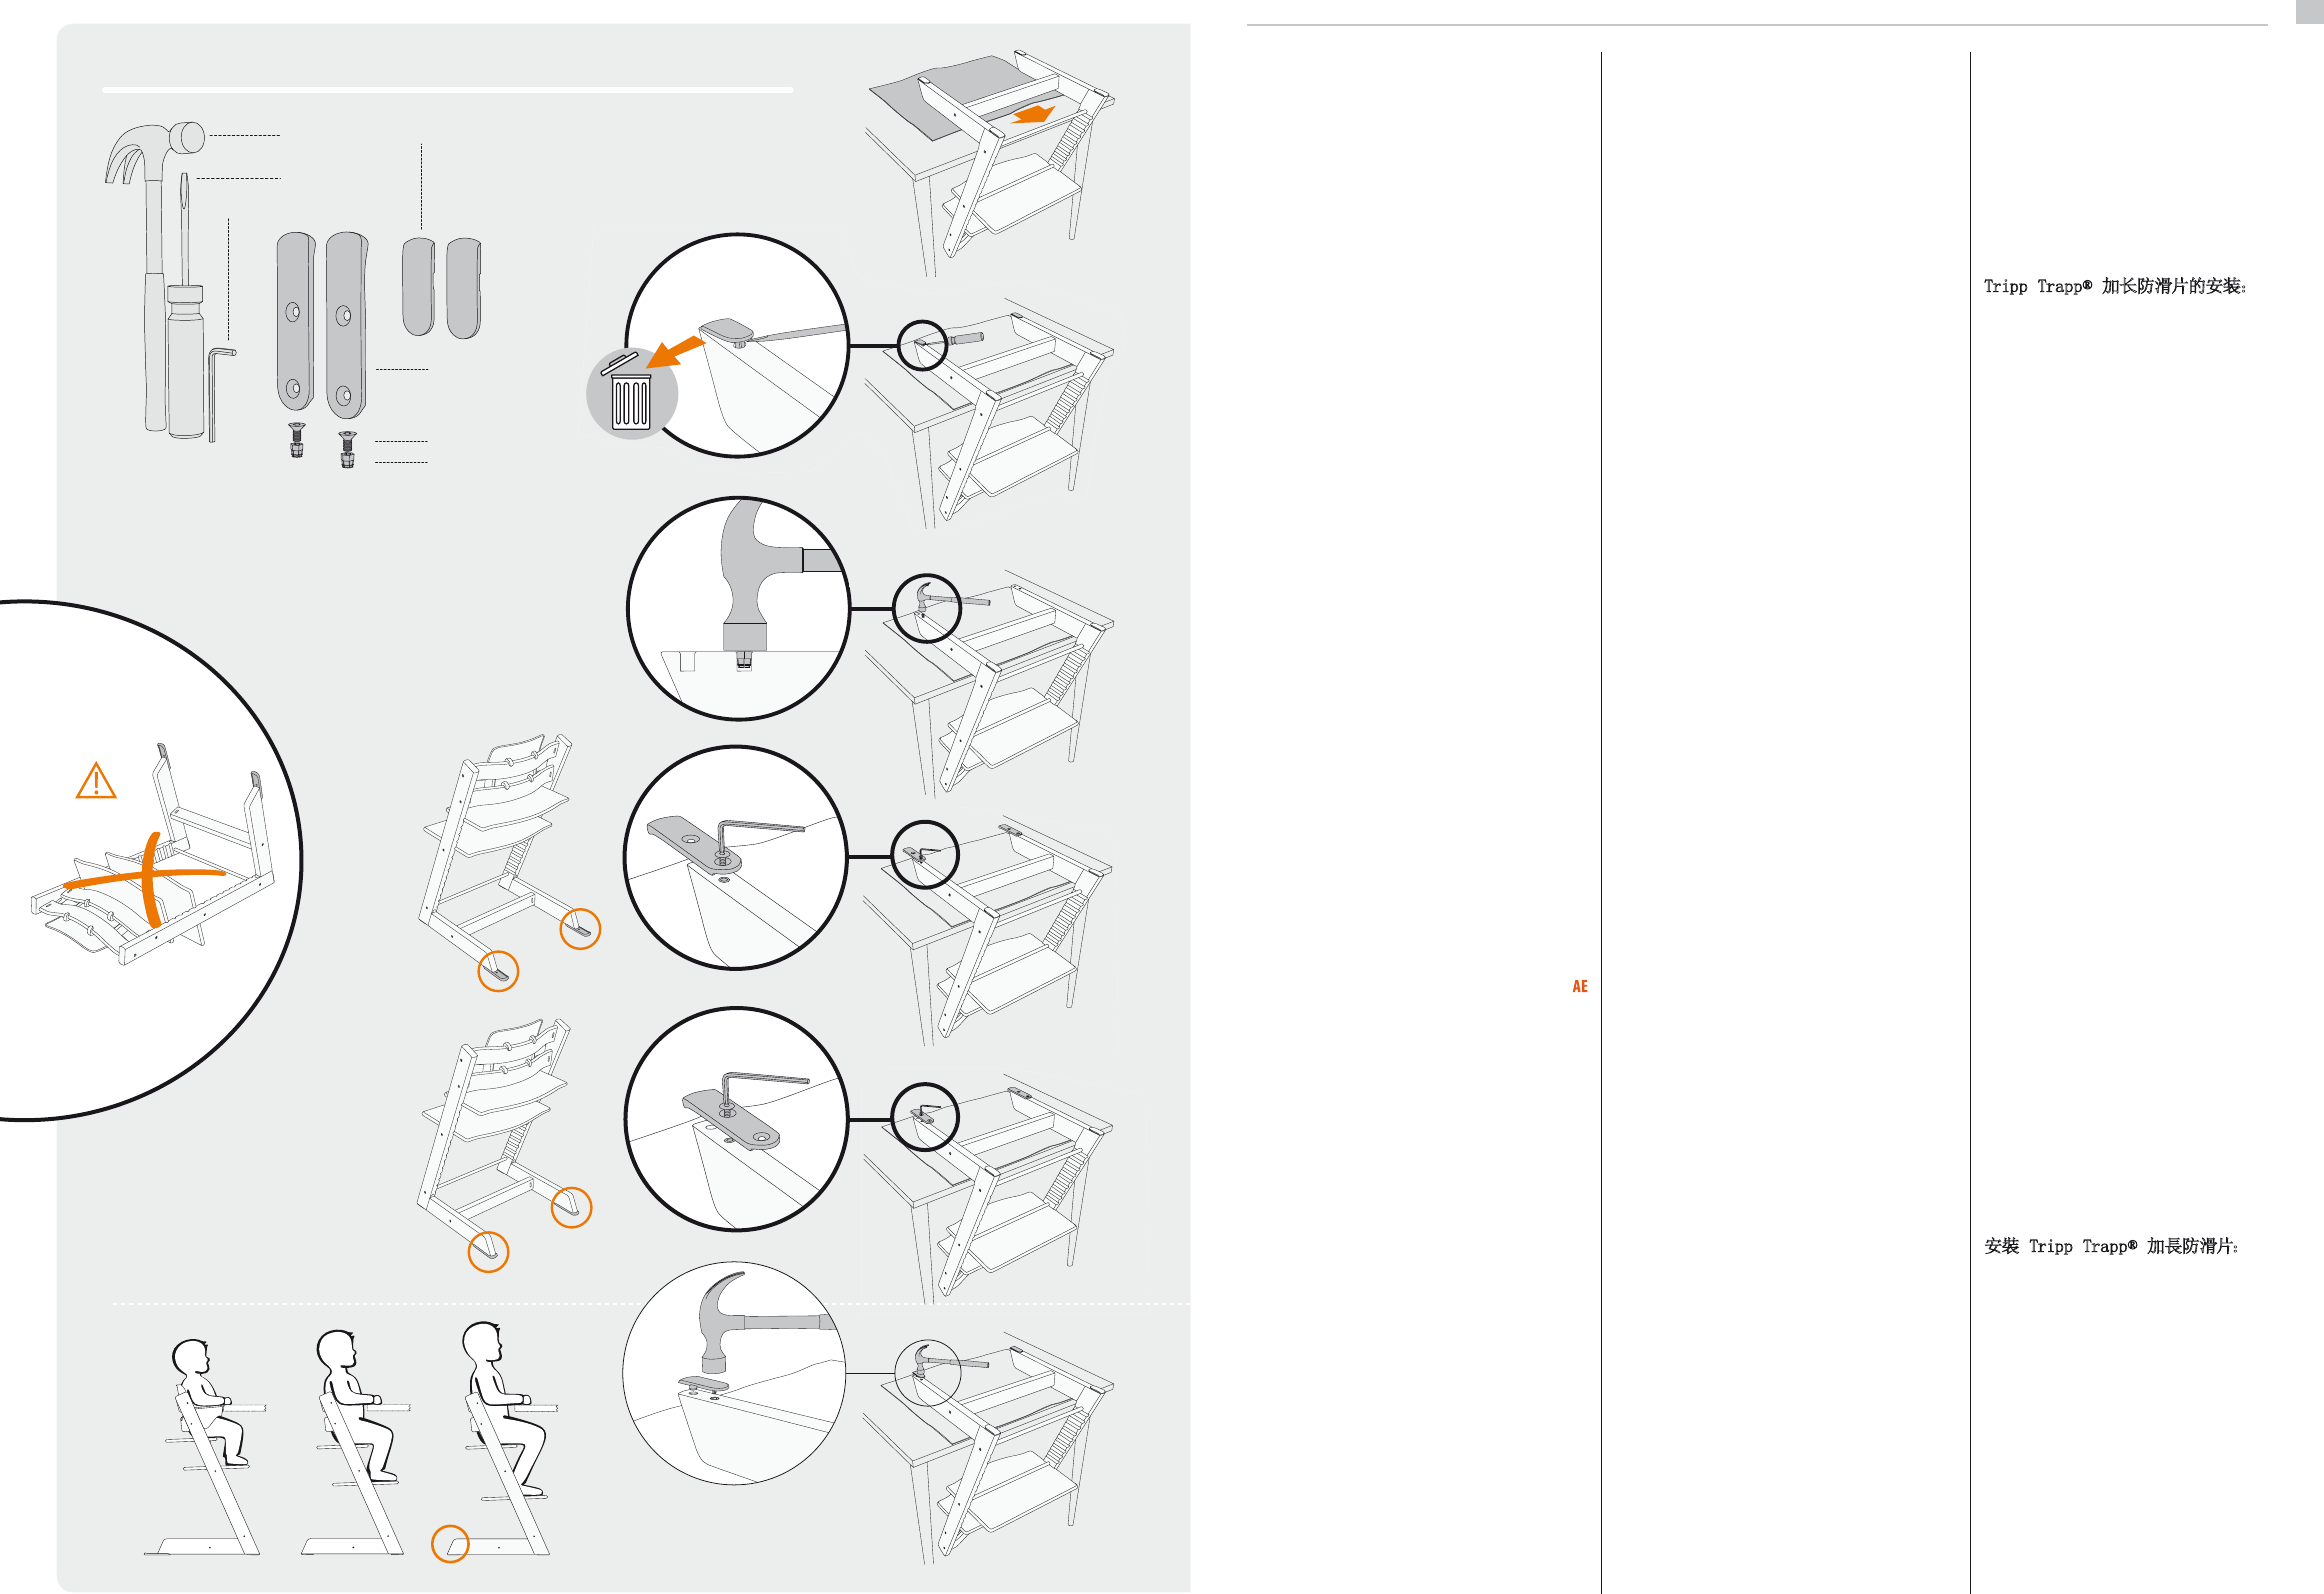
Hammer
Screw driver
2 Extended glider
2 Replacement glider
2 Screw
2 Insert
Allen key
1
2
3
4A
4B
5