(Registering Addresses and Users for Facsimile/Scanner Functions,
Connecting the Machine/ System Settings)
3. (3. Storing Files Using the Scanner Function) (3. Storing Files
Using the Scanner Function) (3. Storing Files Using the Scanner
Function) (3. Storing Files Using the Scanner Function)
Available scan functions:
AScan to E-mail
BScan to Folder (SMB/FTP/NCP)
CScan Using WSD (Web Services on Devices)
DStore to Hard Disk
ESave to Memory Storage Device
FScan to Delivery Server
GScan via TWAIN Driver
For details about C, E, F, and G, see Scan on
the supplied CD-ROM.
How to save to the machine’s hard disk...
(Storing and Saving the Scanned Documents)
APress the {Home} key on the top left of the control panel,
and press the [Scanner] icon on the [Home] screen.
BPress the {Reset} key.
CPlace originals.
DPress [Send Settings].
EPress [
T
] three or four times, and then press [Store File].
FPress [Store to HDD].
GIf necessary, specify file information, such as [User Name],
[File Name], and [Password].
HPress [OK] twice.
IIf necessary, press [Send Settings] or [Original] to configure
settings for resolution and scan size.
JPress the {Start} key.
For details about saving to memory storage device, see
“Storing the Scanned Documents to a USB Flash Memory
Device or SD Card”, Scan on the supplied CD-ROM.
Why use it?
To store scanned files in the hard disk of the machine for
later (shared) use. (See Scan.)
Displaying a list of files stored
on the machine’s hard disk
(Storing and Saving the
Scanned Documents)
*The shape of the machine, screen displays,
procedures, and titles in references vary depending
on the machine you are using. Also, not all functions
are available on all machines.
APress the {Home} key on the top left of the control panel,
and press the [Scanner] icon on the [Home] screen.
BPress [Send Settings].
CPress [
T
] four times, and then press [Select/Manage Stored
File].
The list of stored files is displayed.
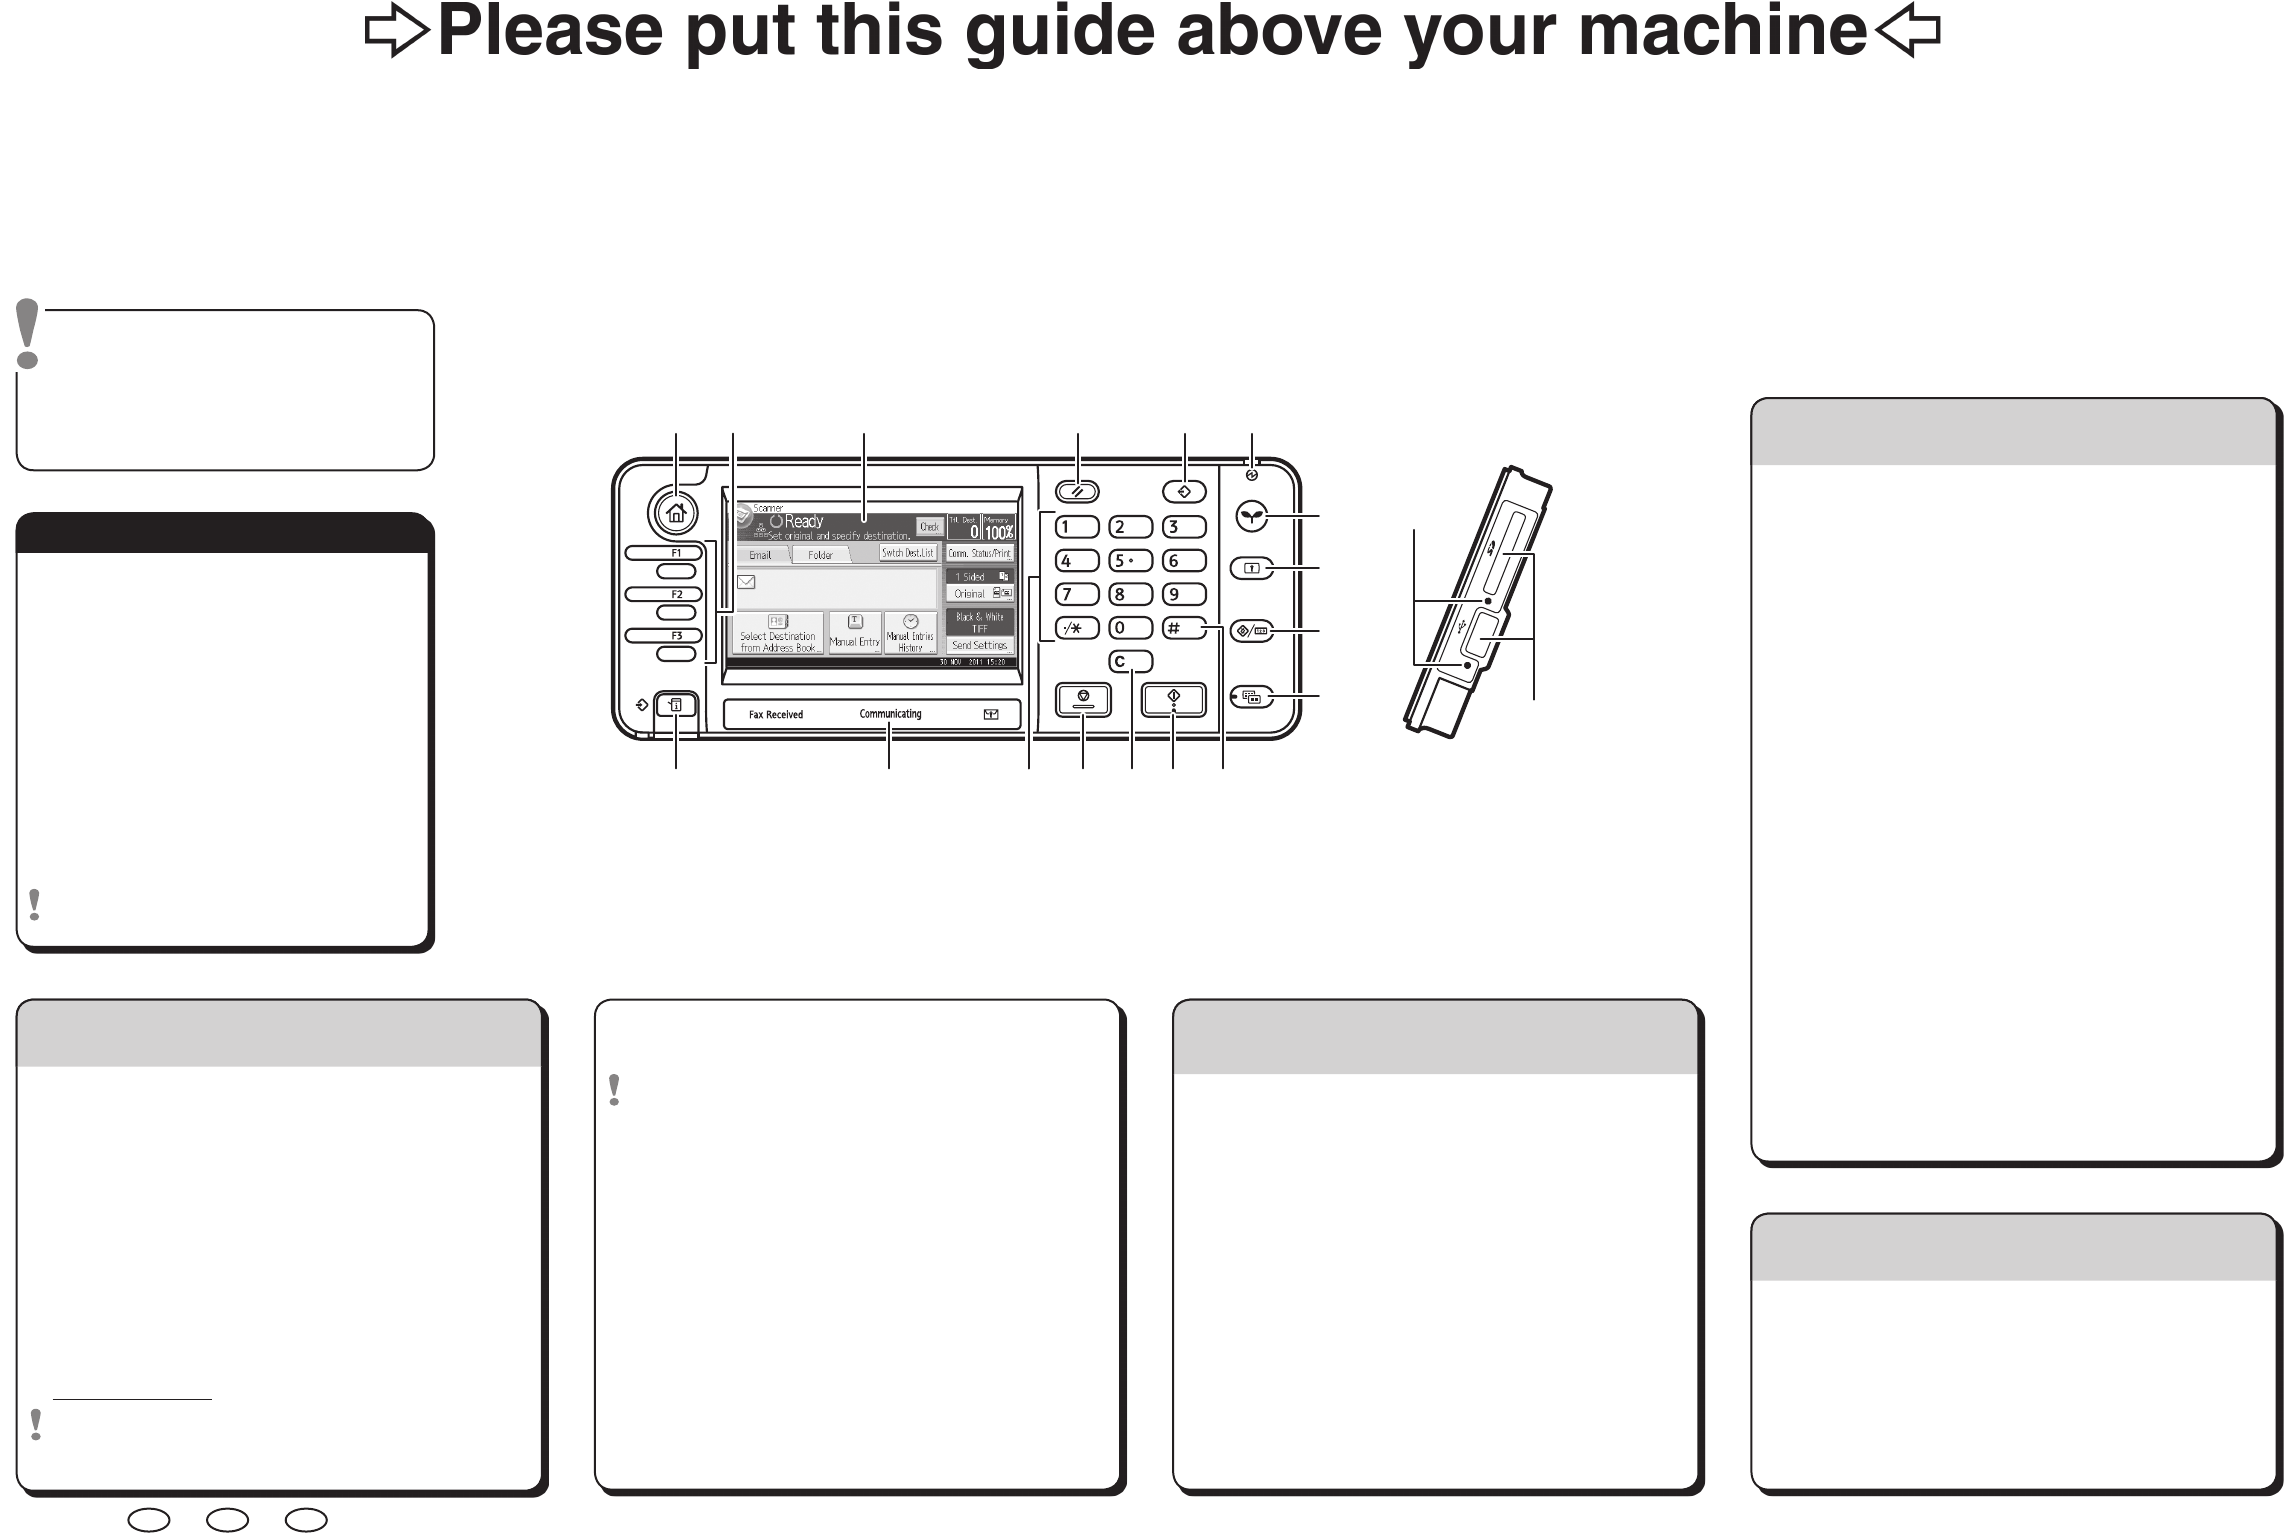
1. {Home} key
Press to display the [Home] screen.
2. Function keys
No functions are registered to the
function keys as a factory default.
You can register often used functions,
programs, and Web pages.
3. Display panel
4. {Reset} key
Press to clear the current settings.
5. {Program} key
Press to register frequently used
settings, or to recall registered settings.
6. Main power indicator
7. {Energy Saver} key
8. {Login/Logout} key
9. {User Tools/Counter} key
10. {Simple Screen} key
11. {#} key (Enter key)
12. {Start} key
Press to start copying, printing,
scanning, or sending.
13. {Clear} key
Press to delete a number entered.
14. {Stop} key
Press to stop a job in progress, such as
copying, scanning, faxing, or printing.
15. Number keys
16. Communicating indicator
17. {Check Status} key
18. Media access lamp
19. Media slots
1
7
11
18
1214
23456
8
9
10
131517
19
16
Need help? Post your question in this forum.
Report abuse
Libble takes abuse of its services very seriously. We're committed to dealing with such abuse according to the laws in your country of residence. When you submit a report, we'll investigate it and take the appropriate action. We'll get back to you only if we require additional details or have more information to share.
Product:
Forumrules
To achieve meaningful questions, we apply the following rules:
First, read the manual;
Check if your question has been asked previously;
Try to ask your question as clearly as possible;
Did you already try to solve the problem? Please mention this;
Is your problem solved by a visitor then let him/her know in this forum;
To give a response to a question or answer, do not use this form but click on the button 'reply to this question';
Your question will be posted here and emailed to our subscribers. Therefore, avoid filling in personal details.
Register
Register getting emails for Ricoh MP 2001SP at:
new questions and answers
new manuals
You will receive an email to register for one or both of the options.
Get your user manual by e-mail
Enter your email address to receive the manual of Ricoh MP 2001SP in the language / languages: English as an attachment in your email.
The manual is 0,48 mb in size.
You will receive the manual in your email within minutes. If you have not received an email, then probably have entered the wrong email address or your mailbox is too full. In addition, it may be that your ISP may have a maximum size for emails to receive.
If you have not received an email with the manual within fifteen minutes, it may be that you have a entered a wrong email address or that your ISP has set a maximum size to receive email that is smaller than the size of the manual.
The email address you have provided is not correct.
Please check the email address and correct it.
Your question is posted on this page
Would you like to receive an email when new answers and questions are posted? Please enter your email address.