Quick Reference Fax Guide
cPlease put this guide above your machineg
Chapter references in this guide refer to the bundled OI CD; Fax and Connecting the Machine/ System Settings.
© 2013 EN
GB
EN
US
EN
AU
D148-7537
A Press the {Home} key on the top left of the control
panel, and press the [Facsimile] icon on the [Home]
screen.
B Specify a transmission mode:
• Memory Transmission, or
• Immediate Transmission (selected by pressing
[Immed. TX])
C Place the original.
• Exposure glass
(face down)
• Auto Document
Feeder (face up)
D Make the scan settings you require.
E Specify a destination.
F Press the {Start} key.
If you select Memory Transmission, you can send to
more destinations at once. To do this, after step 5,
specify destinations and press the {Start} key.
To send to an Internet Fax, e-mail, or folder destination,
press [
] (Internet Fax) , [ ] (Email), or [ ] (Folder)
to switch the transmission type.
How to send a fax...
(Transmission)
Please see Fax Operating Instructions:
- SUB/SEP Codes (Other Transmission Features)
Privacy can be protected when faxing with a SUB/
SEP Code, since only people who know the SUB/
SEP Code can receive or print the fax document.
- Printed reports (Changing/Confirming
Communication Information) Inform you if a fax has
been saved, sent, or failed to be transmitted.
- LAN-Fax features - Sending a fax from a computer.
(Fax via Computer)
Advanced Fax Features
Memory + Immediate
Before the original is scanned = before pressing the
{Start} key:
A Press the {Reset} key.
While the original is being scanned
A Press the {Stop} key.
B Press [Cancel Scan.] or [Cancel TX].
Memory
After the original is scanned
A Press the {Stop} key.
B Press [Standby File List].
C Select the file you want to cancel.
D Press [Cancel TX], and then press [OK].
E Press [Exit].
How to cancel a transmission...
(Transmission)
A Press [Send Settings].
B Press [
T
] three or four times, and then press [Store
File].
C Select [Store to HDD + Send].
D Set the user name, file name, and password as
necessary, and then press [OK] twice.
E Specify a destination, and then press the {Start} key.
To send a fax from Document Server:
A Press [Send Settings].
B Press [
T
] four times, and then press [Select Stored
File].
C Select the documents to be sent, and then press
[OK] twice.
D Specify a destination, and then press the {Start} key.
How to fax to Document Server...
(Storing a Document)
A Press the {User Tools/Counter} key.
B Press [Address Book Mangmnt].
C Press [Change], and then select the item you want to display from
[All Users], [User Code], [Fax Dest.], [Email] and [Folder].
D Select the name whose fax destination you want to register. Press
the name key, or enter the registered number using the number keys.
E Press [Fax Dest.].
F Press [Fax Destination], enter the fax number using the number
keys and press [OK].
G Press [Exit].
H Press [OK].
I Press the {User Tools/Counter} key.
How to program a Destination key…
(Registering Addresses and Users for Facsimile/Scanner Functions,
Connecting the Machine/ System Settings)
Using this function, you can instruct the machine to send the fax
at a later time via Memory Transmission.
Advantage: you can take advantage of off-peak telephone
charges, without being at the machine.
A Place the original, and then select the scan settings you require.
B Press [Send Settings].
C Press [
T
], and then press [Send Later].
D Enter the time using the number keys, and then press [#].
E Press [OK] twice.
How to send at a specific time (Send Later)
(Other Transmission Features)
The Journal is printed automatically after every 50
communications. You can also request a Journal at
any time, by following the procedure below.
A Press [Comm. Status/Print].
B Press [Print Journal].
C Select the printing method:
- [All]
- [Print per File No.]
- [Print per User]
D Press the {Start} key.
E Press [Exit] twice.
How to print the Journal...
(Changing/Confirming Communication Information)
*The shape of the machine, screen displays, procedures,
and titles in references vary depending on the machine
you are using. Also, not all functions are available on all
machines.
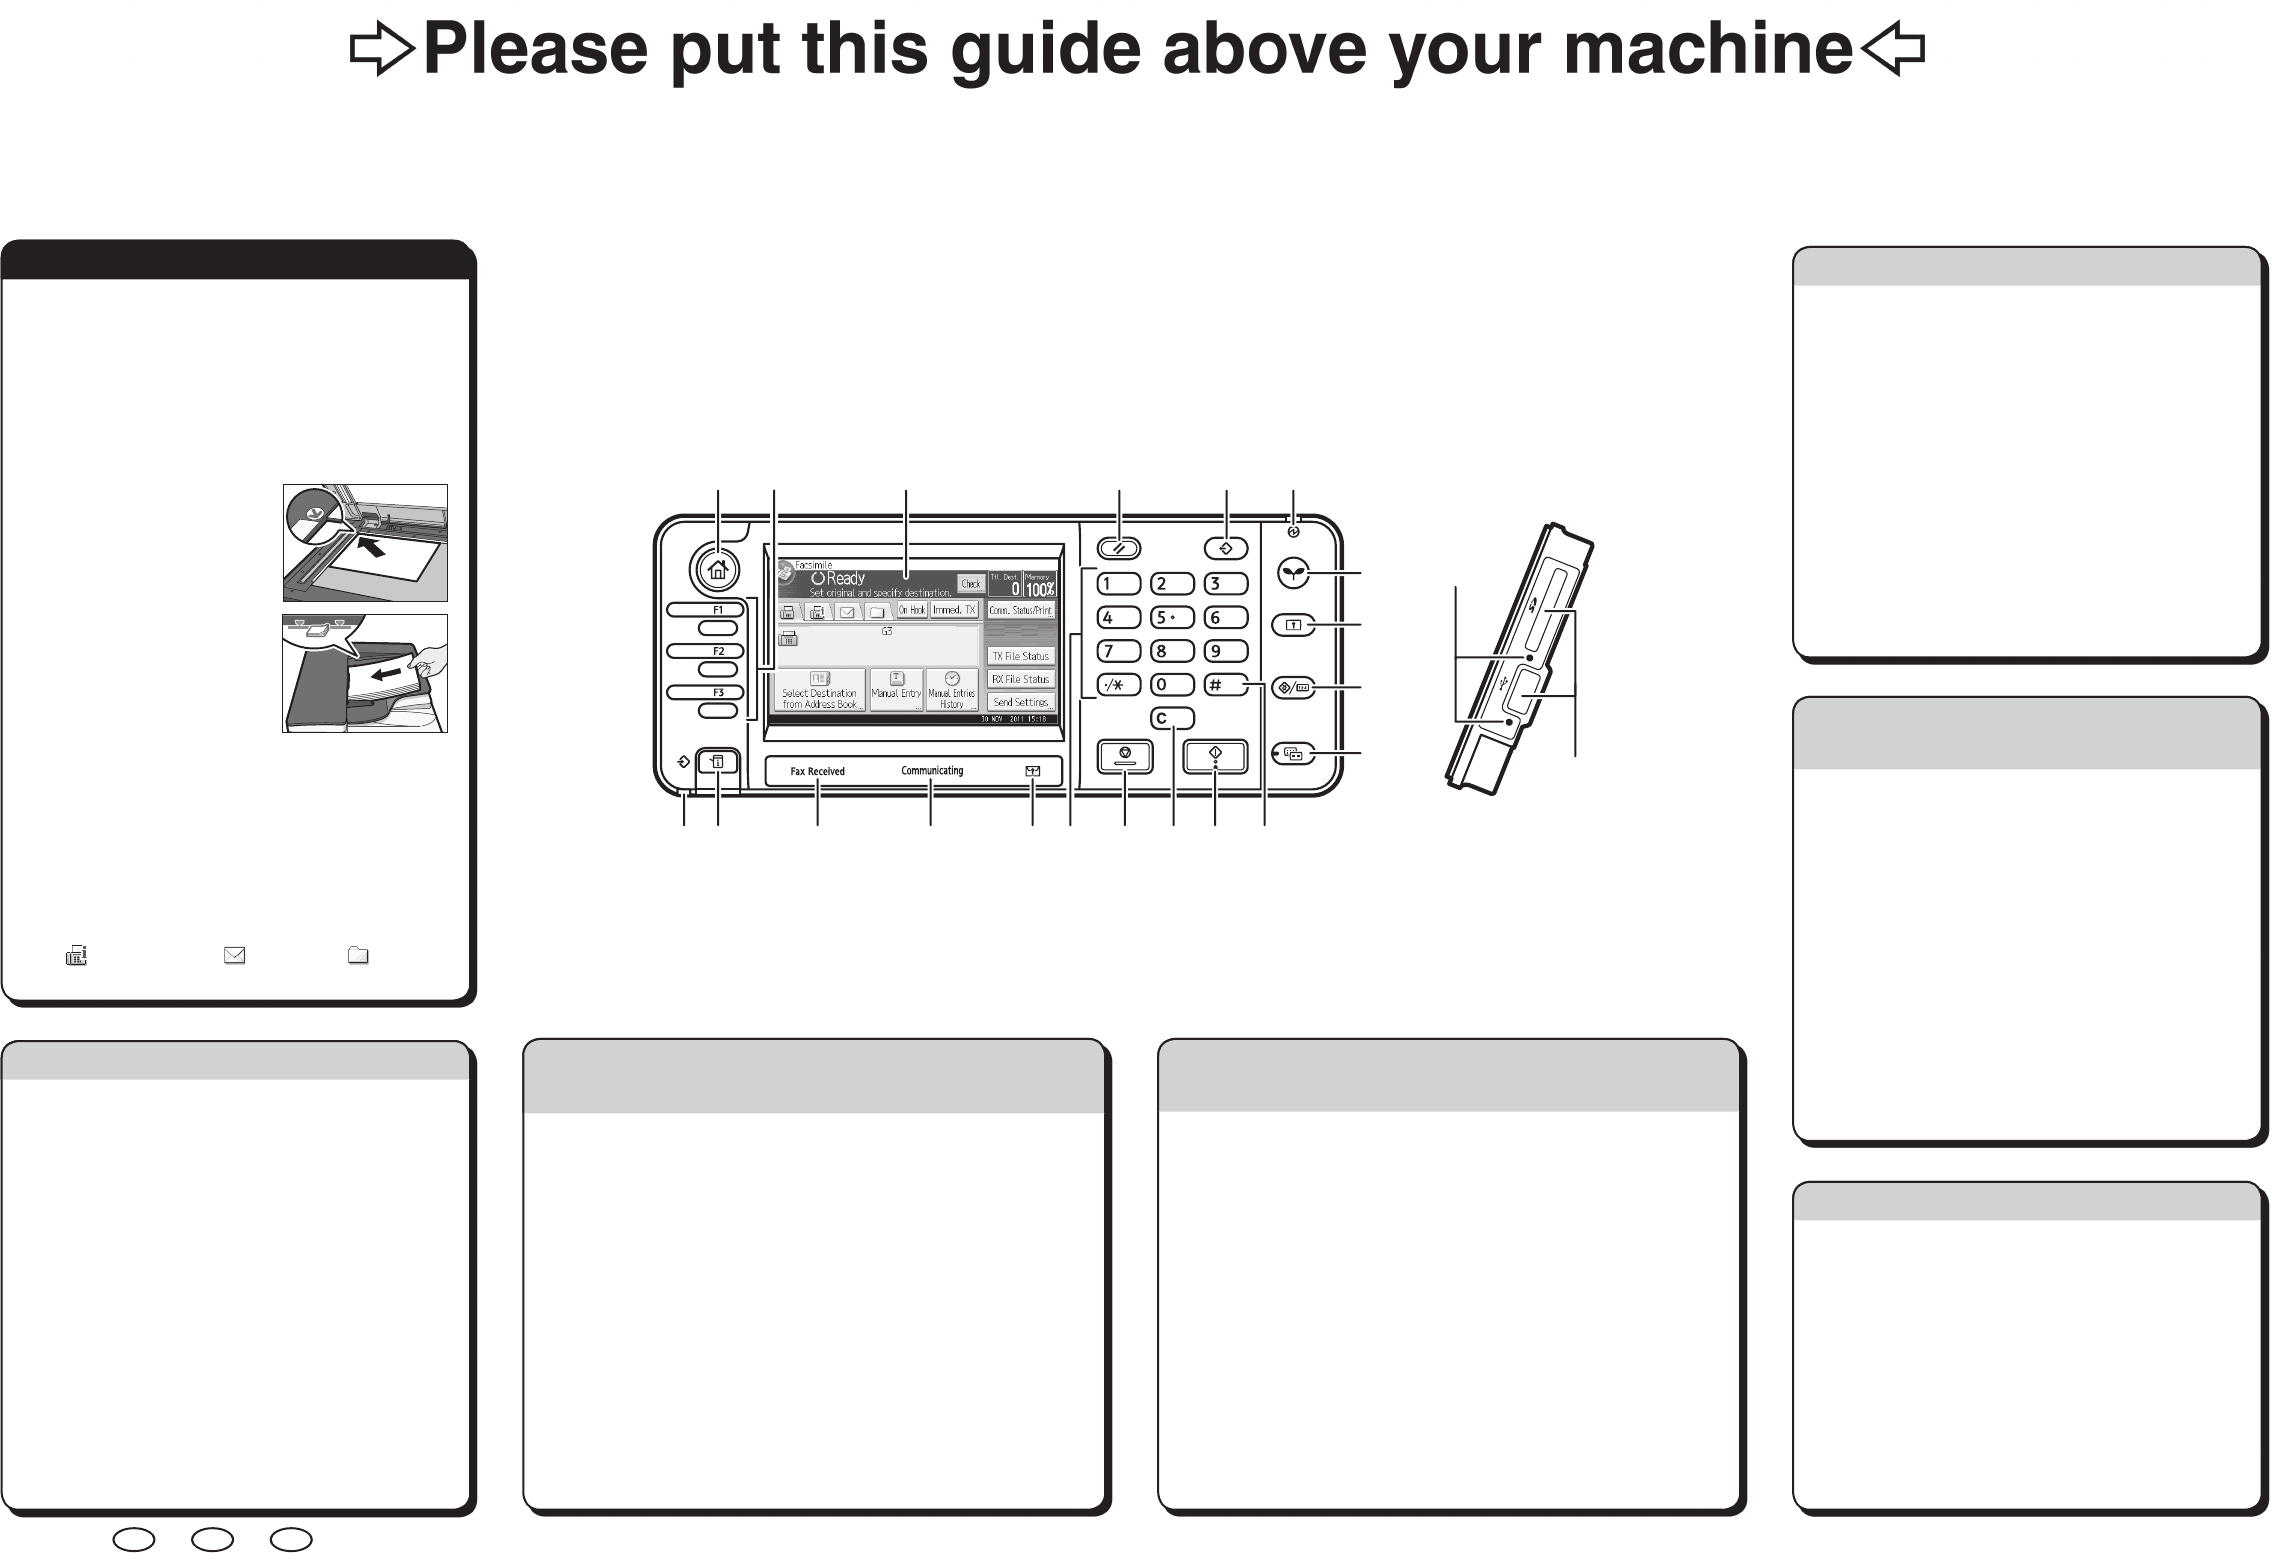
1. {Home} key
Press to display the [Home] screen.
2. Function keys
No functions are registered to the function keys
as a factory default. You can register often used
functions, programs, and Web pages.
3. Display panel
4. {Reset} key
Press to clear the current settings.
5. {Program} key
Press to register frequently used
settings, or to recall registered settings.
6. Main power indicator
7. {Energy Saver} key
8. {Login/Logout} key
9. {User Tools/Counter} key
10. {Simple Screen} key
11. {#} key (Enter key)
12. {Start} key
Press to start copying, printing,
scanning, or sending.
13. {Clear} key
Press to delete a number entered.
14. {Stop} key
Press to stop a job in progress, such as
copying, scanning, faxing, or printing.
15. Number keys
16. Confidential File indicator
17. Communicating indicator
18. Fax Received indicator
19. {Check Status} key
20. Data In indicator
21. Media access lamp
22. Media slots
☺
1
7
11
21
1214
2 3 4 5 6
8
9
10
131519
22
17 161820