Co
Different Control Methods - You may with the
devices:
1.) Wired mouse and
2.) 2.4GHz USB wireless mouse and
NGC-1
N
快
操控
感M
遵
M是 M重
定
M内 1存 4内 W,
这M 强
更M 官w 。
不
您M
1有
2无
版2I 保
没M 明
包
购
M和 M的 M科
所
此
不
Vielen Dank für Ihren Kauf
Bitte folgen Sie dieser Anleitung zur Einrichtung Ihres Geräts.
Der NGC-1 ist ein
an Möglichkeiten. Der NGC-1 definiert den Desktop PC neu
ist er damit
Mit 128 GB
Windows 10 ist der
Weitere Hinweise, Tipps und nützliche Informationen finden Sie im offiziellen
MINIX Forum: www.minixforum.com
Be
N
B
D
S m
b
1
2
N
C
K
u
v
g
a
K
M
Al
D
P
d
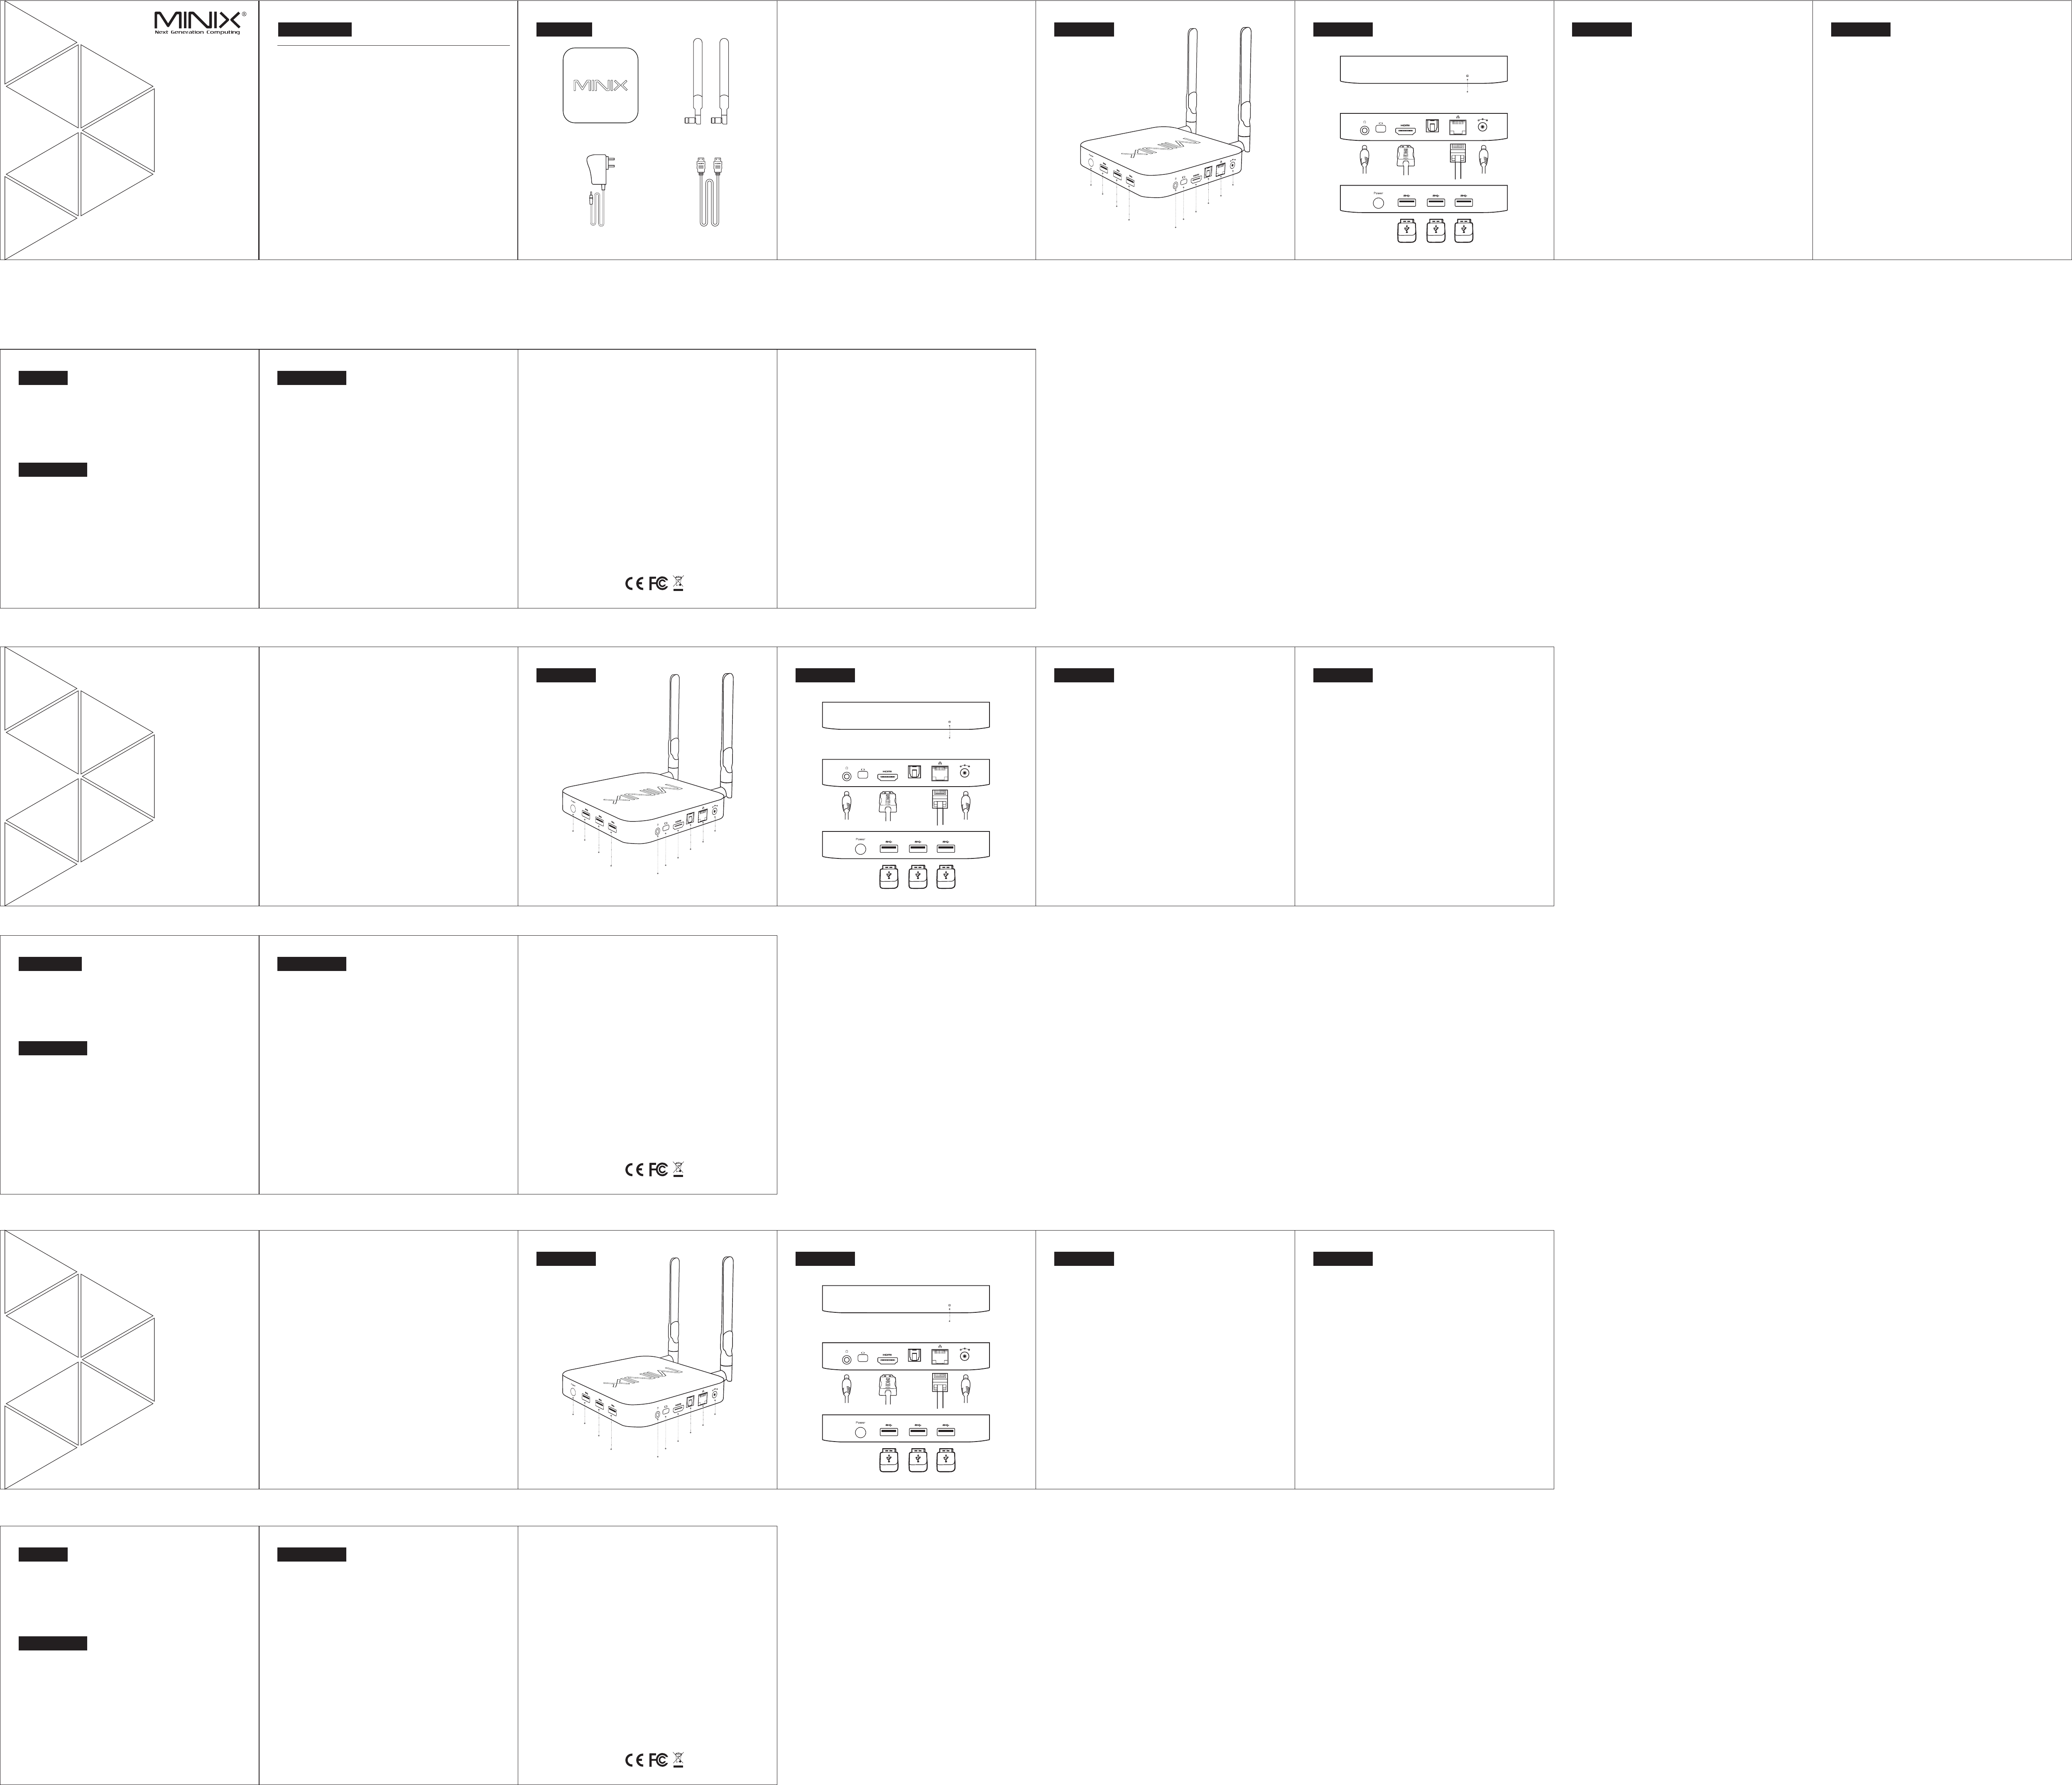
MINIX connects to
that delivers both audio and
on the side/back of
- HDMI cable:
receiver that has
Step 1: Connecting the cable
1. Connect one end
2. Connect the other
Step 2: Connecting the power
- Connect the
Press and hold the
blue power LED should then
Step 3: Turn
- Simply turn
connected to NGC-1.
NGC-1
Ba
What you need:
High-Definition - That
at least one
HDMI Cable -
Wireless Network - A or ac
network (wireless video streaming requires 802.11n or ac), your wireless network
name and password.
n
Ba
Ve
P
D
E
U
E
a
a
h
u
K
V
S
E
S
H
V
T
Er
W
U z
H
Eo
V
K
E
N
E
e W
b
N
g
Er
E
D wi
T
H
p
u
- H
G
d
S
1
I
2
d
S
V
S
b
S
S
e
N
安装
电
M开
电
M开 1秒
时O 确
者8 秒
耳
S卡
可S 卡
为2 。
安装
H接
用H 线M 到H 接
口
U接
连U 设U 闪U 鼠
标M
以
连
D充
将1 电M 操
电1 但
盘1 的
基础
您
要M 以
高
一7 或4 视
H输
排
一H 排M 与
无
一8 或a 无8
您
基础
安M
通H 端M 与
在M 之
确
-H 排H 排M 与H 端
或
步1 :
1将 H排 H端
2将 M的 H端
步2 连1 电1 秒
当M 开
步3 :
打H 端M
Ve
U
V
S
E
E
V
E
w
s
E
A
I
N
M
E中
I
W
Qu
In
4G
12
Wi
80
Mi
Vi
RJ
US
Ke
DC 1
Pr
GP
Sy
St
Op
Co
Vi
Au
Pe
Po
Sp
Co
Po
(1
HD
Ov
Ethernet Jack - Connect the
DC 12V Power-in Jack - Connect the
to this port.
power adapter provides 3A, in consideration that you may
connect other power-drawing external devices such as an external hard drive.
USB 3.0 P
receiver of wireless keyboard and mouse, USB wired
headset etc..
HDMI port -
using an HDMI
Ov
Thank you for
NGC-1 Intel Braswell Fanless Mini PC is
that packs an
far beyond its small
Combining 128GB of M2 SSD
Windows 10 ensures NGC-1 Intel Braswell Fanless Mini PC
the box.
More hints, tips and
Forum: www.minixforum.com
Po - Th is o
Po- T
1-
th
wi
Mi - I
a Mi
Ea- C
NG
Ov
Po
Co© 201
No
tr
or
th
MI
T
No
de
pr
us
wi
th
do
by
by
-
-
-
is
-
ap
FC
Ov
US
US
HD
Et
DC 1
Po
He
US
12V D
C
IN
Mi
S
P
D
IF
SP
12 V DCI N
SP DIF
MI 2 x Du
Ve
Po
Ve
US
US
HD
Et
Ei
Ei
Ko
US
12
V DC
I
N
Mi
S
PD
I
F
SP
12 V DCI N
SP DIF
安装
Po
安装
US. 0接口 2
US. 0接口 1
HD接
以太
DC充电接
电源
耳机
US. 0接口 3
12
V D
CI
N
Mi接口
S
P
D
I
F
SP接口
12 V DCI N
SP DIF