No part of this guide, including the products and software described in it, may be reproduced,
transmitted, transcribed, stored in a retrieval system, or translated into any language in any form
or by any means, except documentation kept by the purchaser for backup purposes, without
the express written permission of MINIX.
MINIX and the MINIX logo are trademarks of MINIX Technology Limited.
All other marks and trademarks are properties of their respective owners.
The content of this guide may differ in some details from the product or its software.
All information in this documentation is subject to change without notice.
Note: This equipment has been tested and found to comply with the limits for a Class B digital
device, pursuant to part 15 of the FCC Rules. These limits are designed to provide reasonable
protection against harmful interference in a residential installation. This equipment generates,
uses and can radiate radio frequency energy and, if not installed and used in accordance
with the instructions, may cause harmful interference to radio communications. However,
there is no guarantee that interference will not occur in a particular installation. If this equipment
does cause harmful interference to radio or television reception, which can be determined
by turning the equipment off and on, the user is encouraged to try to correct the interference
by one or more of the following measures:
- Reorient or relocate the receiving antenna.
- Increase the separation between the equipment and receiver.
- Connect the equipment into an outlet on a circuit different from that to which the receiver
is connected.
- Consult the dealer or an experienced radio/TV technician for help. Modifications not expressly
approved by the manufacturer could void the user’s authority to operate the equipment under
FCC rules.
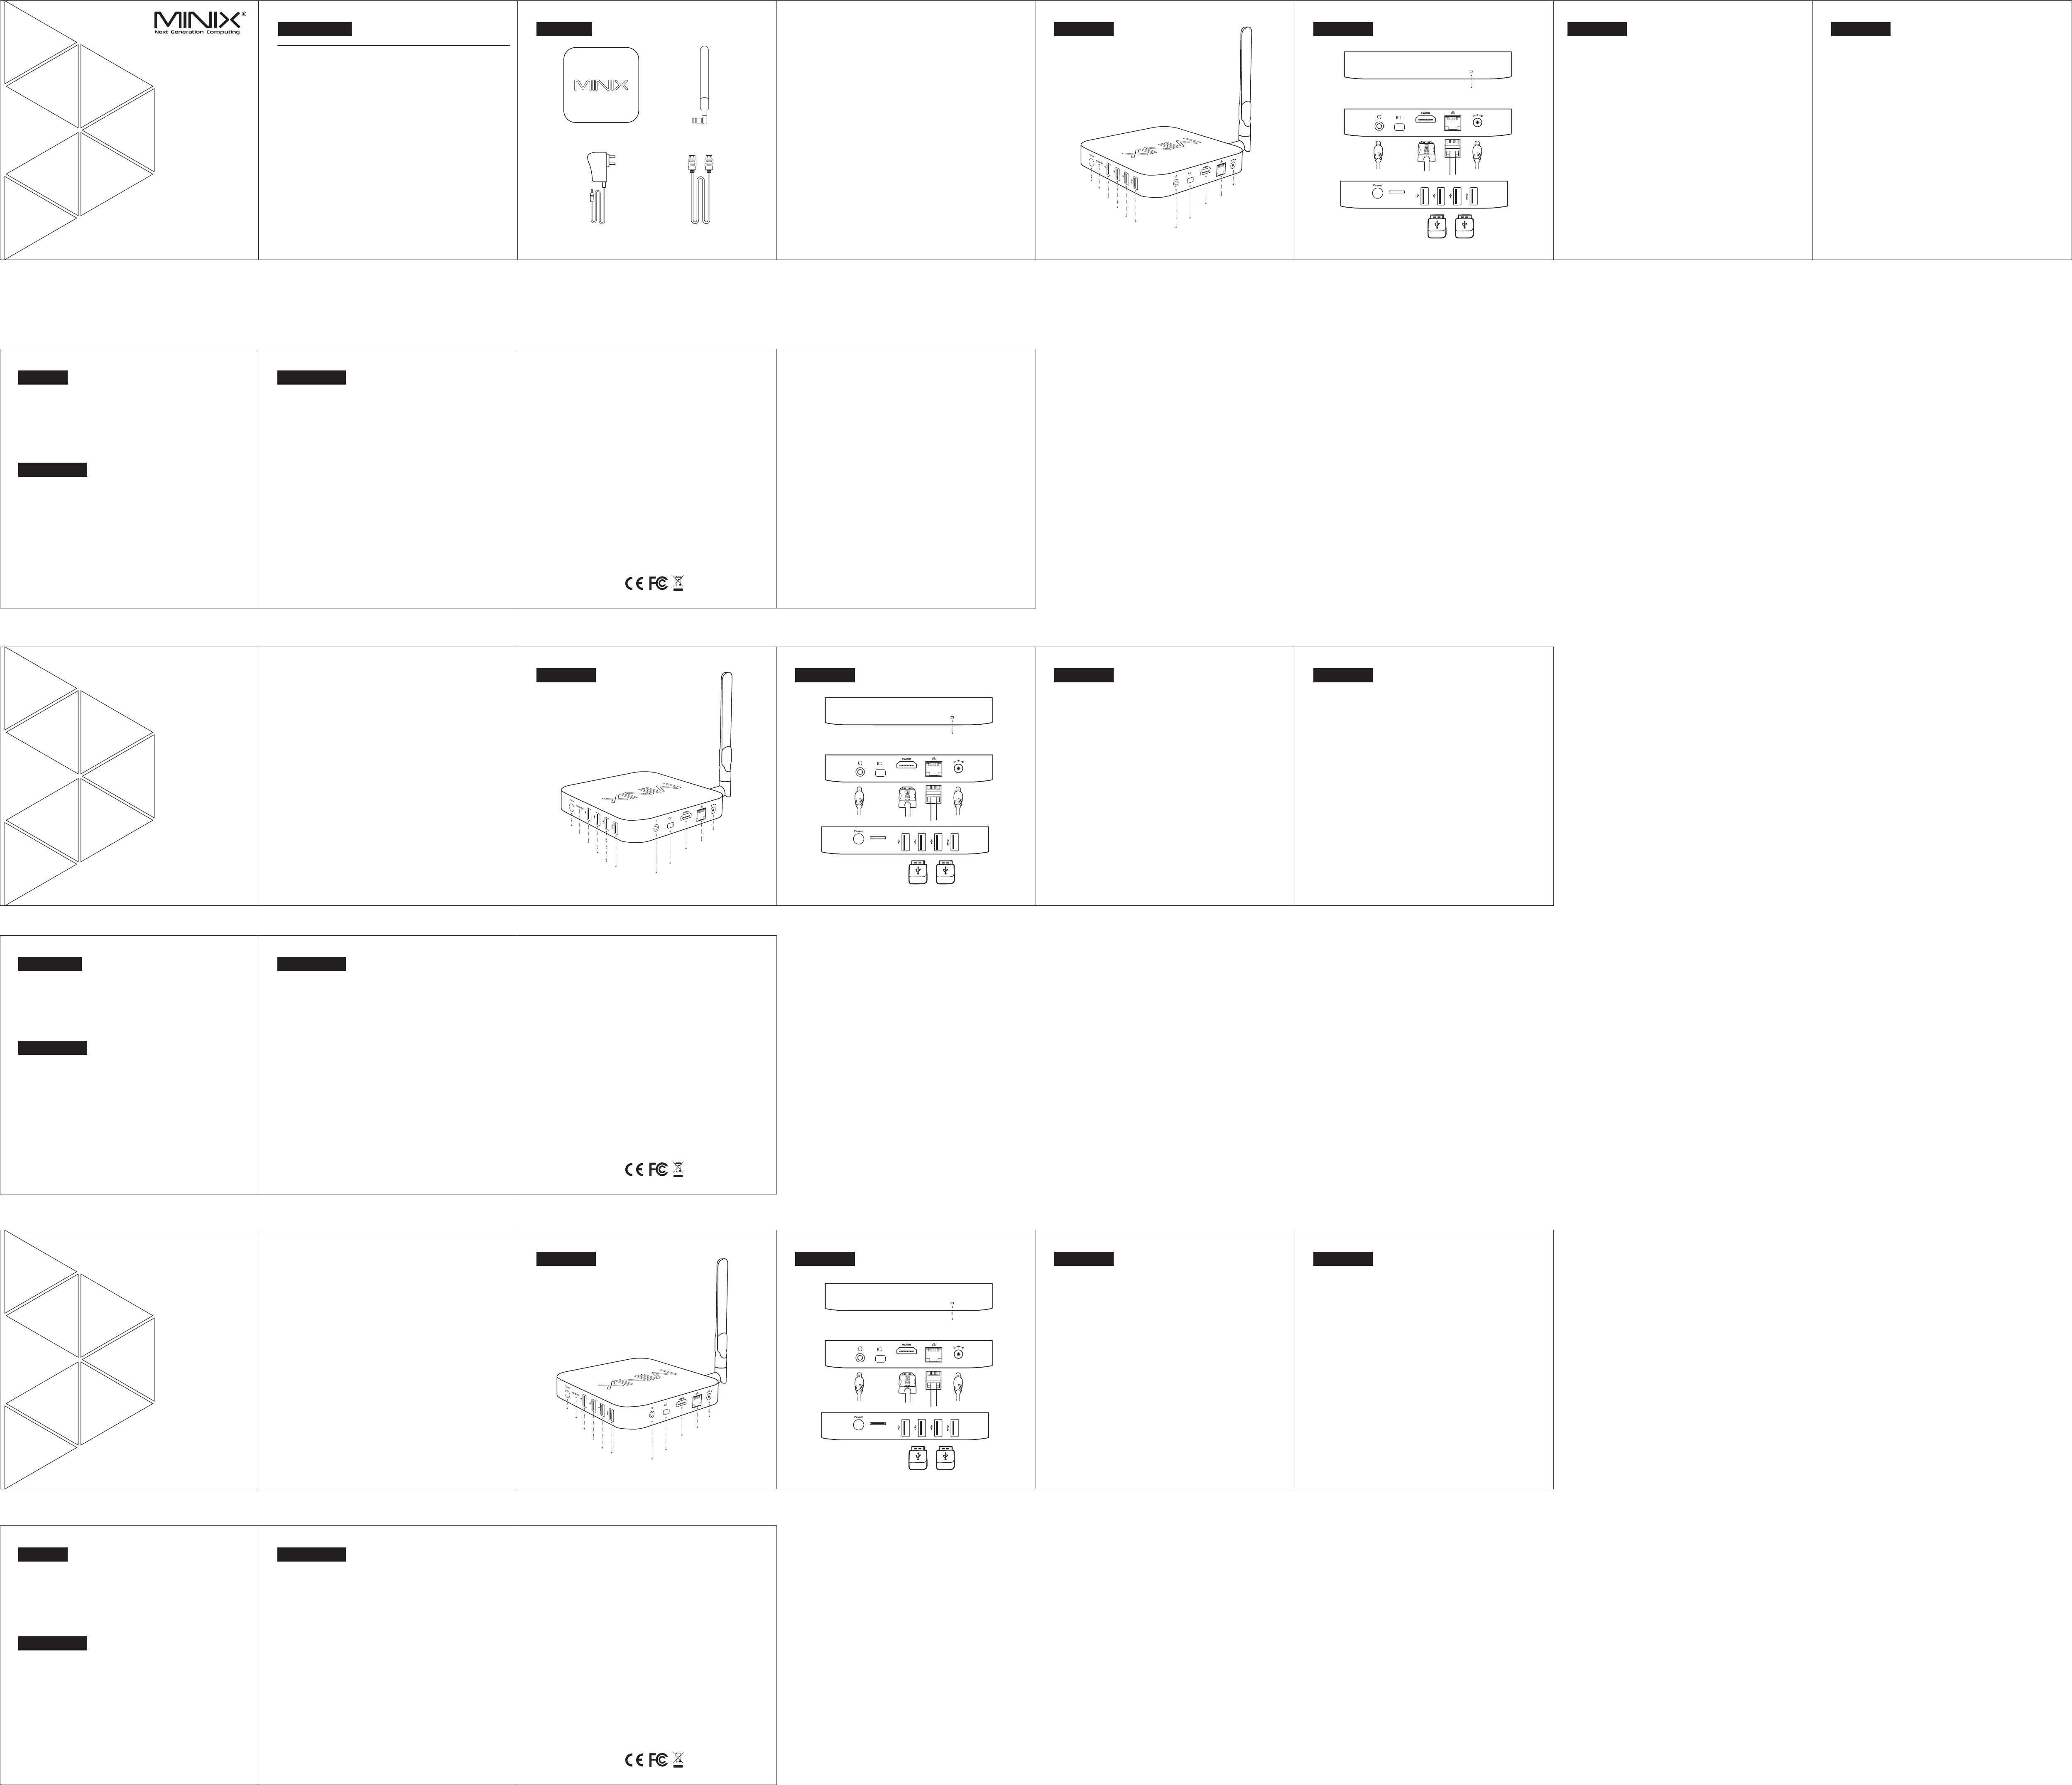
TF
Power LED
12V DCIN
TF
Power LED
12V DCIN
TF
12V DCIN
电源指示灯
1
2
V DCI
N
T
F
DC 12V 充电接口
以太网接口
HDMI接口
MiniDP接口
耳机接口
USB3.0接口1
USB2.0接口1
USB2.0接口2
USB2.0接口3
电源键
TF 接口
Overview
USB 2.0 port2
USB 2.0 port1
Ethernet jack
DC 12V Power-in jack
Power Button
Audio jack
HDMI port
USB 2.0 port3
1
2
V DCI
N
Mini DP port
T
F
USB 3.0 port1
TF card
USB 2.0 port2
USB 2.0 port1
USB 2.0 port3
12V D
C
IN
Mini DP port
TF
USB 3.0 port1
TF Karten Steckplatz
HDMI Anschluss
Ethernet Anschluss
Eingang Netzteilkabel 12V
Ein/AUS Schalter
Kopfhörer Anschluss
Power Adapter
(DC 12V, 3A)
HDMI Cable
MINIX NEO Z83-4
Dual-Band Antenna
Need help? Post your question in this forum.
Report abuse
Libble takes abuse of its services very seriously. We're committed to dealing with such abuse according to the laws in your country of residence. When you submit a report, we'll investigate it and take the appropriate action. We'll get back to you only if we require additional details or have more information to share.
Product:
Forumrules
To achieve meaningful questions, we apply the following rules:
First, read the manual;
Check if your question has been asked previously;
Try to ask your question as clearly as possible;
Did you already try to solve the problem? Please mention this;
Is your problem solved by a visitor then let him/her know in this forum;
To give a response to a question or answer, do not use this form but click on the button 'reply to this question';
Your question will be posted here and emailed to our subscribers. Therefore, avoid filling in personal details.
Register
Register getting emails for Minix Neo Z83-4 at:
new questions and answers
new manuals
You will receive an email to register for one or both of the options.
Get your user manual by e-mail
Enter your email address to receive the manual of Minix Neo Z83-4 in the language / languages: German as an attachment in your email.
The manual is 0,4 mb in size.
You will receive the manual in your email within minutes. If you have not received an email, then probably have entered the wrong email address or your mailbox is too full. In addition, it may be that your ISP may have a maximum size for emails to receive.
If you have not received an email with the manual within fifteen minutes, it may be that you have a entered a wrong email address or that your ISP has set a maximum size to receive email that is smaller than the size of the manual.
The email address you have provided is not correct.
Please check the email address and correct it.
Your question is posted on this page
Would you like to receive an email when new answers and questions are posted? Please enter your email address.