Assembly Instructions - Handles
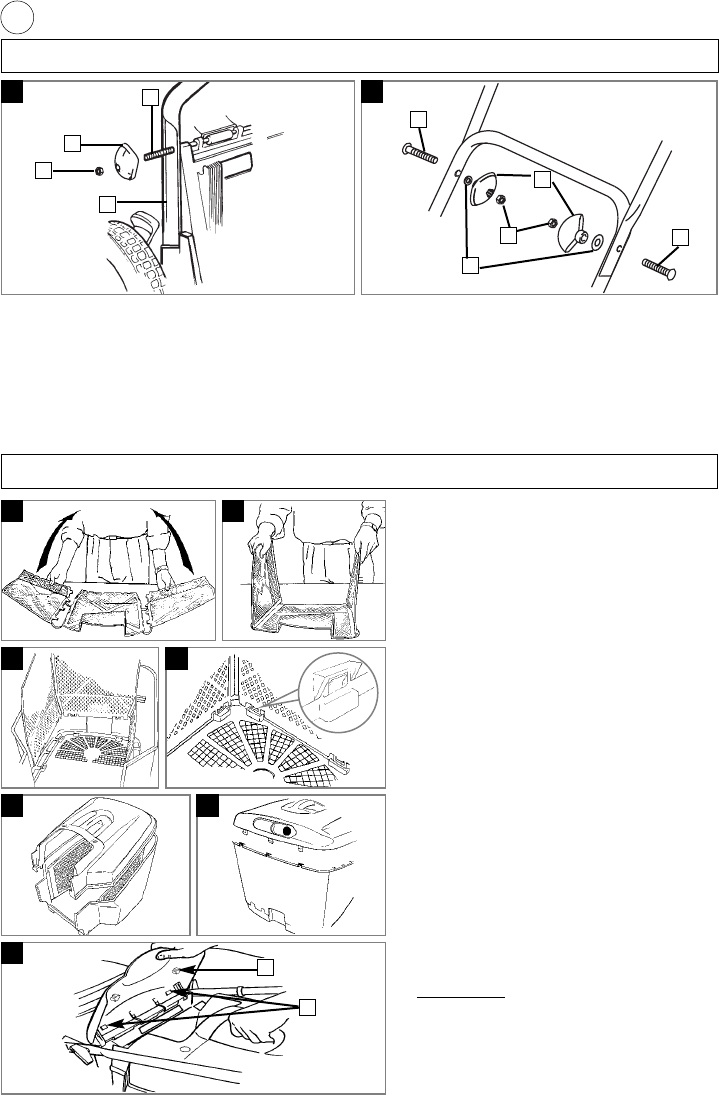
Fitting the Lower Handles to your Lawnmower (A)
1. Pull the tie bar spindle (A1) to one side so that it is
flush with the hole in the side of the moulding.
2. Locate the lower handle (A2) formed end in the
recessed moulding at the rear of the deck.
3.
Insert the nut (A3) into the handle knob.(A4) (if applicable)
4. Push the tie bar back through the locating hole in the
handle and secure it with the handle knob (A4).
Repeat the sequence for the other side of the handle.
Fitting the Upper Handle to the Lower Handle (B)
1.
Insert the nut (B1) into the handle knob.(B2) (if applicable)
2. Fit the bolts (B3), washers (B4) and handle knobs (B2).
3. Fit the cable to the handles with the cable clips pro-
vided, making sure the cable is not trapped between
the upper and lower handles.
A B
1
2
3
3
Assembly Instructions - Grassbox
Assembling the Grassbox Screen
(See Figures C1 - C2)
• DO NOT CUT OR SEPARATE THE 3 PARTS
OF THE GRASSBOX SCREEN
1. Fold the screen sides inward (C1).
2. Align the matching tabs and slots and press
firmly together (C2).
Fitting the Grassbox Screen to the Grassbox
Lower
• Locate the tabs on the bottom of the grassbox
screen into the slots in the base of the grassbox
lower and push home. See Figures D1 - D2.
Fitting the Grassbox Lid
1. Place the upper lid onto the lower grassbox
(E1).
2. Align the clips with the slots.
3. Push the two halves together, starting from the
rear of the box and working forward (E2).
• Ensure that all clips are securely connected.
Fitting Fully Assembled Grassbox to
Lawnmower (See Figure F)
1. Lift safety flap, (F1).
2. Make sure the discharge chute is clean and
free from debris.
3. Locate fully assembled grassbox onto grassbox
sill.
4. Fit the 2 location stud, (F2), on the safety flap
into the 2 location holes on the grassbox lid and
ensure the grassbox is securely located.
• IMPOR
TANT
AFTER FITTING ENSURE NO GAP REMAINS
BETWEEN THE SAFETY FLAP AND THE
GRASSBOX LID.
• Removal is the reverse procedure.
D1 D2
1
2
E1 E2
F
C1 C2
4
1
4
2
3
3