EN
Start Here
FR
Démarrez ici
DE
Hier star
NL
Hier beginnen
IT
Inizia qui
ES
P
© 2017 Seiko Epson Corporation
Prin
Windo
Contents ma
Le contenu peut v
Inhalte können nach Region variieren.
De inhoud kan per locatie verschillen.
I contenuti potrebber
El contenido puede variar según el país.
Do not connect a USB cable unless instructed
to do so
Ne connectez pas de câble USB sauf si cela
vous est demandé.
Schließen Sie kein USB-Kabel an, sofern Sie
nicht dazu angewiesen werden.
Sluit de USB-kabel niet aan tenzij dit in de
instructies wordt aangegeven.
Non collegare un cav
No conecte un cable USB a menos que se le indique que lo haga.
1
A
Remove all protective mat
Retirez tous les emballages de protection.
Entfernen Sie sämtliches Schutzmaterial.
V
Rimuovere tutti i materiali pr
Retire todos los materiales de prot
Do not touch the green chip as shown
illustration.
Ne touchez pas la puce verte indiquée
sur l’
Grünen Chip nicht berühren; vgl
Abbildung.
Raak de groene chip niet aan, als getoond in de afbeelding.
Non toccare la linguetta v
No toque el chip verde tal y c
For the initial setup
this printer
ink supply units will be partly used to charge the print head.
units may print few
Pour la pr
en encre fournies av
encre ne peuvent pas êtr
d’alimentation en encr
charger la tête d’
imprimer moins de pages que les unités d’alimenta
Für die Erstk
V
nicht zur späteren Benutzung aufbewahrt werden. Die zur Initialisierung
vorgesehenen
des Druckkopfes. Diese
weniger Seiten als nachfolgende
V
deze printer zijn gelev
bewaard voor la
zijn geleverd
inkttoevoereenheden drukken mogelijk minder pagina
met de volgende inkttoev
Per l’
dell’
dell’
di alimentazione dell’
testina di stampa. Queste unità di alimentazione dell’
meno pagine rispetto alle successiv
Cuando realic
de suministro de tinta que se incluyen c
de suministro de tinta no se pueden guardar para un uso post
unidades de suministro de tinta iniciales se utilizarán parcialmen
cargar el cabezal de impresión. Estas unidades de suministro de tinta pueden
imprimir menos páginas comparado con las unidades de suministr
posteriores.
B
Inser
Insérez le bac de sortie.
Setzen Sie das Ausgabefach ein.
Stop de inv
binnen.
Inserire il vassoio di uscita.
Inser
C
Place the output tray
Placez le bac de sortie.
Platzieren Sie das Ausgabefach.
Plaats de uitvoerlade.
Posizionar
Coloque la bandeja de salida.
D
Connect and plug in.
Connexion et branchement.
Anschließen und einstecken.
Snoer aansluiten.
Collegare e inserire
Conéctela y enchúfela.
E
T
Mise sous tension.
Einschalten.
Inschakelen.
Accender
Enciéndala.
F
Select a language, country and time.
Choix d’une langue, d’un pays et
de l’heure.
Eine Sprache, Land und Uhrzeit
wählen.
Een taal, land en tijd selecteren.
Selezionare lingua, Paese e or
Seleccione un idioma, un país y la hora.
G
Open.
Ouverture.
Önen.
Openen.
Aprire.
Ábrala.
H
Press the ink supply unit tra
then pull it out.
Appuyez sur le bac de l’unité
d’alimentation en encre
retirez-le
Drücken Sie gegen das F
Duw op de lade van de inkttoevoereenheid en tr
Premer
Presione la bandeja de la unidad de suministr
extráigala.
K
Fit the ink supply unit int
supply unit tray
Installez l’unité d’alimentation
en encre dans le bac de l’unité
d’alimentation en encre
Richten Sie die
Einheit im F
V
Stop de inkttoevoer
Adattare l’unità di alimentazione dell’
Ajuste la unidad de suministro de tinta en la bandeja de dicha unidad
J
Unpack.
Déballez.
Packen Sie sie aus
Pak de eenheid uit
Aprire la confezione
Desempaquete.
M
W
Patien
W
W
Attendere che t
Espere a que nalice la carga.
N
Pull out.
Retrait.
Herausziehen.
Uittrekken.
Estrarre.
Tire de la bandeja.
O
Pinch and slide the edge guides.
Pincez et faites glisser les guides
de bords.
Kantenführungen drücken und
verschieben.
Knijp de randgeleiders samen en
schuif ze.
Aerrare e far
Apriete y deslice las guías de los bordes
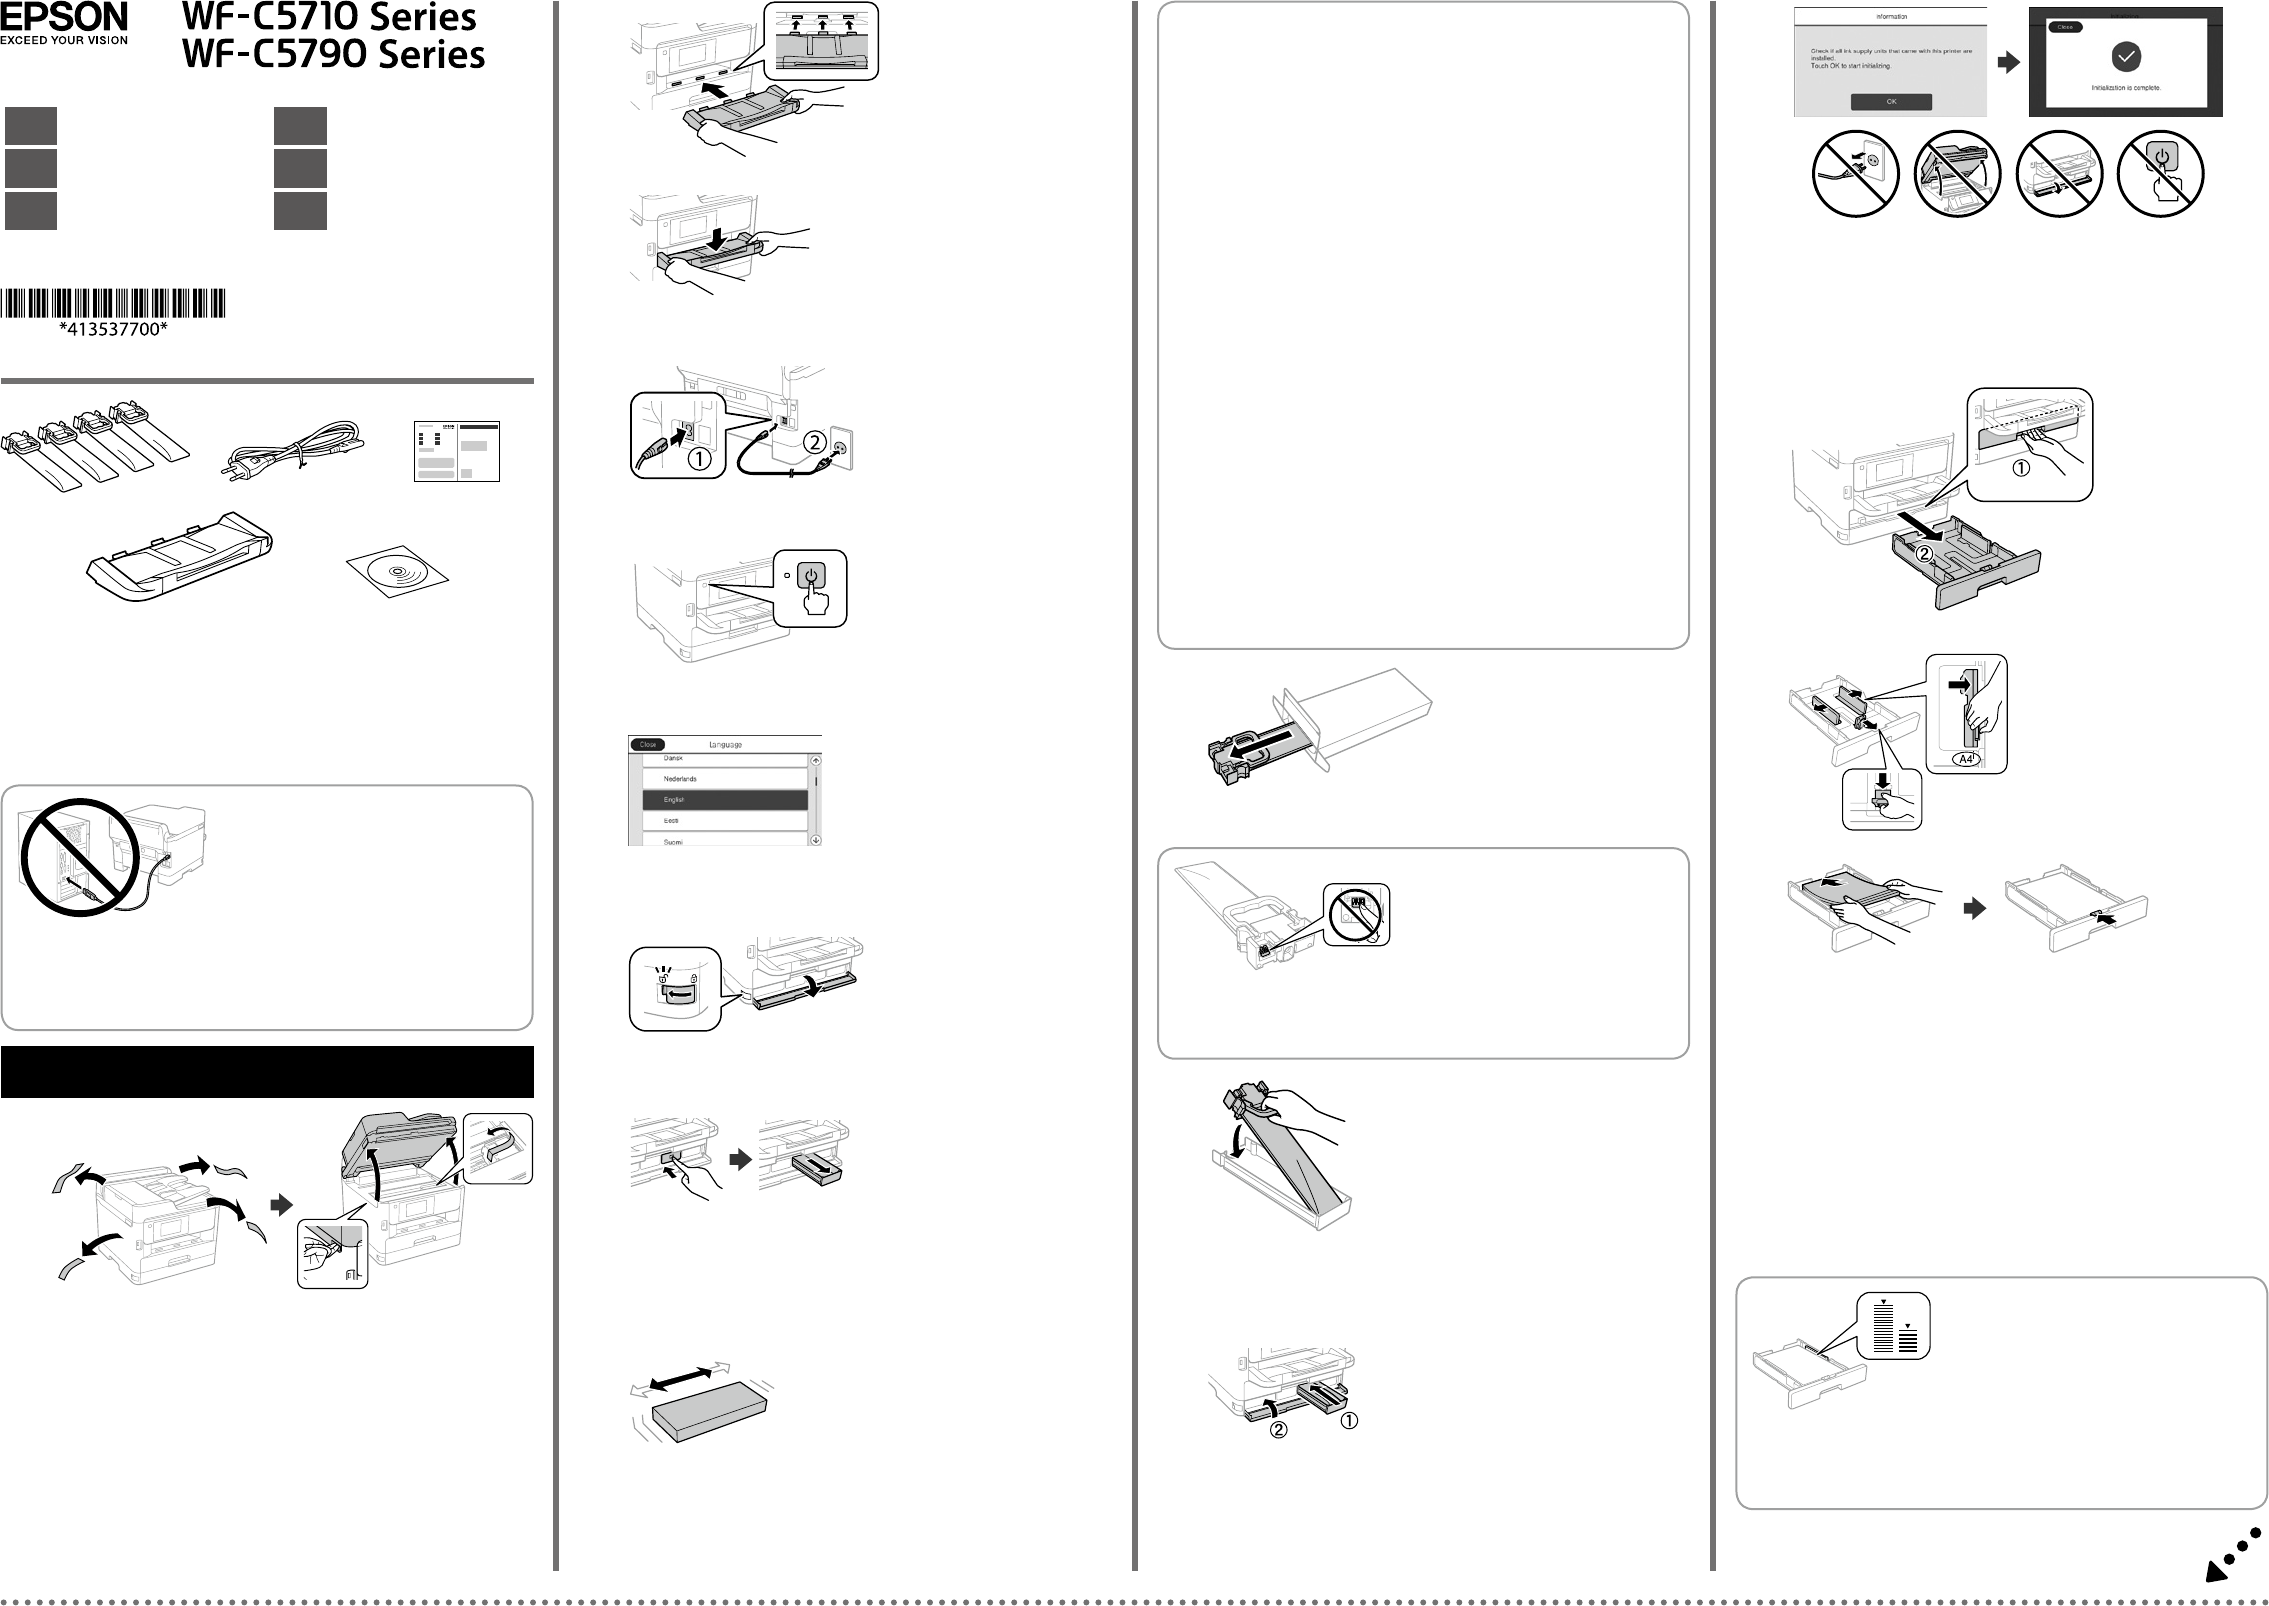
P
Load A4 size paper to
side face down then slide the front edge guide t
Chargez du papier de taille A4 vers l’arrièr
tournée vers le bas, puis faites glisser le guide de bor
A4-Papier mit der bedruckbaren Seite nach unten einlegen, an der Rückwand
der Papierkassette ausrichten und dann die vor
Papier schieben.
Laad A4-papierformaat naar de achterkant van de papiercassette gericht met de
afdrukbare zijde omlaag gericht en schuif dan de voorrandgeleider naar het papier
Caricare carta di formato A4 verso la parte posteriore del cassetto carta con
il lato stampabile rivolto v
anteriore sulla carta.
Cargue el papel A4 hacia la parte posterior de la bandeja de papel con la cara para
imprimir hacia abajo y
Do not load paper above the d arro
inside the edge guide.
Ne chargez pas de papier au-dessus de la
marque échée d sur le bord du guide.
Papier nicht über die Pfd an
der Innenseite der Kantenführung hinaus
einlegen.
Laad geen papier boven de pijlmarkering d binnenin de r
Non caricare carta oltre la freccia d all’
No cargar papel por encima de la marca de la echa d dentro de la guía de bor
L
Inser
supply units as well.
Insérez et fermez. Installez
également toutes les unités
d’alimentation en encre
Setzen Sie sie ein und schließen Sie sie. Installieren Sie auf diese
sämtliche Tinten-
Plaats en sluit. Installeer ook alle inkttoevoereenheden.
Inserire e chiudere. Installare tutte le unità di alimentazione dell’
Inser
I
Shake the ink supply unit 10 times
well.
Secouez bien l’unité
d’alimentation en encre 10 f
Schütteln Sie die
Schud de inkttoevoereenheid 10 keer goed.
Scuotere bene l’unità di alimentazione dell’
Agite bien la unidad de suministr