Features
Thi
followRef.
Accessing the Online Ref
Guide
FolR .
1. Inse
2. ForU in
. ForEPSON iUser
Guide in .
Online P
The EPSON
solv
ways:
For W
You can also acceT in the
M
For
areaRefe .
For Macint
1. Inse
2. DoubE ic
3. SeTec, an .
For
areaRefe .
Ac
The p
lets y
your prin
oper
For W
From Wind
1. FrFile menu of yPrint . The Print
appea
2. SeProperties , P, Setup, or Opti
to acce
need
No
Wh
sett
From the Start
1. For MSt , point to
Settings, then c Pri.
ForSta,C , then click
Printers , the Print.
2. SeProperties oF
a WPrintin
Pre on t File me
For Macint
Yo
be
Pane
SRef for detai
R
Y
on
ca
the SRe. To r
ca
Not
❏Y
othe
ca
❏In ad
during the
whi
cha
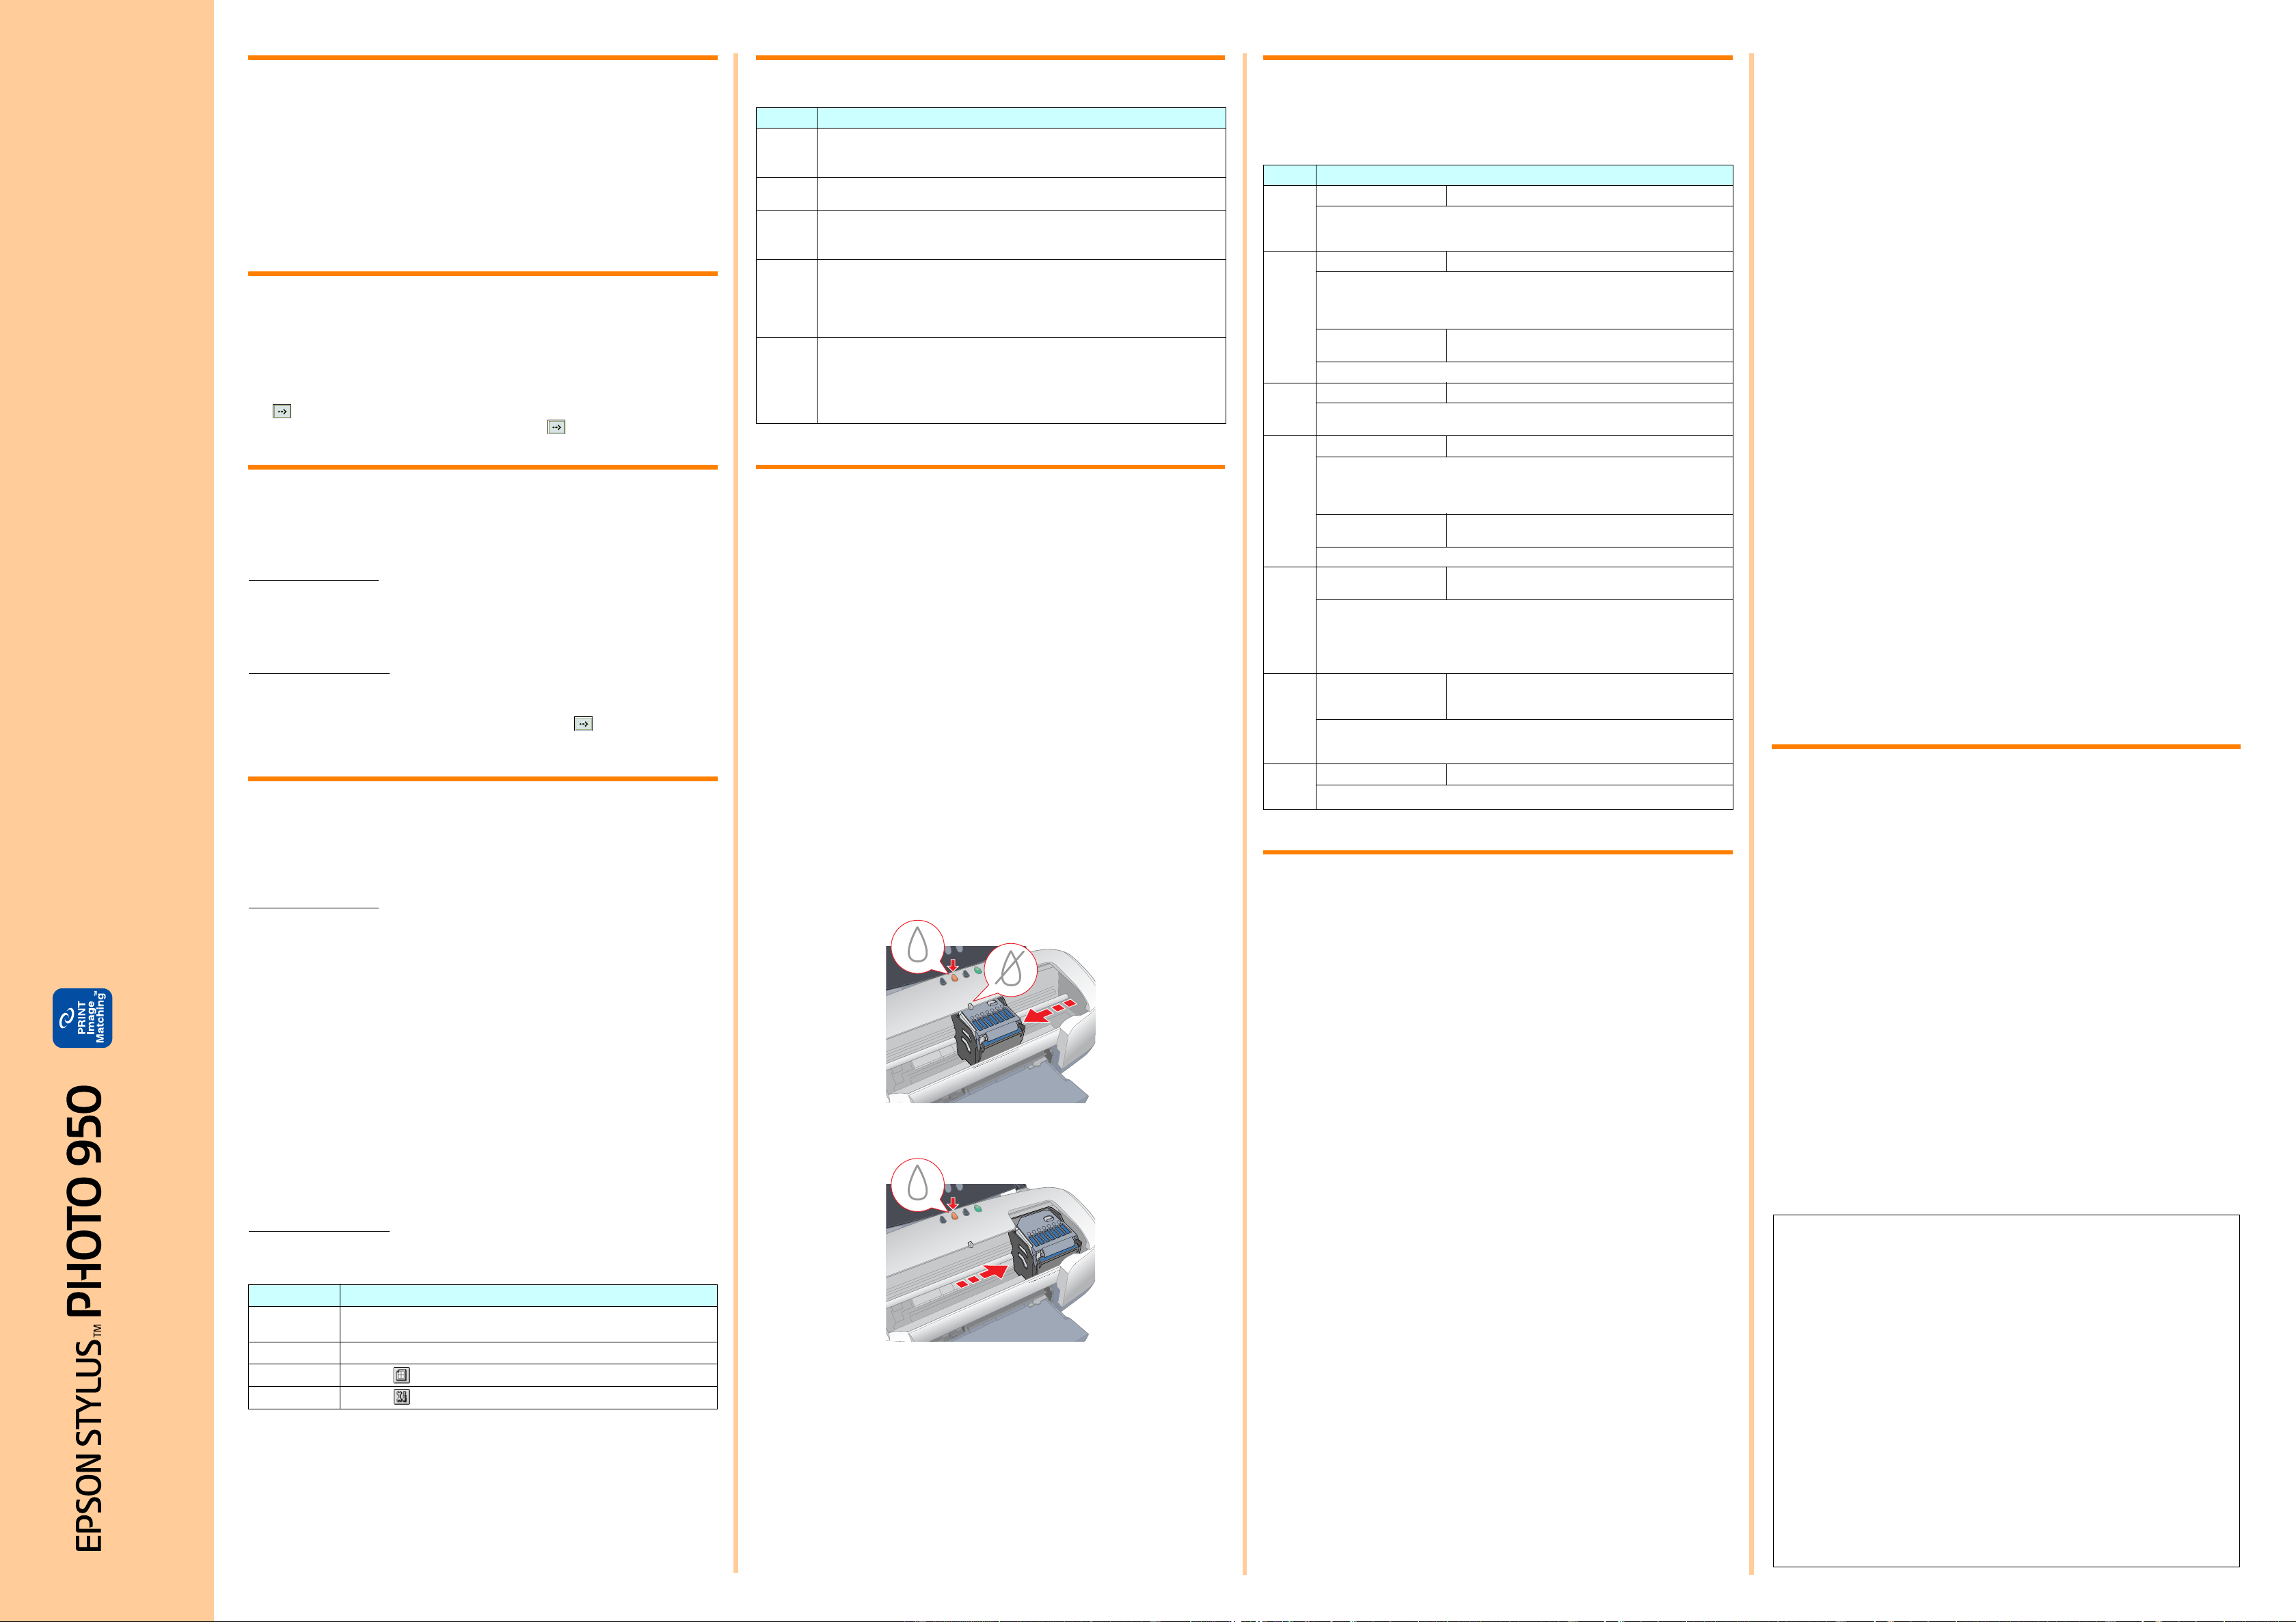
1. MH ink bu
The
2. Op
be r_ mark
cCauti
❏Do no
prH i
❏W
ink s
por
3. ThH ink butto
ca
4. InsSet i
the ink cart
For
to thRe .
Not
Disp
Er
You
control
problem
O O = on, N = k k =
* EPSON
Sa
Read a
printer
When
❏Avoid p
Also
source
❏Av
❏Leav
❏Plac
unplu
❏Place the
base
than 1
not ope
❏Whe
or tur
When
❏Use
❏Do not
❏If you
amper
exceed
ratin
wall ou
❏If you
be pro
short-c
❏Be su
When ha
❏Do not ope
❏Do no
❏Kee
to dr
❏Be car
ink re
the a
them
after
❏Do no
the c
❏Do not re
Whe
❏Do n
printi
❏Do no
❏Do no
❏Unpl
under
The
pr
oper
❏Do not inse
❏Tak
❏Leav
dehy
Whe
❏Do no
ma
❏Ke
❏Do no
❏Do no
tabl
❏Do no
Inf
Use of opti
EPS
arising
desig
EPS
Sa
wWarning:
Refer
voltag
Impor The
colou
Blue
Brow
If y
As th
co
the fol
❏The
the l
❏The
with
❏If the p
electr
❏Replace
Doub No m
Pri Au
Pri Ph
Pri
Dialog Box How to
Pr CliPr on thOpti in
Se
Page ClicPage Setup on th
La Cl La
Uti Cl Util
Button Fu
P
pow
TurP po
butt
Cl
m
pape Con
paper out error or double feed e
H
ink
Moves
EnaHink
off.
z
ro
(w
the c
Pri
re
Fe
Fe
rol
z
ro
(w
cu
WSin
Cut
Then
WNot Cut
Cut
pape
Light Prob
O mPaper out No
Chec
fem pa
goes
k mPaper jam Pa
Chm paper
but
and
in tm pa
Automatic Ro
Cutter error
Th
Remo
k HInk lo The
Obt
c
O HInk o The
Re
c
ink
may
Wro The cu
the p
Us
O P
O H In
in
The
If the pH ink
to t
con
If
ink
k P
k m
O H
Carriage error Th
or
po
Tur
pat
deal
k P
k m
k H
Unknown p A
Tur
Quic
K
C
English
Copyright© 2002 by S
Pr
All
in any
wri
use wi
pr
Ne
thir
acc
or (ex
maint
SEIK
option
Appr
SEIK
inter
Pr
EPS
PRIN
PRIN
is a
PRIN
by di
Par
Co
Mic
Gene
of thei