C
D
E
F
A
B
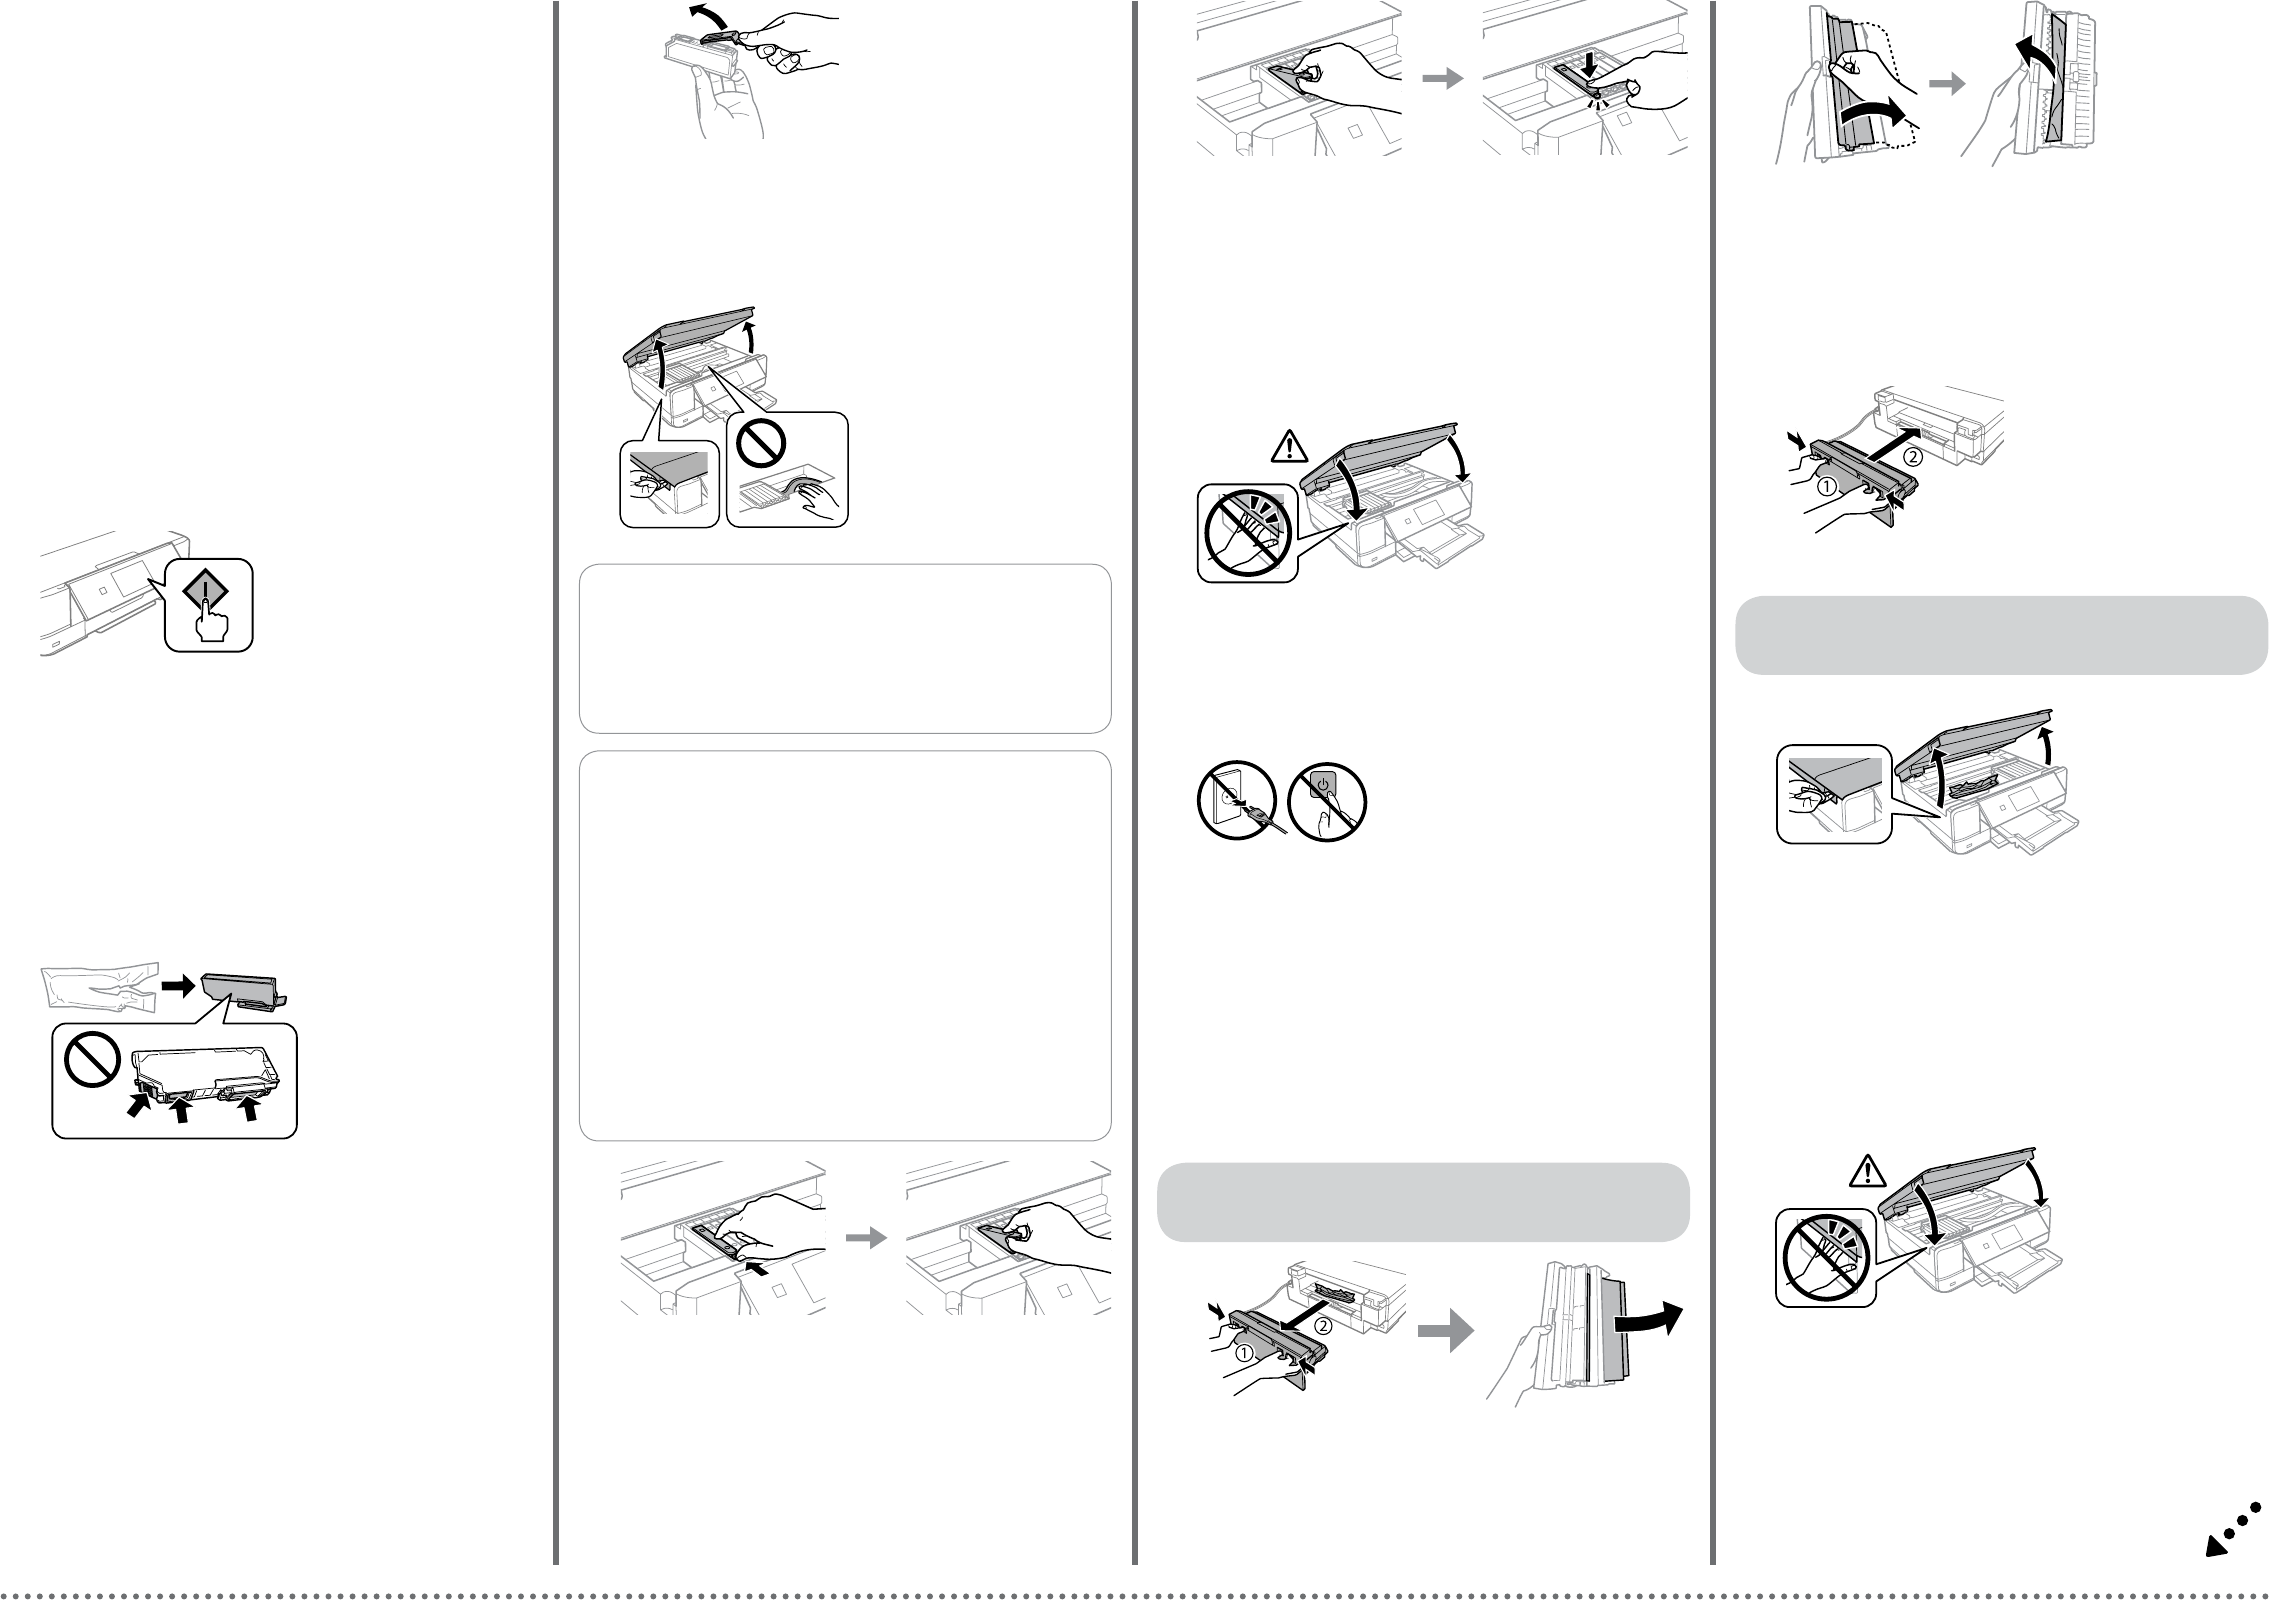
Replacing Ink Cartridges
Remplacement des cartouches d’
Ersetzen von
Cartridges vervangen
Sostituzione delle car
Cambio de cartuchos de tinta
Prepar
Prépar
d’
Halten Sie neue
V
Nieuwe cartridge(s) voorbereiden. Haal alle car
Preparar
dalle relative conf
Prepar
sus paquetes.
Open the scanner unit.
Ouvrez le module scanner
Önen Sie die Scannereinheit.
Scannereenheid openen.
Aprire l’unità scanner
Abra la unidad del escáner
Remove the cap from the new cartridge.
Retirez le capuchon de la nouvelle cartouche.
Entfernen Sie die Abdeckung von der neuen P
Dop van de nieuwe cartridge ver
Rimuovere il cappuccio dalla nuov
Quite la tapa del cartucho nuevo.
Inser
down until it clicks into place
Insérez la cartouche d’
délicatement sur la cartouche jusqu’
Setzen Sie die neue
drücken Sie sie vorsichtig nach unten, bis sie hörbar einrastet
Cartridge schuin in de car
cartridge vastk
Inserire diagonalmente la cartuccia d’inchiostro nel supporto per cartuccia e
spingerla delicatamente in basso no allo scatto in posizione
Inser
el clic que indica que está bien encajado.
Close the scanner unit and follow the on-screen instruction.
Fermez le module scanner et suiv
Schließen Sie die Scannereinheit und folgen Sie den Bildschirmanweisungen.
Scannereenheid sluiten en instructies op het scherm volgen.
Chiudere l’unità scanner e seguire le istruzioni a video
Cierre la unidad del escáner y siga las instrucciones que aparez
Clearing the paper jam
Suppression des bourrages papier
Beseitigen von P
Papierst
Rimozione dell’
Cómo solucionar un a
Pull out the rear co
Retirez le capot arrière et ôtez délicatement le papier c
Ziehen Sie die hintere Abdeckung heraus und entf
Deksel aan de achterzijde uittrekken en het vastgelopen papier voorzichtig verwijderen.
Estrarre il coperchio post
Saque la cubierta posterior y retire con cuidado el papel atascado.
Open the rear cov
Ouvrez le capot arrière et ôtez délicatement le papier c
Önen Sie die hintere Abdeckung und entfernen Sie vorsichtig das gestaut
Papier
Deksel aan achterzijde verwijderen en vastgelopen papier voorzichtig
verwijderen.
Aprire il coperchio posterior
Abra la cubierta posterior y retire con cuidado el papel atascado
Reattach the rear cov
Réinstallez le capot arrière.
Setzen Sie die hintere Abdeckung
wieder ein.
Deksel aan achterzijde van apparaat
weer aanbrengen.
Rimontare il coperchio posterior
Vuelva a colocar la cubierta posterior
A
B
C
Fr
Aus der hint
Dal coperchio posterior
A
Fr
Aus dem Druck
Dall’
Open the scanner unit and remove all of the paper inside
pieces.
Ouvrez le module scanner et retirez le papier c
déchirés inclus.
Önen Sie die Scannereinheit und entfernen Sie sämtliches P
von abgerissenen
Scannereenheid openen en al het papier en alle eventuele losse stukken
verwijderen.
Aprire l’unità scanner e rimuovere tutta la carta rimasta all’in
eventuali pezzettini strappati.
Abra la unidad del escáner y saque todo el papel que haya, incluidos los tr
rotos.
B
Close the scanner unit.
Fermez le module scanner
Schließen Sie die Scanner-Einheit.
Scannereenheid sluiten.
Chiudere l’unità scanner
Cierre el escáner
Q
If the ink car
replacement position, close the scanner unit and select
Setup
>
Maintenance
>
Ink Cartridge(s) Replacement
.
Si le porte
des cartouches d’
Cong
>
Entretien
>
Remplact car
.
W
Auswechselposition bew
wählen Sie
Setup
>
W
>
Tint
.
Als de cartridgehouder niet naar de positie voor het vervangen van de
cartridges beweegt, moet u de scannereenheid sluiten en
Instellen
>
Onderhoud
>
V
selecteren.
Se il supporto per car
sostituzione cartuccia, chiudere l’unità scanner e selezionare
Congura
>
Manutenzione
>
Sost. cartucce ad inchiostro
.
Si el soporte no se coloca en la posición de sustitución de car
de tinta, cierre la unidad del escáner y seleccione
Cong
>
Mantenimiento
>
Sustituir Cartuchos de T
.
Push the tab to unlock the ink cartridge holder and then remove the cartridge
diagonally
Poussez la languette pour débloquer le porte-
cartouche de biais.
Drücken Sie die Lasche zur Entriegelung des
nehmen Sie die Patr
Lipje induwen om de cartridgehouder te ontgrendelen en de cartridge er
vervolgens schuin uittrekken.
Premer
la cartuccia in direzione diagonale.
Presione la lengüeta para soltar el soporte del cartucho y saque el car
diagonalmente.
!
Never touch the ink cartridges while the print head is moving.
Ne touchez jamais les cartouches d’
Die
Raak de car
Non toccare mai le cartucce di inchiostro durant
No toque nunca los cartuchos si el cabezal de impresión está moviéndose.
C
D
Press Settings , and then make the print settings. Scr
Appuyez sur Par, puis dénissez les paramètres d’impression. F
l’
Drücken Sie auf Einstellungen und kongurieren Sie dann die
Druckeinstellungen.
Op Instel. drukken en afdrukinstellingen opgeven. Blader eventueel ver
beneden.
PremerImpost. , quindi eettuare le impostazioni di stampa. Scorrer
se necessario.
Pulse Ajustes y c
necesario.
Press x t
Appuyez sur x pour lancer
l’
Drücken Sie x , um den
Druckvorgang zu starten.
Op x drukken om het afdrukken te
starten.
Premerx per avviare la stampa.
Para empezar a imprimirx .
B
Select a photo and press + or - to set the number of copies.
Sélectionnez une photo et appuyez sur + ou sur - pour dénir le nombre de
copies.
W
Exemplare
Fot
Selezionare una foto e pr
Seleccione una foto y pulse + o - para congur
G
W
Attendez qu
W
anzeigt.
W
Attendere la visualizzazione di un messagg
completamento
Espere a que aparezca un mensaje indicando que ha
terminado.