40
A
7
6
5
4
7
8
9
9
A
4
5
6
7
8
9
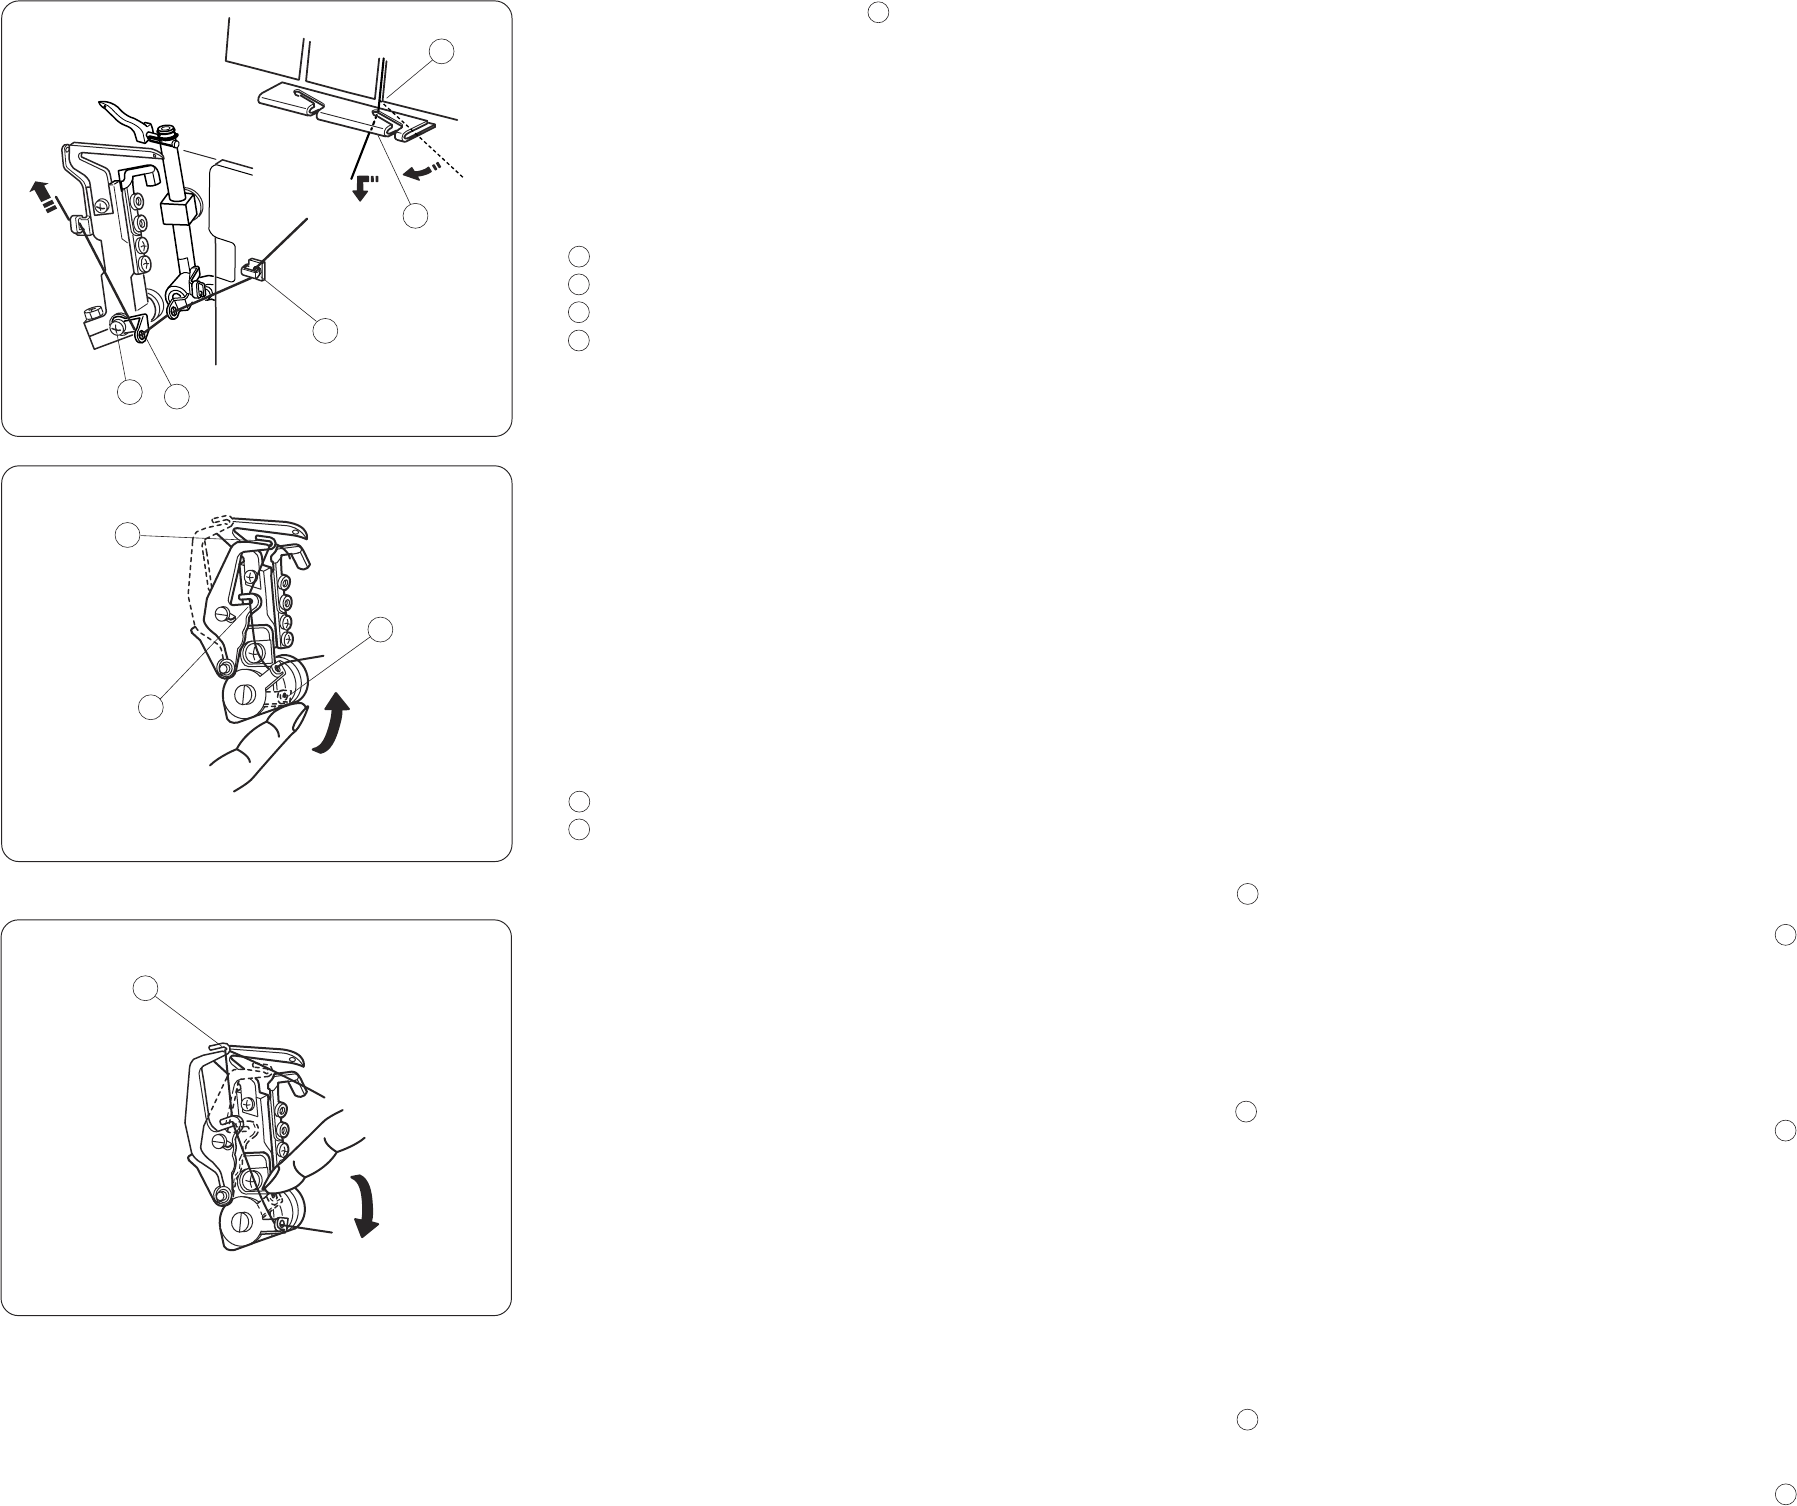
4, 5, 6, 7
8, 9
4. Hook the thread on the corner , and then pass
the thread through the looper thread guide.
5. Pass the thread through the thread guide.
6. Pass the thread through the looper thread
take-up lever (lower).
7. Pass the thread through the lower looper thread
guide (1).
Looper thread guide
Thread guide.
Looper thread take-up lever (lower)
Lower looper thread guide (1)
8. Turn the handwheel toward you to move the lower
looper to the right side.
Then lift up the lower looper thread guide (1).
When you do this, the lower looper thread guide
(2) and (3) are moved to the right for easy
threading.
Pass the thread through the lower looper thread
guide (2).
9. Pass the thread through the lower looper thread
guide (3).
Lower looper thread guide (2)
Lower looper thread guide (3)
Holding the end of the thread, push the lower looper
thread guide (1) down with your other hand to return
it to its original position.
Lower looper thread guides (2) and (3) will return to
their original position automatically.
* You can return the lower looper thread guide (1),
(2) and (3) to their original position automatically
by turning the handwheel counterclockwise.
45
Enfiler le boucleur supérieur
Placer une bobine de fil sur la deuxième broche à
bobine à partir de la droite.
* Les points à enfiler pour le boucleur supérieur
sont indiqués en jaune.
* Un tableau d’enfilage pratique se trouve sur le
corps de la machine à l’intérieur du couvercle du
boucleur.
1. Faire passer le fil dans le deuxième guide-fil à
partir de la droite de l’arrière vers l’avant: A
* Si le fil sort de l’encoche du guide-fil, faire passer
le fil dans le trou du guide-fil à nouveau, comme
montré: B
Guide-fil
2. Après avoir enfilé la barre guide-fil, glisser le fil
dans le premier guide de la machine, comme
illustré.
Guide-fil
3. Tenir le fil aux deux extrémités et tirer
délicatement pour s’assurer que le fil soit inséré
correctement entre les disques de tension. (Si le
releveur de pied presseur est soulevé, le fil
s’insère facilement entre les disques de tension).
Cadran de tension du fil du boucleur supérieur
1
2
3
Einfädeln des oberen Greifers
Schieben Sie eine Spule auf den zweiten
Spulendorn vorn rechts.
* Die Punkte des Fadens für den oberen Greifer
sind gelb markiert.
* Am Maschinenkörper innerhalb der
Greiferabdeckung ist eine praktische
Einfädeltabelle angebracht.
1. Ziehen Sie den Faden von hinten nach vorn durch
die zweite Fadenführung von rechts: A
* Wenn der Faden aus der Fadenführungsnut
herauskommt, führen Sie den Faden erneut durch
die Fadenführungsbohrung wie in der Abbildung
gezeigt: B
Fadenführung
2. Führen Sie das Garn nach Einfädeln der
Fadenführung in die erste Führung der Maschine
(siehe Abbildung).
Fadenführung
3. Halten Sie den Faden an beiden Enden fest und
ziehen Sie vorsichtig daran, um sicherzustellen,
dass der Faden einwandfrei zwischen den
Spannscheiben eingeführt ist. (Wenn der
Stoffdrückerfußheber angehoben ist, lässt sich
der Faden leicht zwischen den
Spannungsscheiben führen.)
Fadenspannungs-Einstellrad für den oberen Greifer
1
2
3