1
ATTENTION! To save energy, the HAC5 turns off automatically at night, meaning the dis-
play turns off at 12 p.m. and only lights up again after pressing any button.
All functions active at the time of shut-off keep going internally despite the display tur-
ned down.
Operational Setup
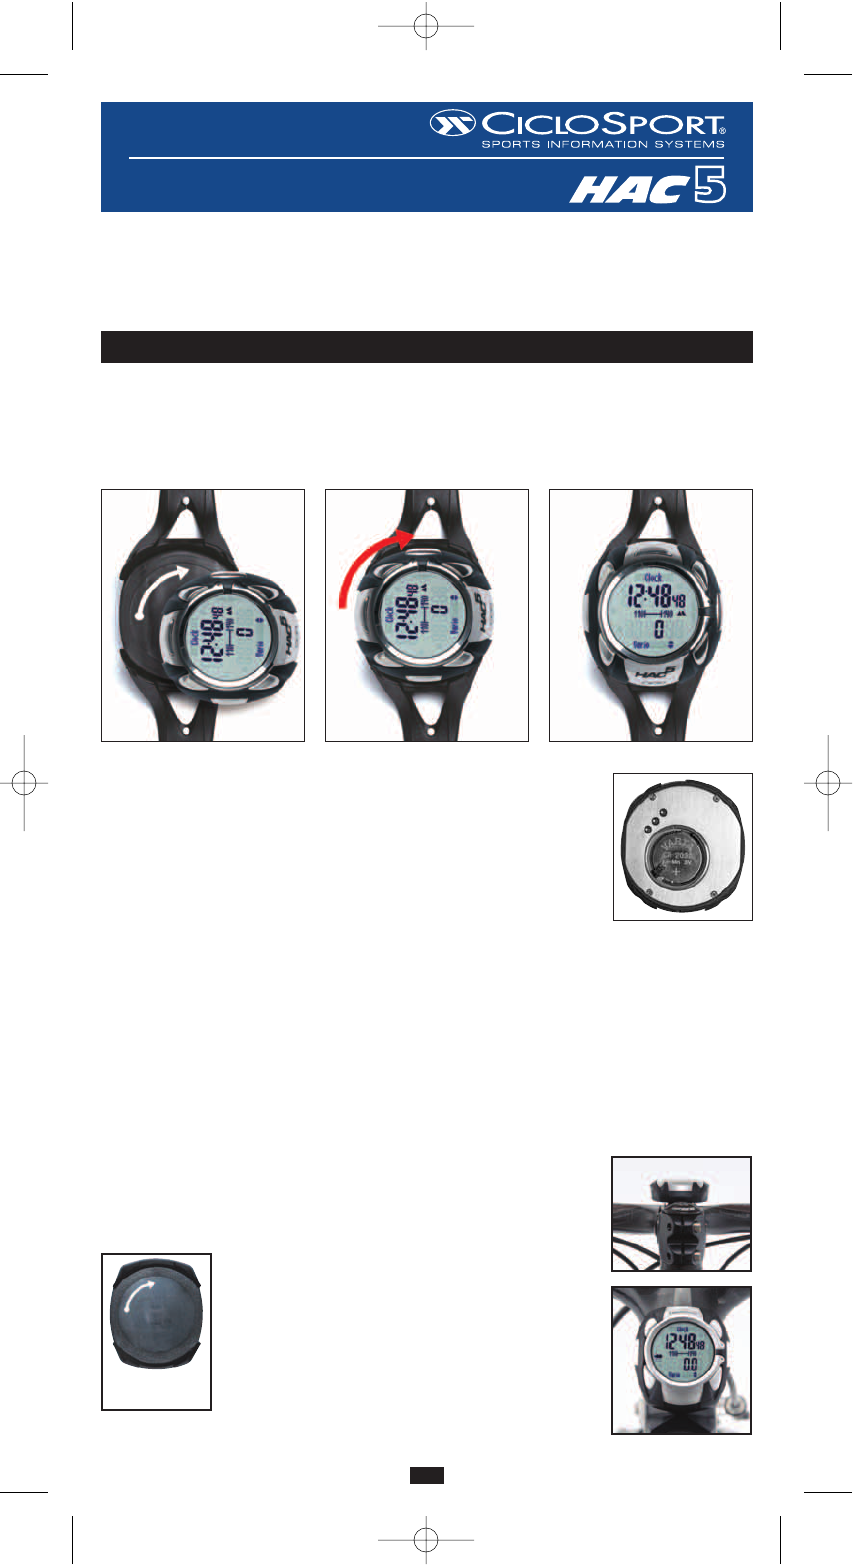
2.1 Attaching the HAC5 to the wrist band and the handlebar bracket
To take the HAC5 out of the wrist band or the handlebar holder, turn it 90° to the left, then re-
move.
To insert into the wrist band or handlebar bracket, insert at a 90° angle to the left, then turn to
right until it engages.
Inserting the batteries
• Inserting the battery into the HAC5:
Open the battery cap on the back of the HAC5 with the aid of a coin
(turn counter clockwise). Insert battery type CR2032 with plus pole fa-
cing up, please make sure that the battery is inserted at a angle from
the side (from right to left), so that the contacts lie on the battery. Then
close the battery cap. The display of the HAC5 shortly shows all seg-
ments, then returns to the normal display.
• Inserting the battery into transmitter belt, speed- and cadence transmitter:
Open the battery cap with the aid of a coin (turn to left). Insert battery type CR2032 with the
plus pole facing up and close the cap again.
Setup / Initialization
Because of the new digital transmission technique, all transmitters have to be initialized prior to
first use. We therefore recommend that you first conduct all necessary initializations (and, if re-
quired, enter all required data) before attaching the parts to the bike. On page 3 (examples)
you will find a step-by-step setup as well for the initializations as for setup of time and date.
Installing
• Installing the handlebar bracket:
The handlebar mounting can also be installed on a stem. To do this the
top section of the handlebar mounting must be removed from the bot-
tom section. To make it easier to remove the top section carefully push
the sides of the bottom section upwards slightly.
Then turn both parts through 90° and assemble them
again until the snap-on mounting engages.
Remove the backing foil from the underside of the
handlebar mounting, place the handlebar mounting in
the required position on the handlebar (or on the stem)
and press it down slightly. Secure it with the O ring or
with the cable ties
“First steps” with the
handlebar
bracket