Installatie
Rond de systeeminstellingen af op de printplaat en schakel de
installatie-modus in vóór de installatie.
①
Houd het papier voor de positionering op de juiste plaats, plak
de waterpas op het papier om de positie te controleren en aan te
passen.
②
Zet vast met twee schroeven in de bovenste schroefgaten.
③
Monteer de beugel in de onderste schroefgaten en zet vast met
schroeven.
④
Haal het papier voor de positionering weg.
⑤
Monteer de sirene aan de muur, draai de schroef vast en zorg
ervoor dat de sirene goed is gepositioneerd.
Waterpas
Papier voor
positionering
Ga in de verbindingsstatus
via de afstandsbediening
Deze functie is bedoeld voor gebruikers om nieuw aangeschafte
accessoires aan te sluiten zonder de demontage van de sirene van
de muur.
Als de sirene in de installatie-modus is, druk drie keer continu op
[Thuis alarm aan
] op de afstandsbediening. De sirene gaat
over op de verbindingsstatus na een lange pieptoon. De sirene
zal de verbindingsstatus verlaten als er binnen 15 seconden geen
bewerking wordt uitgevoerd.
ES
Introducción
La sirena inalámbrica con luz estroboscópica para exterior ayuda
a persuadir a los intrusos sonando cuando recibe una señal
inalámbrica del panel de control o los sensores conectados. Es
posible conectar más sirenas inalámbricas con luz estroboscópica
al mismo panel de control para conseguir un efecto persuasorio
mayor. Si se conecta la sirena como accesorio al panel de control,
sonará y las luces LED parpadearán cuando se active el sistema. Si
se conecta la sirena como panel de control de alarma independiente
a accesorios como un mando a distancia, un contacto de puerta/
ventana, un detector de movimiento, etc., sonará y las luces LED
parpadearán cuando se active un sensor.
Descripción del producto
Vista frontal
Indicadores
LED de alarma
Indicador LED
de estado
Indicación LED de estado
Estado LED
Modo Activar/Hogar Un parpadeo cada 5 segundos
Desactivar Sin indicación de luz
Sin desactivación
después de la alarma
Un parpadeo cada 2 segundos
durante 2 horas
Vista trasera
Agujeros de montaje
Tapa trasera
Interruptor de seguridad
Soporte
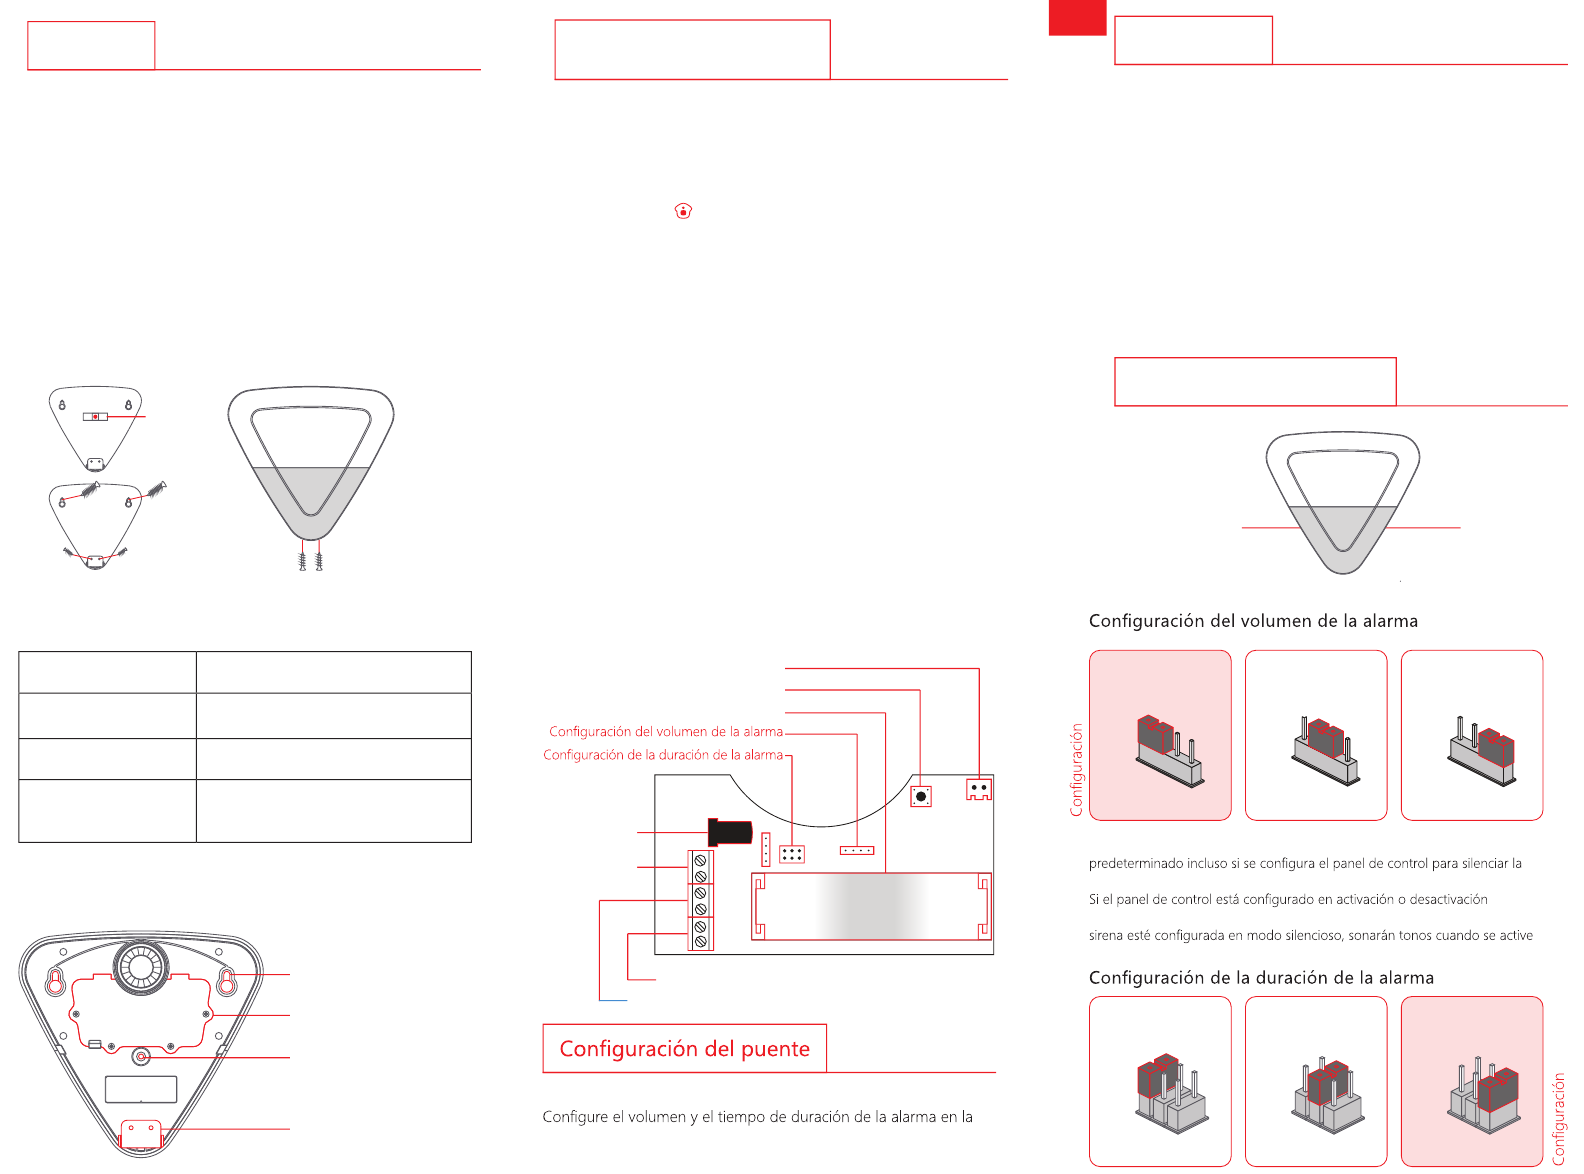
Diseño de la placa del circuito impreso
Interfaz de la sirena
Botón Memorizar
Toma del
adaptador
Terminales de
12 V CC
Terminales del sensor con cable (zona normal)
Terminales del sensor con cable (zona 24 horas)
Ranura de la batería
placa del circuito impreso.
ALTO SILENCIO BAJO
A
L
T
O
A
L
T
O
A
LT
O
SILENCIO
SILENCIO
SILENCIO
B
A
JO
B
A
JO
B
A
JO
predeterminada
Nota: Si la sirena está conectada al panel de control, sonará con el volumen
alarma. De esta forma se alertará a los vecinos y se podrá evitar la intrusión.
silenciosa, la sirena se activará o desactivará silenciosamente. Aunque la
y desactive.
5 MIN
5 MIN
5 MIN
2 MIN
2 MIN
2 MIN
30 S
30 S
30 S
5 MIN 2 MIN 30 S
predeterminada