Setting for SOS Key
You can choose to input code before pressing [SOS] key or not. This
function is to prevent false operation or trick.
Not Input Code for SOS
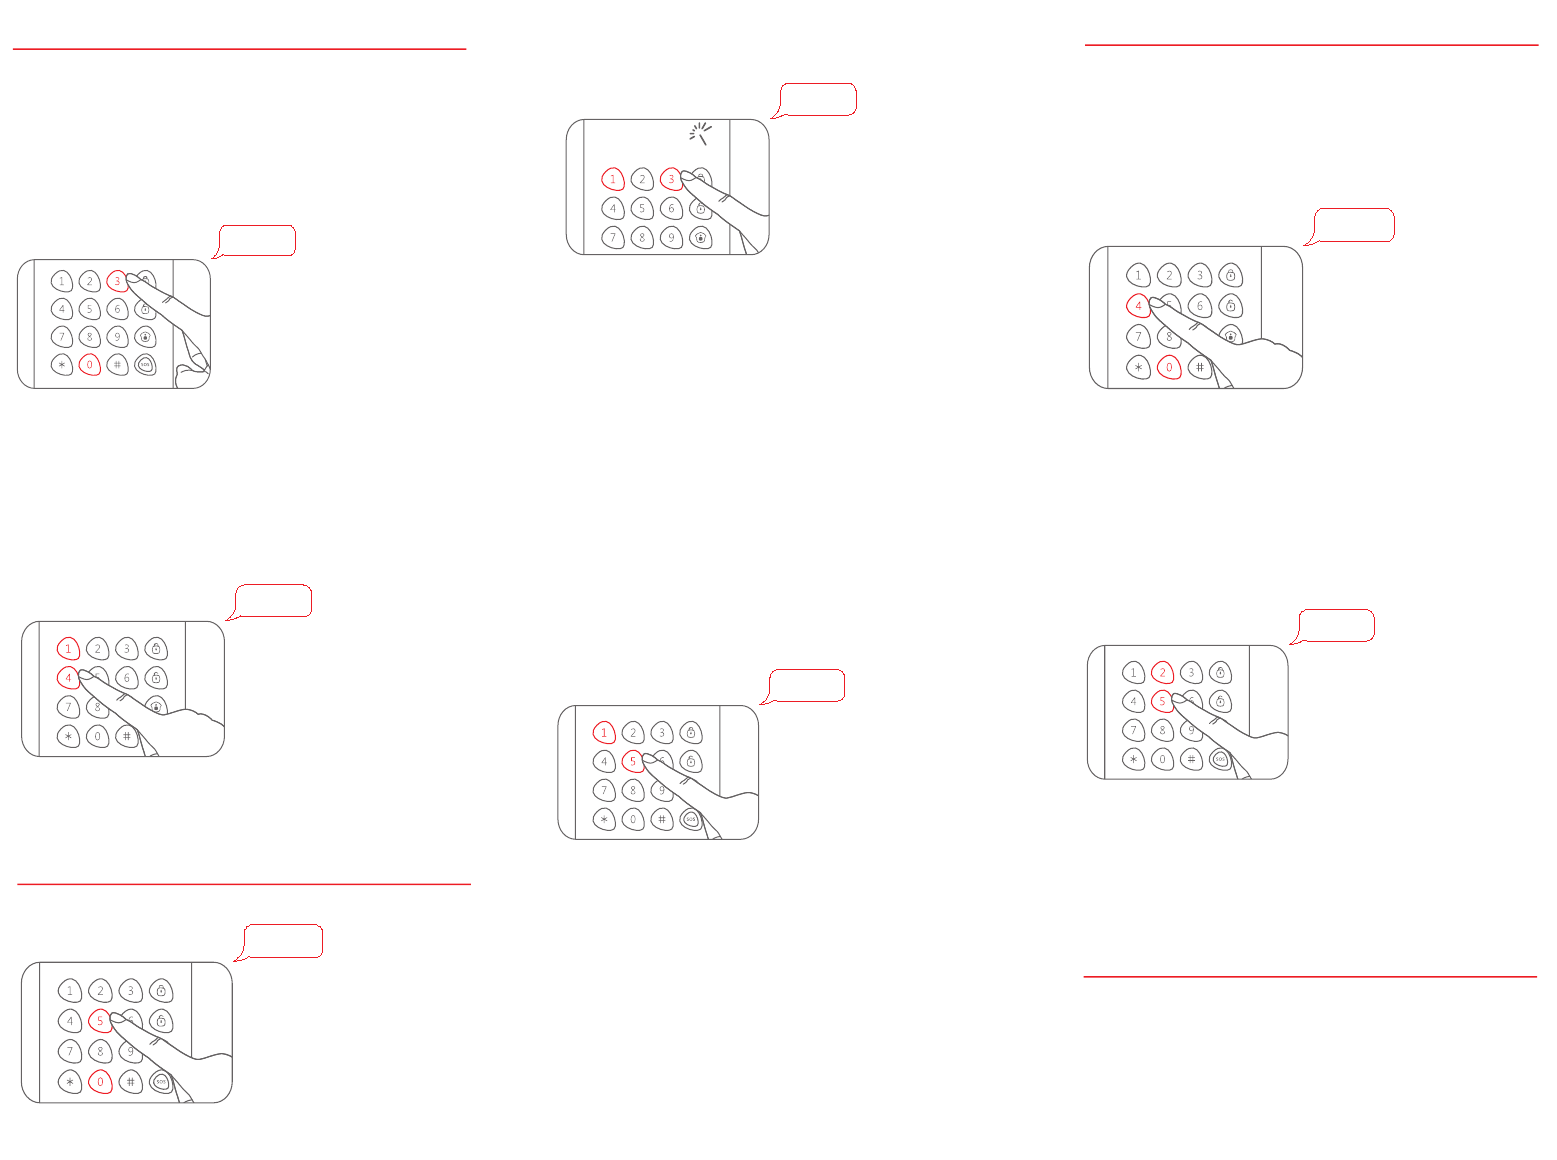
Enter setup state, input:
*3 * 0*
When one beep is heard and the LED indicator keeps on for 10
seconds, the setup is successful.
After setup, you can press and hold the [SOS] key for 3 seconds,
the control panel will alarm immediately.
Input Code for SOS
Enter setup state, input:
*3 * 1*
When one beep is heard and the LED indicator keeps on for 10
seconds, the setup is successful.
After setup, you need to input user code or admin code and [#]
key, and then press and hold the [SOS] key for 3 seconds to send
an emergency call.
Note: Default setting: 0. No need to input code for SOS
Keyboard Tone
Keyboard tone can be turned on or off. If it is off, the setup
confirmation tone will be turned off too.
Turn off Keyboard Tone
Enter setup state, input:
*4 * 0*
When one beep is heard and the LED indicator keeps on for 10
seconds, the setup is successful.
Turn on Keyboard Tone
Enter setup state, input:
*4 * 1*
When one beep is heard and the LED indicator keeps on for 10
seconds, the setup is successful.
Note: Default setting: 1, turn on the keyboard tone.
RFID Reader Setting
Disable RFID Reader
Enter setup state, input:
*5 * 0*
When one beep is heard and the LED indicator keeps on for 10
seconds, the setup is successful.
Enable RFID Reader
Enter setup state, input:
*5 * 1*
When one beep is heard and the LED indicator keeps on for 10
seconds, the setup is successful.
Press [*] on the keypad and then disarm the system by RFID tag
after this function was enabled.
Disarming Silently by RFID Tag
The control panel and siren will hoot twice when disarming by RFID
tag. If set disarming silently by RFID tag, the control panel and siren
will keep silent to finish disarming without disturbing neighborhood.
Enter setup state, input::
*5 * 2*
When one beep is heard and the LED indicator keeps on for 10
seconds, the setup is successful.
Note: Default setting: 1, turn on disarm by RFID tag and the siren will hoot
when disarming.
Direct Disarm by RFID Tag
When direct disarm by RFID tag is enabled, you can directly present
RFID tags to disarm the system and unlock the electric door locks.
However, the function consumes power greatly. It is recommended
to enable this function only when the keypad is powered by DC
12V. If this function is disabled, you should press [*] key before
approaching RFID tag so as to save power.