Connect device to Computer via USB
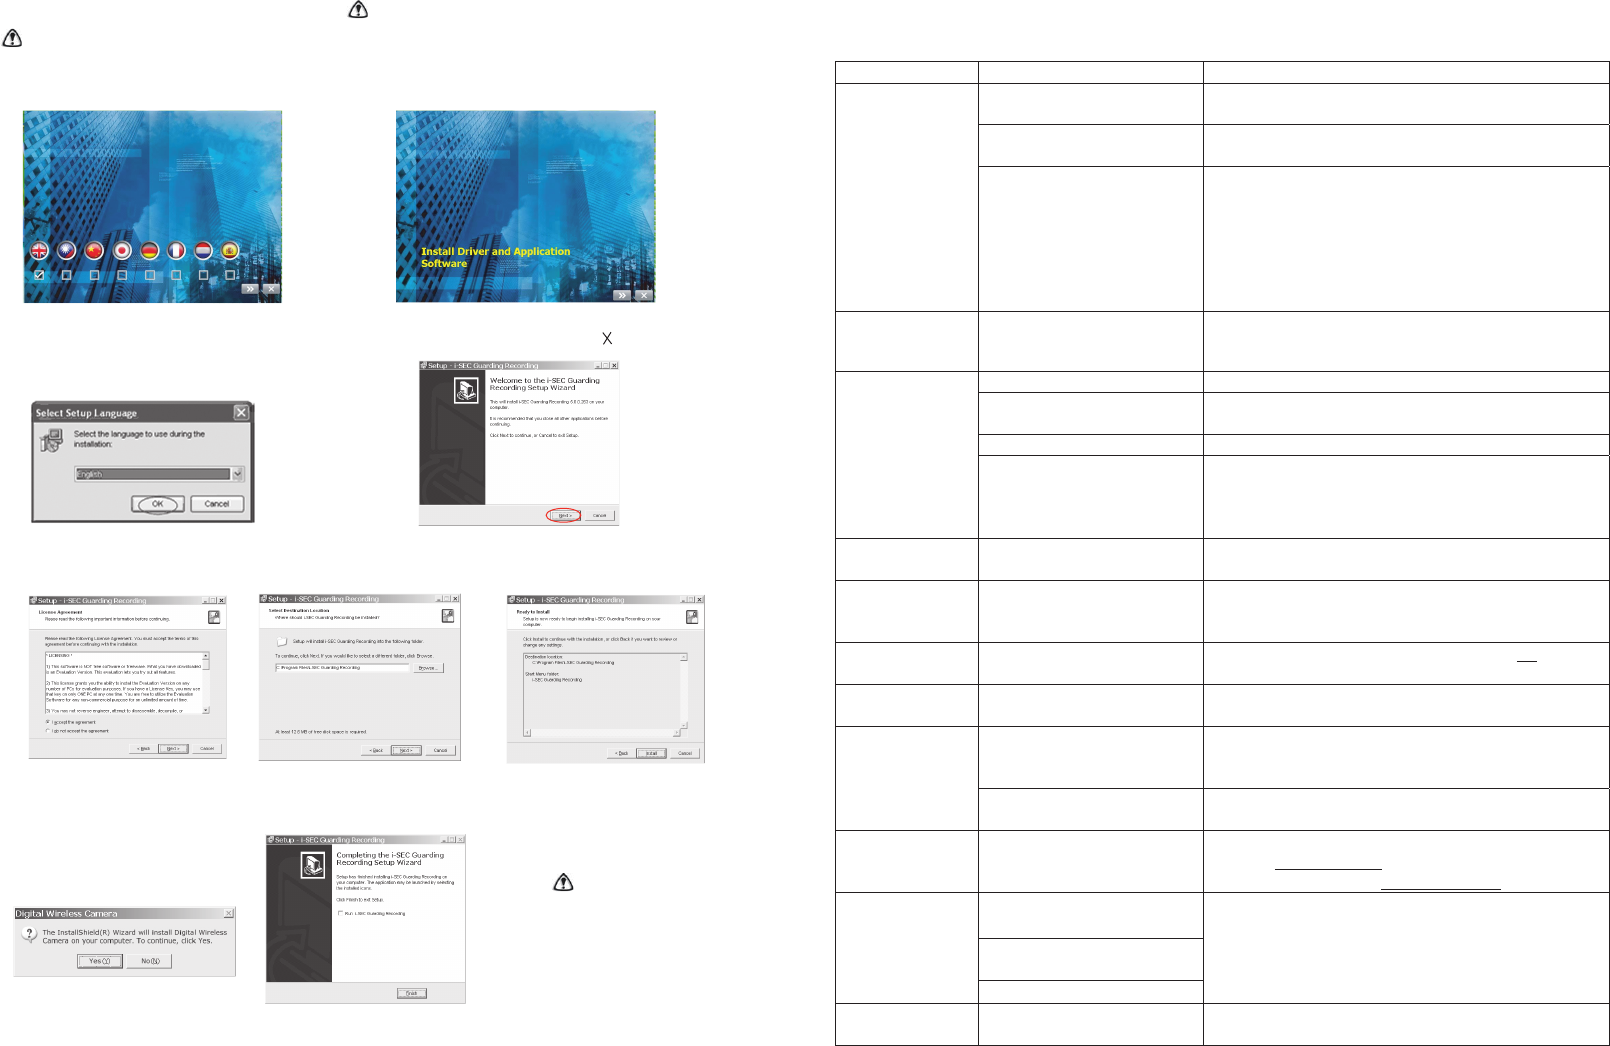
Step 1. Install iSEC Guarding software ( Disconnect USB during installation Step 1)
○
A Select the language desired then click [>>]
○
B click[>>]to continue,click [ ] to exit
○
C Select the language to use during the installation
○
D Click [Next]
○
E
○
H
Accept
the agreement then click [Next]
○
F Click [Next] for default folder path
or click Browse to select different folder
○
G
○
I
Click [Finish] to leave Setup.
Recommend NOT to run
iSEC Guarding BEFORE
plugging in Receiver.
Load the Disk prov
Installation steps subject to Windows XP; installation steps may slightly differ in Windows Vista
ided into CD-ROM of your PC . After a moment, [SETUP] screen will appear automatically (see below).If
the [SETUP] screen does not appear, double-click the CD-ROM icon in [My Computer] to start the installation process manually.
Click [Yes] to install driver
Click [Install] to start
2
15
Trouble Shooting
This section offers some helpful information to overcome most of the problems you may encounter. We hope this section can help you to enjoy
a pleasant setup.
Before requesting service, please make the below checks. If you are in doubt about some of the check points, or if
the
remedies indicated in the chart do not solve the problem, please contact us.
To use this trouble shooting table, check software [Status Bar] to see current status.
Problem Possible Causes Remedies
Incompatible computer operating
syst
em
Upgrad
e operation system to Windows XP® (SP1 recommend) or
VISTA® or Windows 7.
Receiver connection problem Unplug 5V power adapter and AV cable from receiver, use USB
connection
only to power up the receiver.
(USB) Device does
not exist
Sof
tware and Receiver installed in
wrong sequence.
Software and driver should be installed PRIOR to plugging in
USB
receiver.
1. Unplug receiver from USB
2. Exit software
3. Plug in receiver and wait for few seconds allowing Windows
locate the
receiver device.
4. Click on software icon to launch.
Camera not powered. Check camera power connection.
Camera and Receiver not paired
yet
.
Pair
receiver and camera, see [Device Setup – Pairing Camera]
section as a guide.
Channel picked up wrongly. Use [Camera Selection Bar] to pick up the paired camera.
No image shows in
Software picks up
image from PC or
laptop system camera.
(USB) device set up wrongly.
Set USB device as [Digital Wireless Camera]. See [Setup -
Pairing Camera] section as a guide..
[Ca
mera Display
Window]
(No Connection)
Service
range exceeded or bad
reception
Bring camera closer to receiver; reposition camera and receiver
antenna
and secure it firmly to have better reception.
Keep
camera/receiver away from big scale metal or brick piece,
wifi router or microwave oven to have better reception.
Blurry image Resolution sets low Go to [Security Setup], click on [Record] tag, set [Format] to
640x480.
Camera viewable
area
partially
disappear
Zo
om In mode is activated Press [Zoom Out] icon to have full area. See [Basic Operation]
section as a guide.
Image missing from
TV or Monitor
USB
/ AV Alternative Choose image output either from AV (monitor/TV) OR USB.
Unreadable system
message
Language selected wrongly Only select language matching with Windows language version.
[Schedule Record] table set
wrongly.
Sof
tware picks up specific camera at specific time segment as
assigned in [Schedule Record] table. See [Security Setup –
Record Schedule] section as a guide.
Motion Detection not
working properly.
Improper sensitivity level Set proper sensitivity, smaller movements or further objects
req
uire higher sensitivity.
Video clip can not
play back using other
player program
Video codec (XVID) not installed XVID decoder program is available in the installation CD folder
[software] video decoder.exe
. For Xvid later codec version, please
visit
Xvid official website at http://www.xvid.org
Resume from Windows power
management (power saving) mode
Resume from other System
Re
source Exclusive program
Image freeze in
[Ca
mera Display
Window]
Change monitor resolution
Switch out then back to same camera to refresh image.
Program terminated
afte
r 1-hour use.
None registered software See [Registration] section to register.