Operation Guide 2925
2
Stride Length
YXM ) or inches (Yn ) as the str
unit you specify f
used for the distance v
Setting Range
40 to 190 cm
16 to 76 in
Setting Increment
5 cm
2 in
Distance Unit
Kilometers (km )
Miles (mi )
•The following e
239 steps required to run around a 300-meter track.
300 (meters)
÷
239 (steps) = 1.255 (approximately 125 cm)
239 steps required to run around a 330-yard track.
330 (yards)
÷
239 (steps)
×
36 = 49.70 (approximately 50 inches)
Stride Length Unit
Centimeters (XM )
Inches (Yn )
T
1. While the Stopwatch Mode screen shows all zeros
(0H 00' 00 ''00 ), hold down A until the pacer value
appears flashing on the display
setting screen.
2. Press C to move the flashing in the sequence sho
below to select other settings.
3. When the setting you want to change is flashing, use D and B to change it as
described below
Stride length unit
Pacer v Pacer signal
Stride length
|
|
|
|
|
|
|
|
|
|
|
|
|
|
|
Setting
Pacer v
Pacer signal
Stride length
Stride length unit
Screen Button Operations
Use D (+) and B ( – ) to change the setting.
•Selecting xxx disables the pacer signal.
Press D to toggle the pacer signal on (ON )
and off (OFF ).
Use D (+) and B ( – ) to change the setting.
Press D to toggle between centimeters (XM )
and inches (Yn ).
•When the pacer signal is turned on, the pacer signal sounds in accordance with the
pacer value while the pacer signal or pacer v
4. Press A to exit the setting screen.
•If you find that the stride length unit won’ t change
zeros.
T
1. While the Stopwatch Mode screen shows all zeros
(0H 00' 00 ''00 ), hold down A until the pacer value
appears flashing on the display
setting screen.
2. Press C once to display the pacer signal setting
screen.
3. Press D to toggle the pacer signal on (ON ) and off
(OFF ).
•A pacer signal on indicator ( ) appears when this
setting is turned on.
4. Press A to exit the setting screen.
|
|
|
|
|
|
|
|
|
|
|
|
|
|
|
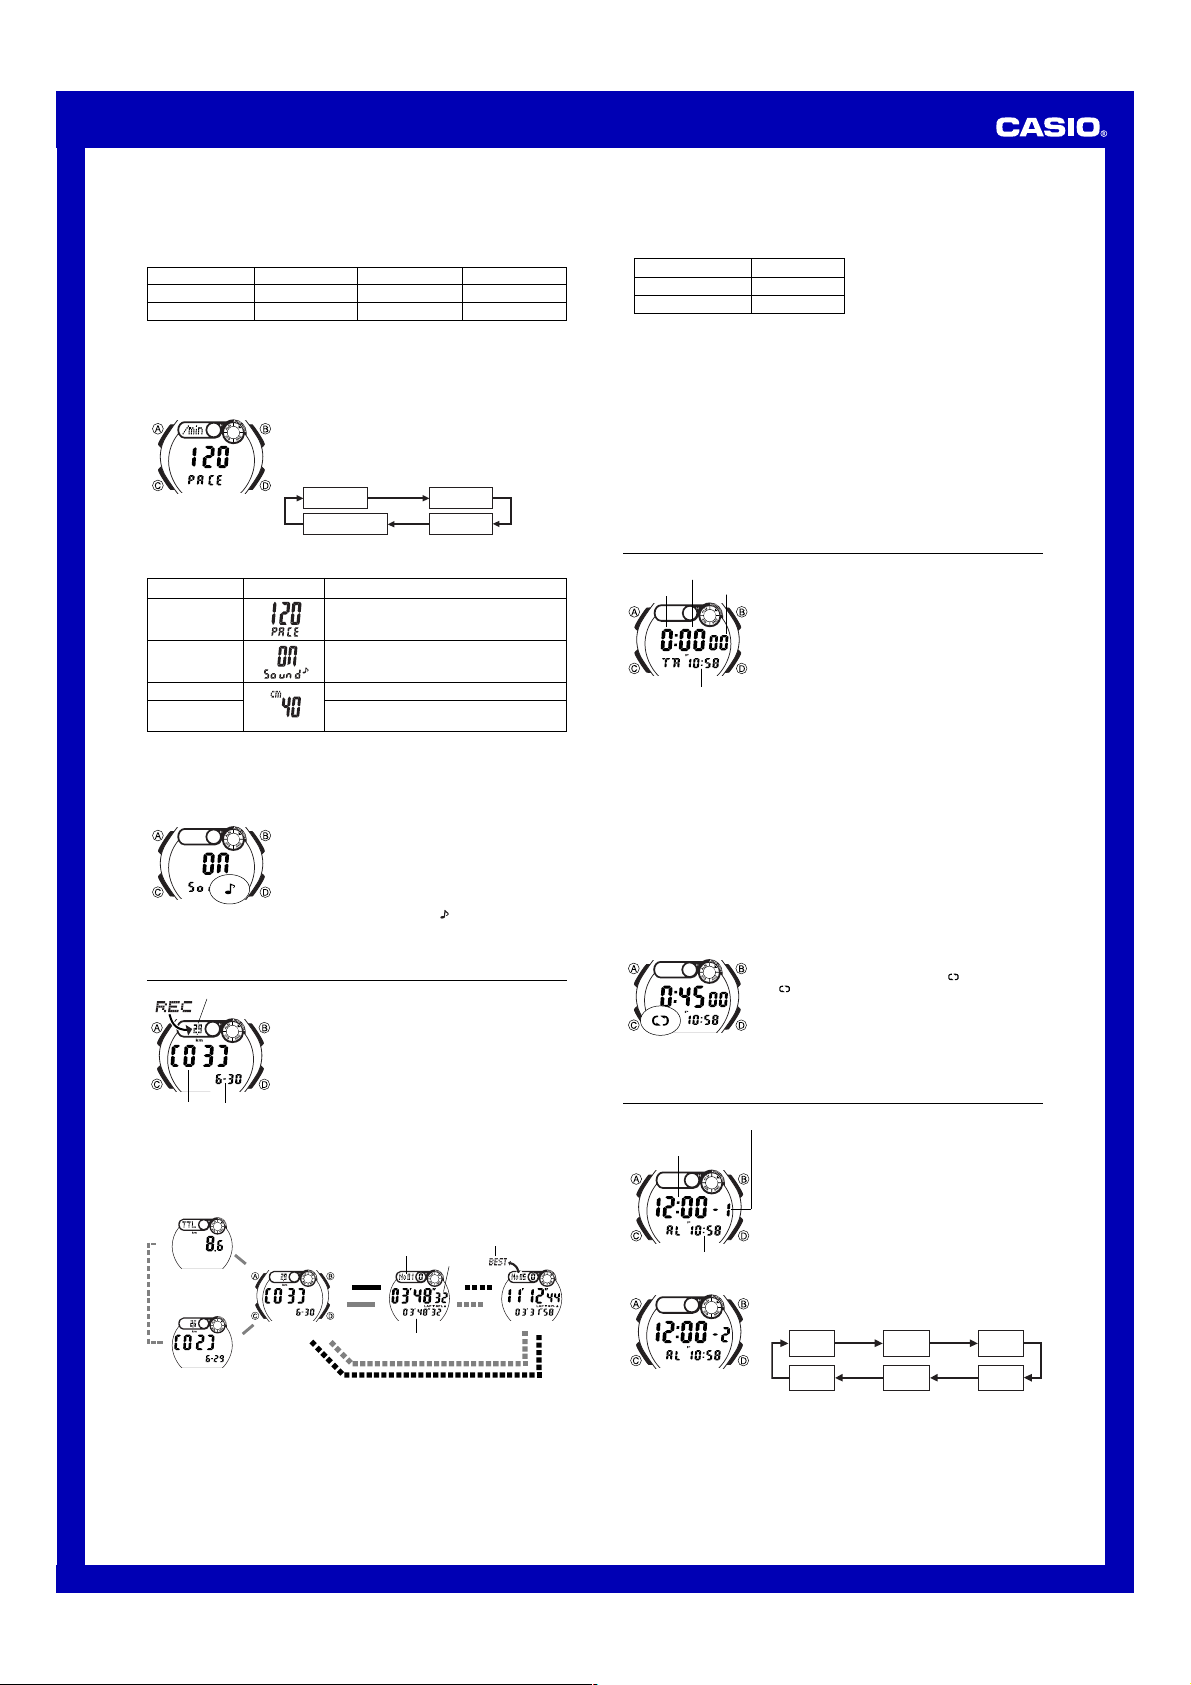
Recall Mode
Use the Recall Mode to recall and delete records stored
by the Stopwatch Mode.
•Stopwatch records are stored in “logs ” that are created
automatically by the watch.“ Memory Management ”
for more inf
•The title screen of the newest log appears first whene
you enter the Recall Mode.
•Log numbers are automatically assigned in sequence,
starting from 01 .
•All of the operations in this section are perf
Recall Mode, which yC.
T
In the Recall Mode, use A to scroll through the log title
screens, starting from the newest one, as shown belo
When the title screen of the log you want is displa
D and B to cycle through the records contained in the log.
Distance covered
Log number Creation date
(Month – Day)
Log Title
•The cumulative total screen shows the total distance since the last cum
distance reset.
Press B.
▲
▲
▲
▲
Press D.
Split time
Lap/Split number BEST indicator
▲
▲
Cumulative T Screen
▲
Press A .
Log Title
Screen
Stopwatch Record
Screen
Best Lap
Screen
Lap time
▲
▲
•The locations of the lap time and split time (middle or bottom of the displa
Stopwatch Record screen are determined by the display f
the Stopwatch Mode.
•The BEST indicator identifies the record that contains the best lap time in the log.
•If a best lap time record is deleted automatically when the log becomes full, the
BEST indicator will not be transf
“Memory Management ” f
•The unit of measurement used for the distance calculation depends on the unit y
select for y“T
basic data” f
Selected Stride Unit Distance Unit
XM (centimeters) km (kilometers)
Yn (inches) mi (miles)
T
1. In the Recall Mode, display the title screen of the log you w
•See “T” below for inf
happens when you select the cumulativ
2. Hold down B and D until the watch beeps and CLR stops flashing on the
display
•This deletes the log and all the records inside it. Deleting a log does not change the
cumulative total distance v
T
1. In the Recall Mode, display the cumulative total screen.
2.B and D until the wCLR stops flashing on the
display
•This resets the cumulative total distance to z
records.
perform.
Countdown Timer
Y
minute to 100 hours.
countdown reaches zero
•Y
restarts the countdown from the original value you set
whenever z
•Countdown timer functions are av
Countdown C.
T
1. While the countdown start time is on the display in the
Countdown A until the hour
setting of the countdown start time star
indicates the setting screen.
Hours
Minutes
Seconds
Timekeeping Mode time
•If the countdown start time is not displayed, use the procedure under “T
countdown timer” to diplay it.
2. Press C to move the flashing between the hour and minute settings
3. Use D (+) and B (–) to change the flashing item.
•T0:00 .
4. Press A to exit the setting screen.
T
Press B while in the Countdown
•When the end of the countdown is reached and auto-repeat is turned off, the alarm
sounds f
time is automatically reset to its starting value when the alarm sounds.
•Press B while a countdown operation is in progress to pause it.B again to
resume the countdown.
•TB ), and then
press D .
T
While the countdown start time is displayed on the
Countdown D for about
two seconds to toggle auto-repeat on ( display
off ( not displayed).
•When auto-repeat is turned on, the alarm sounds and
countdown starts again whenever the countdo
reaches zero
B, and manually reset to the countdown start time by
pressing D.
•Auto-repeat timing repeats up to se
Alarms
Y
alarm is tur
time is reached.
snooze alarm or a one-time alarm, while the other four are
one-time alarms.
Y
the watch to beep twice e
•There are five alarm screens numbered 1 through 5 .
The hourly time signal screen is indicated by :00 .
•All of the operations in this section are performed in the
Alarm Mode, which you enter by pressing C.
Alarm number
Alarm time
(Hour : Minutes)
Timekeeping Mode time
T
1. In the Alarm Mode, use D to scroll through the alarm
screens until the one whose time you want to set is
displayed.
•Y1 as a snooze alarm or a one-time alarm. Alarms 2
through 5 can be used as one-time alarms only
•The snooze alarm repeats ev
2. After you select an alarm, hold down A until the hour setting of the alarm time
star
3. Press C to move the flashing between the hour and minute settings
4. While a setting is flashing, use D (+) and B (– ) to change it.
x3
x4
x1 x2
:00 x5
•When setting the alarm time using the 12-hour format, take care to set the time
correctly as a.m.P indicator).
5. Press A to exit the setting screen.