•Do NOT connect the scanner to a computer before installing the software. If you connect the scanner and the
Found New Hardware screen appears, unplug the USB cable from the computer and click [Cancel]. The
screen may close automatically when the USB cable is unplugged.
•Quit all running applications before installation.
•To upgrade from Windows XP to Windows Vista operating system, first uninstall software bundled with the
Canon scanner.
•Log in as an administrator to install the software.
•Do not switch users during the installation process.
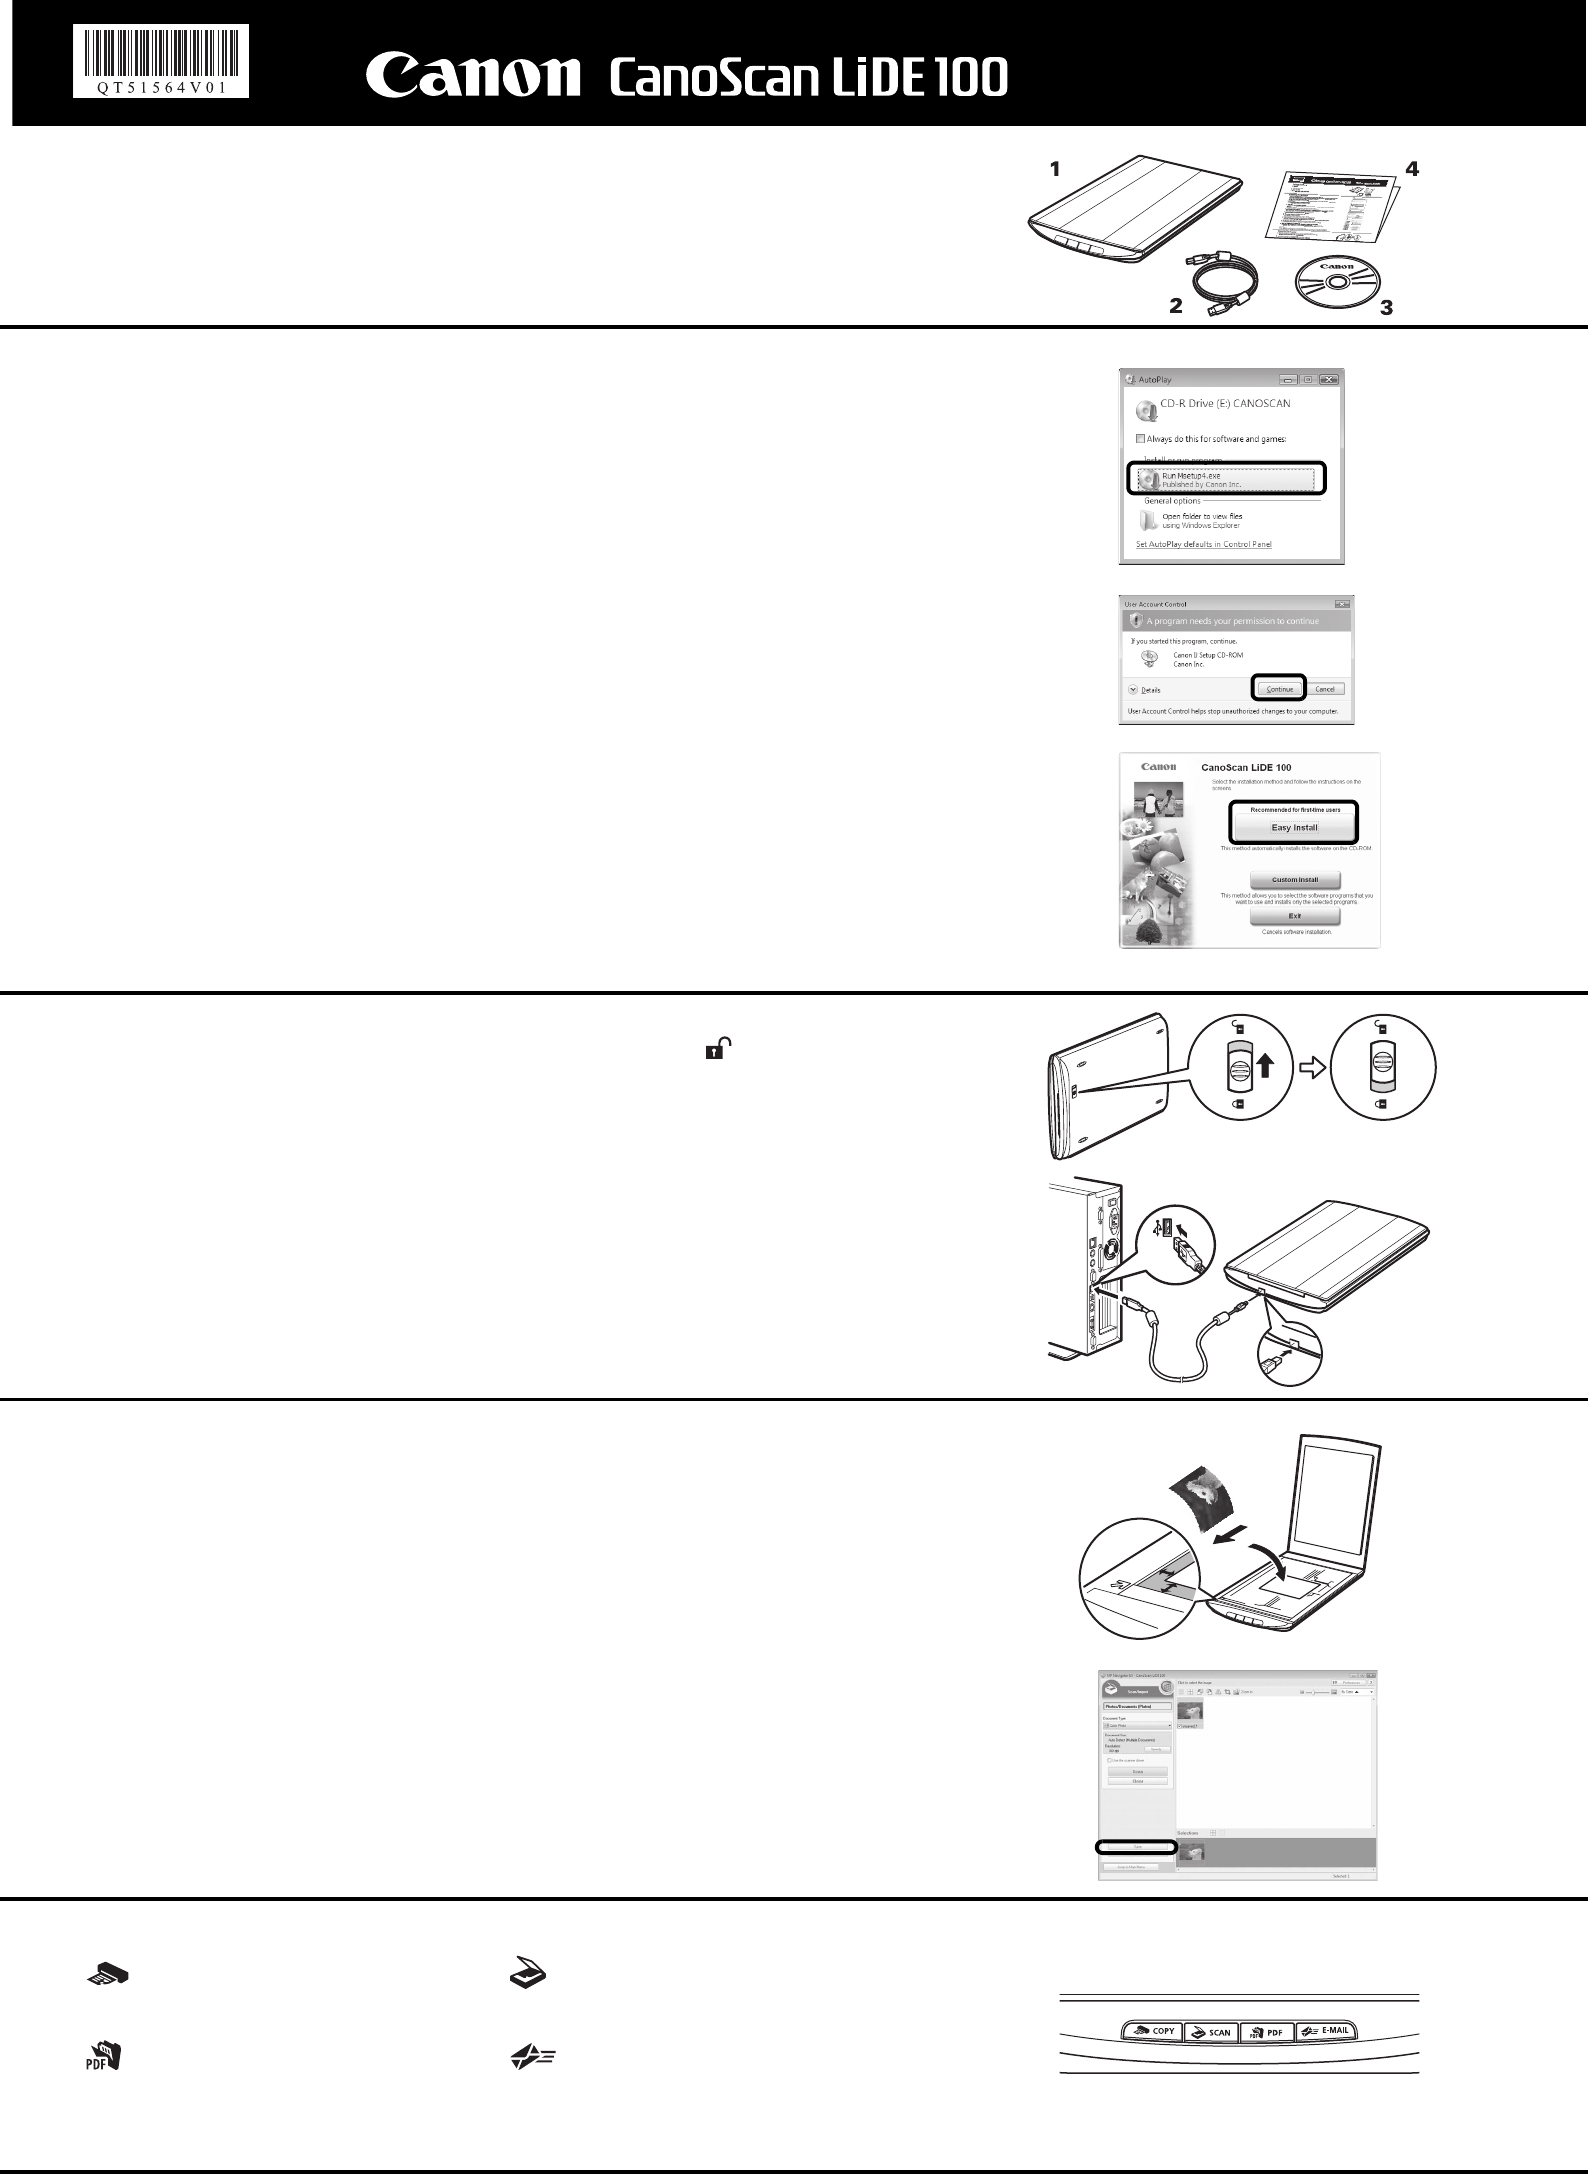
1Place the Setup CD-ROM in the drive.
For Macintosh: Double-click the [Setup] icon. Enter the administrator ID and password on the authentication
dialog box.
For Windows 2000/XP and Macintosh, skip step 2 and go to step 3.
2For Windows Vista, when the AutoPlay dialog box (*1) appears, run the setup program, and then
click [Continue] to proceed when the User Account Control dialog box (*2) appears.
3If prompted, select your language and place of residence.
In some countries, these dialog boxes will not appear.
4Click [Easy Install] on the main menu (*3).
5Click [Install] to start installation.
Carefully read the License Agreement, and then click [Yes] to proceed.
6Follow the on-screen instructions to perform the installation.
When the User Registration screen appears, follow the on-screen instructions to ensure product support.
For Macintosh, skip step 7 and go to step 8.
7For Windows, when the Extended Survey Program screen appears, confirm it.
If you can agree, click [Agree].
8When the installation is complete, click [Restart] to restart your computer.
For Windows: After restarting the computer, Solution Menu will appear.
For Macintosh: After restarting the computer, [Solution Menu] icon will be registered in the Dock.
<Solution Menu>
You can select either MP Navigator EX or the Scanning Guide (on-screen manual), or the Online Registration.
Preparing the Scanner
1Slide the lock switch on the bottom of the scanner toward the unlock mark ().
•Always lock the scanner when carrying or transporting it.
2Connect the scanner to the computer with the supplied USB cable.
•Only use the USB cable provided with the scanner. Use of other cables may lead to a malfunction.
•Do not touch the metallic parts of the USB connector.
•The scanner does not have a power switch. The power is activated as soon as the computer is turned on.
•When the scanner is connected to the USB 1.1 port and “HI-SPEED USB Device Plugged into non-HI-
SPEED USB Hub” message appears, ignore the message.
The scanner operates in this condition without problems.
Try Scanning
1Place a color photo document with the side to be scanned facing down on the document glass at
least 0.4 in. (1 cm) away from the edges of the document glass, and then close the document
cover.
2Start MP Navigator EX.
For Windows: Double-click the [Canon Solution Menu] icon, then click [Scan/import photos or documents.].
For Macintosh: Click the [Solution Menu] icon in the Dock, then click [Scan/import photos or documents.].
3Click [Photos/Documents (Platen)].
4Select [Color Photo] in “Document Type”.
5Click [Scan] to start scanning.
•Do not move the scanner while it is operating.
•Do not see the light source directly during a scan job.
6When prompted that the scanning completed, click [Exit].
7Click [Save] to save the images and close MP Navigator EX (*1).
Using the Scanner Buttons
Refer to the Scanning Guide (on-screen manual) for further information about ScanGear, MP Navigator EX, Scanner Buttons, and Troubleshooting. To start the Scanning Guide (on-screen manual), double-click the on-screen manual icon on
the desktop.
In this guide, Windows Vista screen shots are used to illustrate explanations common to all operating systems.
Quick Start Guide
*1
*2
*3
Bottom
Top
*1
COPY Button
Prints (copies) the scanned image with a printer.
PDF Button
Saves the scanned image as a PDF file.
SCAN Button
Discriminates the document type
automatically, then scans and saves it with
appropriate settings.
E-MAIL Button
Attaches the scanned image to a new e-mail
message.
• For Mac OS X v.10.3.9: Refer to Other Scanning Methods in the Scanning Guide (on-screen manual)
Libble takes abuse of its services very seriously. We're committed to dealing with such abuse according to the laws in your country of residence. When you submit a report, we'll investigate it and take the appropriate action. We'll get back to you only if we require additional details or have more information to share.
Product:
Forumrules
To achieve meaningful questions, we apply the following rules:
First, read the manual;
Check if your question has been asked previously;
Try to ask your question as clearly as possible;
Did you already try to solve the problem? Please mention this;
Is your problem solved by a visitor then let him/her know in this forum;
To give a response to a question or answer, do not use this form but click on the button 'reply to this question';
Your question will be posted here and emailed to our subscribers. Therefore, avoid filling in personal details.
Register
Register getting emails for Canon CanoScan LiDE 100 at:
new questions and answers
new manuals
You will receive an email to register for one or both of the options.
Get your user manual by e-mail
Enter your email address to receive the manual of Canon CanoScan LiDE 100 in the language / languages: English as an attachment in your email.
The manual is 0,47 mb in size.
You will receive the manual in your email within minutes. If you have not received an email, then probably have entered the wrong email address or your mailbox is too full. In addition, it may be that your ISP may have a maximum size for emails to receive.
The manual is sent by email. Check your email
If you have not received an email with the manual within fifteen minutes, it may be that you have a entered a wrong email address or that your ISP has set a maximum size to receive email that is smaller than the size of the manual.
The email address you have provided is not correct.
Please check the email address and correct it.
Your question is posted on this page
Would you like to receive an email when new answers and questions are posted? Please enter your email address.