Koristite 4 noÏice kako bi
poravnali perilicu.
a) Maticu kojom je
priãvr‰çena nogica
oslobodite tako da je
odgovarajuçim kljuãem
odvijete u smjeru kretanja
kazaljki na satu.
b) Nogicu okretanjem
povisujete ili snizujete tako
dugo dok sasvim ne prijanja
uz pod.
c) Nakon ‰to ste zavr‰ili
poravnavanje, nogicu
ponovno priãvrstite tako da
je odgovarajuçim kljuãem
priteÏete u smjeru
suprotnom kretanju kazaljki
na satu dok sasvim ne
prilegne na dno perilice.
Provjerite da su svi gumbi na
poloÏaju "OFF" odnosno
iskljuãeni i da su vrata
perilice zatvorena.
Utaknite utikaã u zidnu
utiãnicu.
Nakon namje‰tanja, perilica
mora biti smje‰tena tako da
je utikaã uvijek dostupan.
HR
HU
A gép vízszintbe állításához
használja a 4 lábat.
a) Fordítsa el az anyát az
óramutató járásával
megegyezŒ irányban (jobbra),
hogy szabaddá váljon
lábszabályozó csavar.
b) A készülék megemeléséhez
vagy lesüllyesztéséhez
forgassa el a lábat, amíg az
stabilan meg nem áll a padlón.
c) Rögzítse a lábat a megfelelŒ
helyzetben az anya óramutató
járásával ellentétes irányban
(balra) csavarásával, amíg az
neki nem feszül a gép aljának.
Ügyeljen arra, hogy a gomb a
„KI” helyzetben legyen, és az
ajtó legyen becsukva.
Dugja be a csatlakozódugót.
A telepítés után a készüléket
úgy kell beállítani, hogy a
csatlakozódugó hozzáférhetŒ
legyen.
RO
Folositi cele patru picioare
ajustabile pentru a aseza
orizontal masina pe podea .
a) Rotiti piulita in sens orar
pentru a debloca surubul
piciorusului.
b) Rotiti piciorusul si coborati-l
sau inaltati-l pentru a obtine
o aderenta perfecta la sol.
c) Blocati piciorusul rotind
piulita in sens invers acelor
de ceasornic pana la capat.
Asigurati-va ca toate
butoanele sunt in pozitia
“OFF” si hubloul este inchis.
Introduceti stekerul in priza.
Daca nu se aprinde,cititi
capitolul referitor la defecte
posibile.
EN
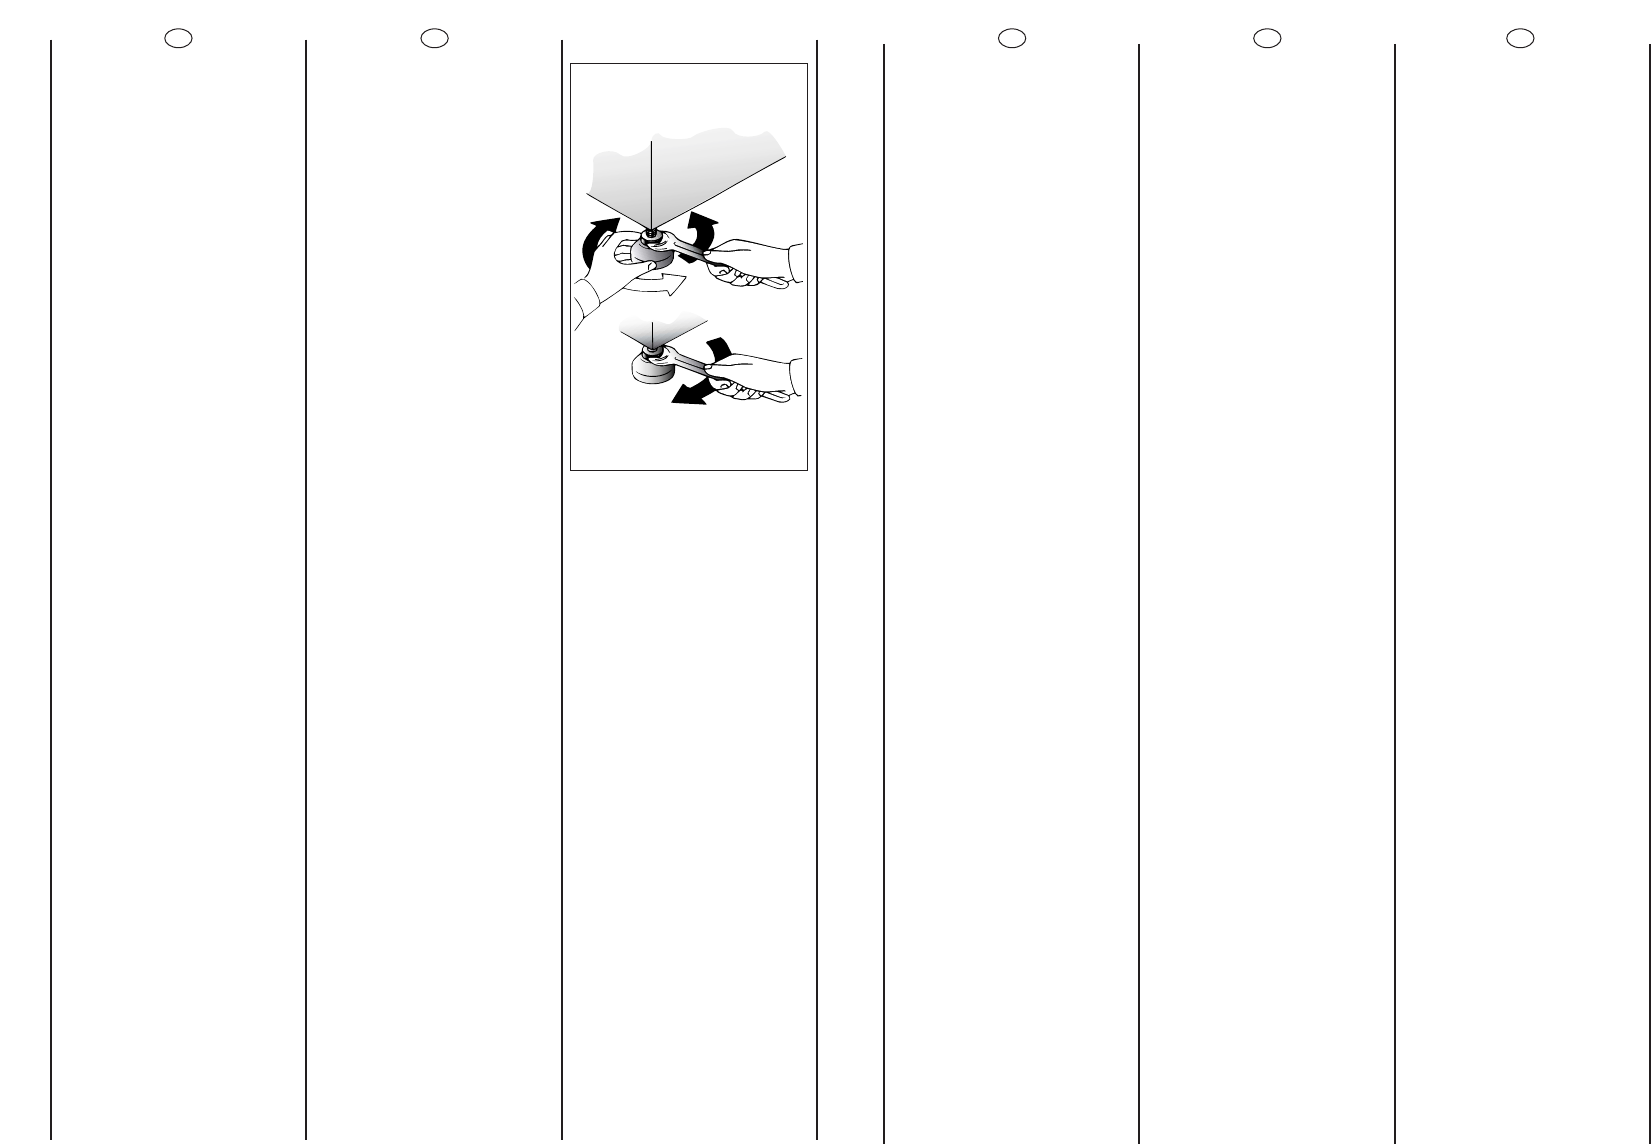
Use the 4 feet to level the
machine with the floor:
a) Turn the nut clockwise to
release the screw adjuster of
the foot.
b) Rotate foot to raise or
lower it until it stands firmly
on the ground.
c) Lock the foot in position
by turning the nut anti-
clockwise until it comes up
against the bottom of the
machine.
Ensure that the knob is on
the “OFF” position and the
load door is closed
Insert the plug.
After installation, the
appliance must be
positioned so that the plug is
accessible.
PL
Wypoziomuj urzàdzenie za
pomocà 4 nó˝ek:
aa))
Przekrëciç w kierunku
zgodnym z kierunkiem
wskaz
ó
wek zegara nakrëtkë
blokujåcå n
ó
ãkë pralki.
bb))
Przekrëciç n
ó
ãkë
podnoszåc jå lub
opuszczajåc, tak aby
uzyskaç doskonaäe
przyleganie do podäoãa.
cc))
Zablokowaç n
ó
ãkë
przykrëcajåc nakrëtkë w
kierunku przeciwnym do
ruchu wskaz
ó
wek zegara, aã
bëdzie przylegaäa do dna
pralki.
Sprawdziç czy pokr´t∏o
programów jest na pozycji
OFF i czy drzwiczki sà
zamkni´te.
Wäoãyç wtyczkë kabla
zasilajåcego do gniazda
sleciowego.
Po zainstalowaniu,
urzådzenie naleãy ustawiç w
pozycji zapewniajåcej
swobodny dostëp do
kontaktu (wtyczki).