20
21
EN
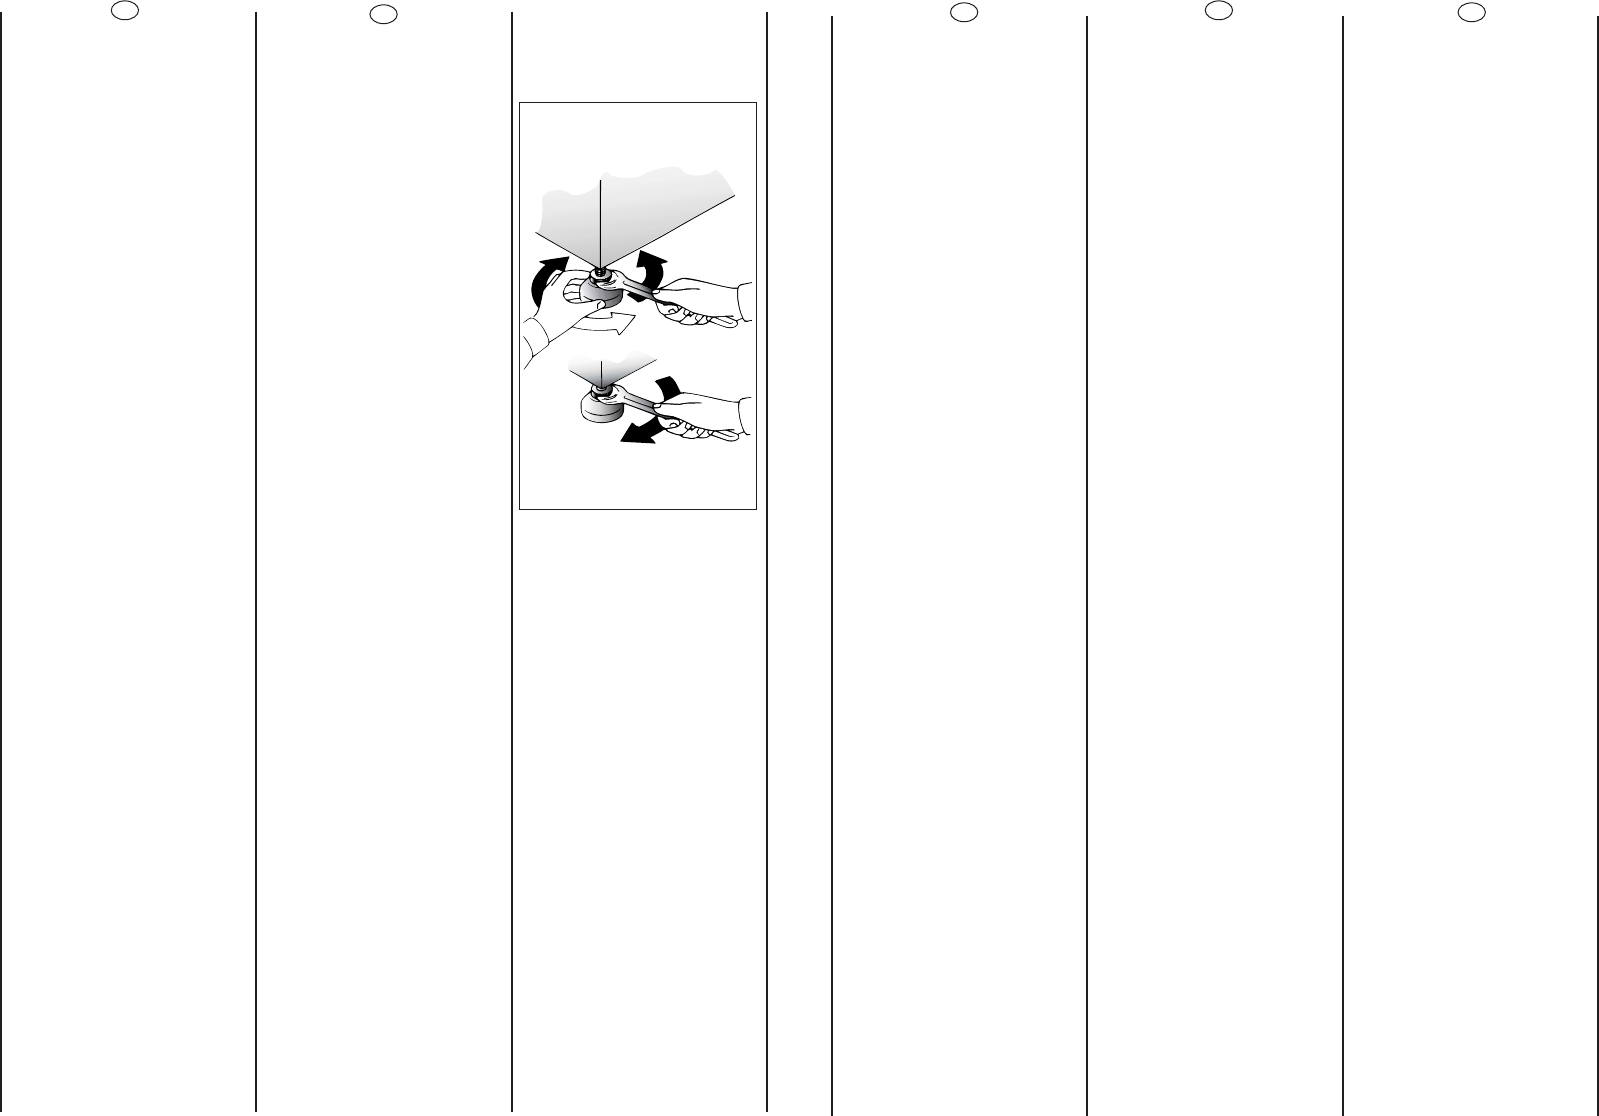
Use front feet to level the
machine with the floor.
a) Turn the nut clockwise to
release the screw adjuster of
the foot.
b) Rotate foot to raise or
lower it until it stands firmly
on the ground.
c) Lock the foot in position
by turning the nut anti-
clockwise until it comes up
against the bottom of the
machine.
Ensure that the knob is on
the “OFF” position and the
load door is closed.
Insert the plug.
After installation,the
appliance must be
positioned so that the plug is
accessible.
RU
Óñòàíîâèòå ìàøèíó ïî
ópîâíю ñ ïîìîùüю ïåpåäíèõ
íîæåê.
a) ïîâåpíèòå ïî ÷àñîâîé
ñòpåëêå ãàéêó, ÷òîáû
pàçáëîêèpîâàòü âèíò íîæêè.
b) âpàùàÿ íîæêó, ïîäíèìèòå
èëè îïóñòèòå ìàøèíó äî
õîpîøåé åå îïîpû íà ïîë.
c) çàáëîêèpóéòå âèíò íîæêè,
çàòÿíóâ ãàéêó ïpîòèâ ÷àñîâîé
ñòpåëêè äî óïîpà.
ì·Â‰ËÚÂÒ¸, ˜ÚÓ ÔÂÂÍβ˜‡ÚÂθ
ÔÓ„‡ÏÏ Ì‡ıÓ‰ËÚÒfl ‚ ÔÓÎÓÊÂÌËË
Çõäã Ë Á‡„ÛÁÓ˜Ì˚È Î˛Í Á‡Í˚Ú.
Âêëю÷èòå âèëêó â pîçåòêó.
èÓÒΠÔÓ‰ÒÓ‰ËÌÂÌËfl ÔË·Ó
‰ÓÎÊÂÌ ·˚Ú¸ ‡ÒÔÓÎÓÊÂÌ Ú‡ÍËÏ
Ó·‡ÁÓÏ, ˜ÚÓ·˚ ÓÁÂÚ͇ ·˚·
‰ÓÒÚÛÔÌÓÈ.
ES
Nivele la máquina con las
patas delantares
a) Girar la tuerca en el
sentido de las agujas del
reloj para desbloquear el
tornillo del pie.
b) Girar el pie y hacerlo
bajar o subir hasta
conseguir su perfecta
adherencia al suelo.
c) Bloquear el pie girando la
tuerca en el sentido
contrario a las agujas del
reloj hasta que se adhiera al
fondo de la lavadora.
Verificar que el mando de
los porgramas esté en
posición OFF y que la
escotilla esté cerrada.
Enchúfela.
El aparato tiene que ser
colocado de forma que el
enchufe sea accesible una
vez instalado.
PT
Nivele a máquina
regulando a altura dois pés
dianteiros.
a) Rode a porca no sentido
dos ponteiros do relógio
para soltar a rosca de
fixação do pé.
b) Rode a pé para o erguer
ou baixar até estar
firmemente assente no
chão.
c) Fixe o pé nessa posição
rodando a porca no sentido
contrário co dos ponteiros
do relógio até embater no
fundo da máquina.
Assegure-se que o botão
está em posição de
desligado (OFF) e a porta
está fechada.
Ligue a máquina à corrente,
inserindo a ficha do
respectivo cabo de
alimentação na tomada.
Depois da instalação,os
acessórios devem estar
posicionados, pelo que a
tomada deve estar num
local acessível.
NL
Zet de machine waterpas
door middel van de
voorvoetjes.
a) Kontra moer losdraaien
b) Apparaat waterpas zetten
m.b.v.verstelbare voeten
(maak eventueel gebruik
van een waterpas)
c) Kontra moer weer
vastdraaien.
Controleer of alle knoppen
op “OFF” staan en of de
vuldeur gesloten is.
Steek de stekker in het
stopcontact.
Na installatie,plaatst u het
apparaat zo,het
stopcontact makkelijk
toegangbaar is.