5
6
2
$
>
$
$
$
out
$
a
a
ʋ
ʋ
ʋ
ʋ
ʋ
ʋ
ʋ
ʋ
ʋ
ʋ
ʋ
ʋ
ʋ
ʋ
a
a
L
L ~
/
<
a
>
:
a
$
~
~
ʋ
ʋ
ʋ
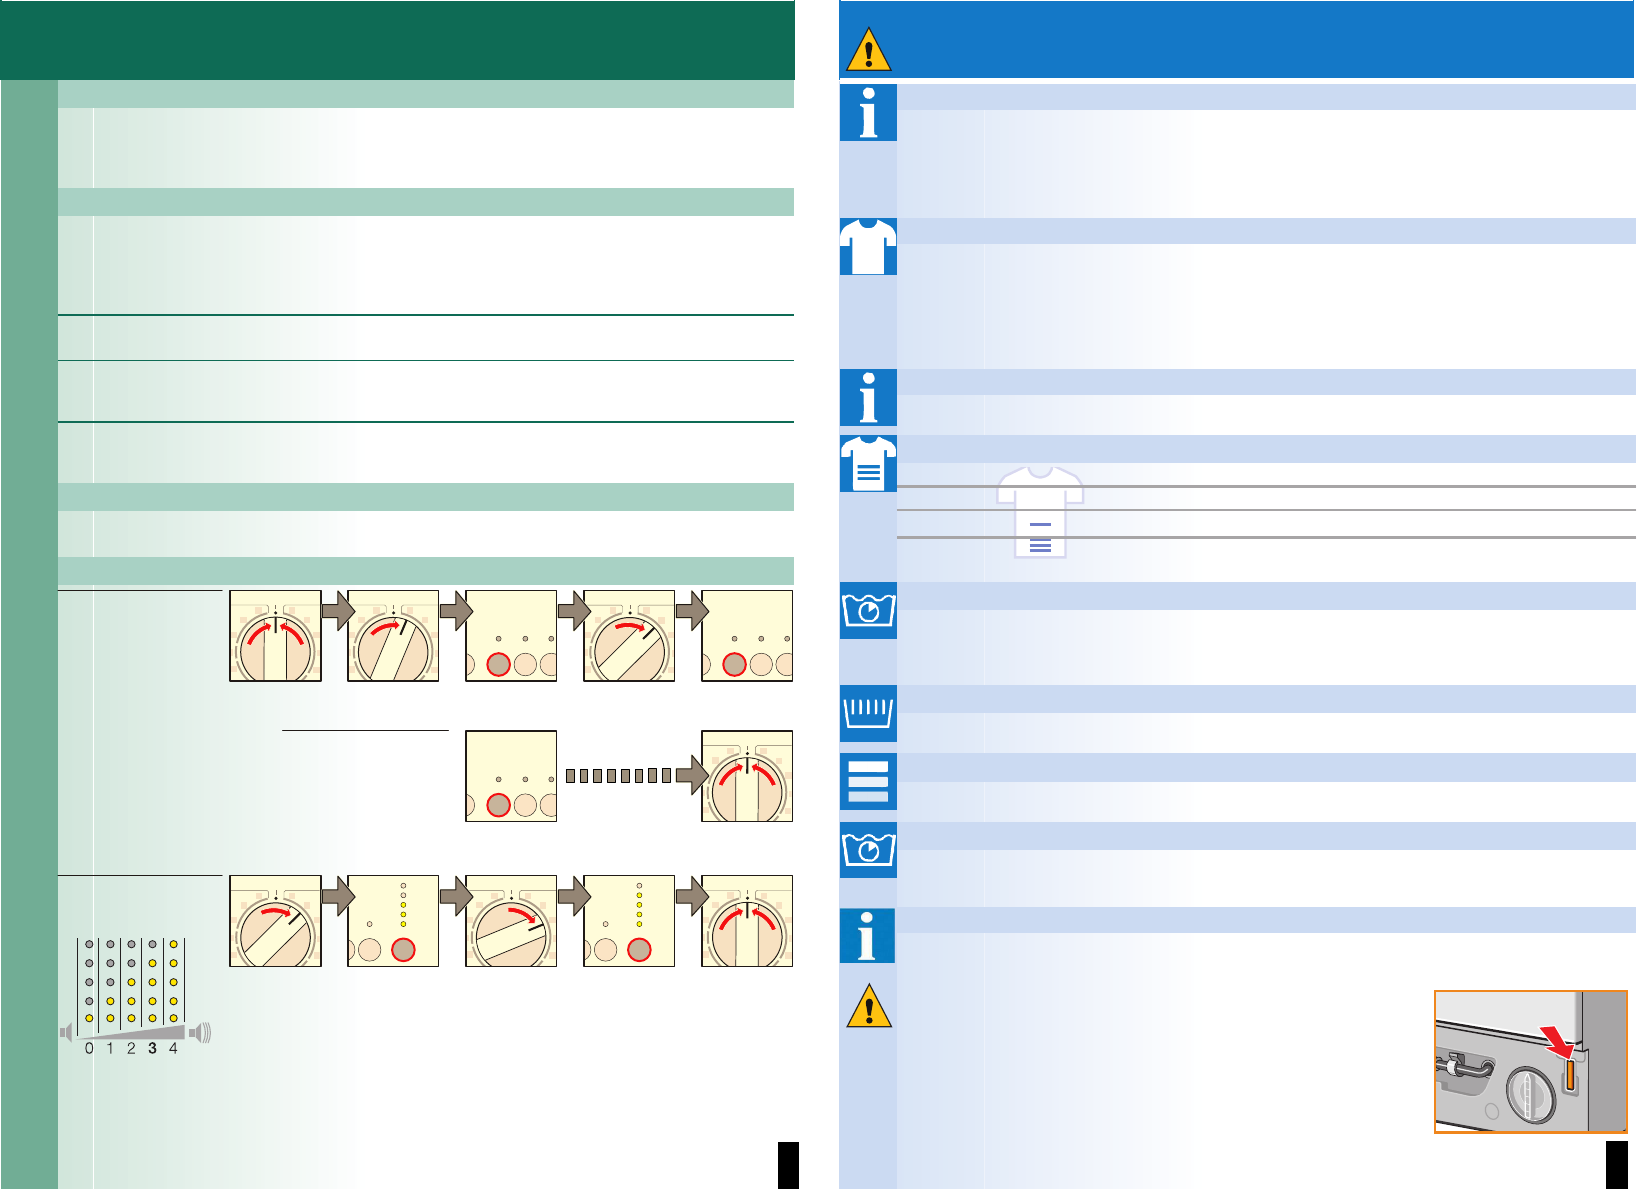
Individual settings
ʑ
Spin speed a depending on model
You can change the indicated spin speed or select Rinse Hold (rinse stop = without final spin
cycle, washing remains in the water after the last rinse cycle). Effects dependent on the
programme progress.
The maximum selectable spin speed depends on the model and the set programme.
ʑ
Additional functions a Overview of programmes, Page 7
Eco
+
Energy-optimised washing by reducing the temperature while
achieving a consistent washing result.
The washing temperature is lower than the selected temperature. For
special hygiene requirements, it is recommended that a higher
temperature be selected.
7 Prewash For heavily soiled washing. Prewash at 30 °C.
S Reduced Ironing Special spin sequence with subsequent fluffing. Gentle final spin
at reduced spin speed. Residual moisture of the washing slightly
increased.
= Aqua Plus Increased water level. Additional rinse cycle. Longer programme
duration. For areas with very soft water or for further improvement
of the rinsing result.
ʑ
$Start/Pause
For starting or interrupting the programme.
ʑ
Signal
1 step
to right
2. Set volume for ...
1. Activate setting
mode for signal
volume
set to  1 step
to right
select and
hold
+
release
... Button signals ... Information signals
set to Âset volume **set volume **
direct
** If required, select repeatedly
Blind mode *
ON–OFF
Optional:
ON–OFF
set to Â
* Long signal – function on.
Short signal – function off.
1 step
to right
Important information
Before using your washing machine for the first time
Do not put any washing in the washing machine! Turn the tap on. Pour into dispenser II:
– approx. 1 litre of water,
– detergent (dosage according to manufacturer’s instructions for light soiling and according to
degree of water hardness).
– Set programme selector to Easy-Care 60 °C and select $ Start/Pause.
At the end of the programme set the programme selector to Off.
Protecting the washing and the machine
– When dosing all detergents, cleaning aids and cleaning agents, always follow
the manufacturer's instructions.
– Empty pockets. Remove metal parts (paper clips, etc.).
– Wash delicates in the net/bag (tights, curtains, underwired bras).
– Close zips, button up covers.
– Brush sand out of pockets and collars.
– Remove curtain fittings or include in the net/bag.
Insert laundry
Insert large and small items of washing!
Do not jam items of washing between the washing machine door and rubber seal.
Washing with different degrees of soiling
Wash new items separately.
Light Do not prewash.
If required, pretreat stains. Select Eco
+
additional function.
Heavy Load less washing. Prewash.
If required, pretreat stains. Select Eco
+
additional function.
Soaking Load washing of the same colour.
Pour soaking agent/detergent into dispenser II according to the manufacturer’s instructions. Set
programme selector to
L Cottons 30 °C and select $ Start/Pause. After approx. 10 minutes
select $ Start/Pause to stop the programme. After the required soaking time reselect
$ Start/Pause if the programme is to be continued or change the programme.
Starching Washing should not be treated with fabric softener.
Liquid starch can be used in all wash programmes. Pour starch into the fabric softener
dispenser ~ according to manufacturer’s specifications (if required clean beforehand).
Dyeing/Bleaching
Dye in household quantities only. Salt may attack stainless steel! Observe specifications of the
dye manufacturer! Do not bleach washing in the washing machine!
Refreshing Programme 2 Rinse/Freshen Up.
For items of washing which were stored away or not used for a prolonged period, to remove
odours and creases which were caused by folding and storage.
Use finishing agent for a “fresh” fragrance.
Emergency release e.g. if power failure occurs
The programme continues running when the power supply is restored.
If the washing is still to be removed, the door can be opened as described below:
Risk of scalding!
Detergent solution and washing may be hot. If required, leave to
cool down.
Do not reach into the drum in case it is still rotating.
Do not open the door if you can still see water through the glass.
1. Set programme selector to Off, pull out the mains plug.
2. Removing base strip a see separate installation instructions.
3. Drain the water. aPage 10
4. Pull down emergency release with a tool and release.
Door can then be opened.
5. Attaching base strip a see separate installation instructions.
a
>
$
– Leave detergent drawer and door open so that