NL 11NL 10
kookaanwijzingen
ovenfuncties
turbo; hete lucht
U kunt op verschillende niveaus tegelijk bakken. Door de
intensieve warmteoverdracht kunt u een ca. 20 °C lagere
temperatuur kiezen dan bij conventionele recepten staat
aangegeven.
infra; boven- en onderwarmte
Infra is bedoeld voor het bakken op één niveau. Plaats het
gerecht altijd in het midden van de oven voor de traditionele
manier van bereiden. De gerechten rijzen goed uit en krijgen een
mooie bruine kleur.
onderwarmte
Alleen de onderwarmte is ingeschakeld. Deze stand is geschikt
voor het kortstondig extra doorbakken van taart- en pizzabodems.
U schakelt deze stand in aan het eind van een bakproces.
spaar-grill
Gebruik de spaargrill wanneer alleen in het midden van de oven
een gerecht staat of bij gebruik van het draaispit. De thermostaat
regelt ook de grill. Het element zal daarom niet continu, maar van
tijd tot tijd rood oplichten.
maxi-grill
Gebruik de maxi-grill voor grote porties, bijvoorbeeld bij een
volledig bedekt rooster. De thermostaat regelt ook de grill. Het
element zal daarom niet continu, maar van tijd tot tijd rood
oplichten.
voorverwarmen
Gebruik deze functie als u de oven extra snel wilt
voorverwarmen.
Let op: Gebruik deze stand nooit om gerechten te bereiden.
Plaats het gerecht pas in de oven nadat deze is voorverwarmd.
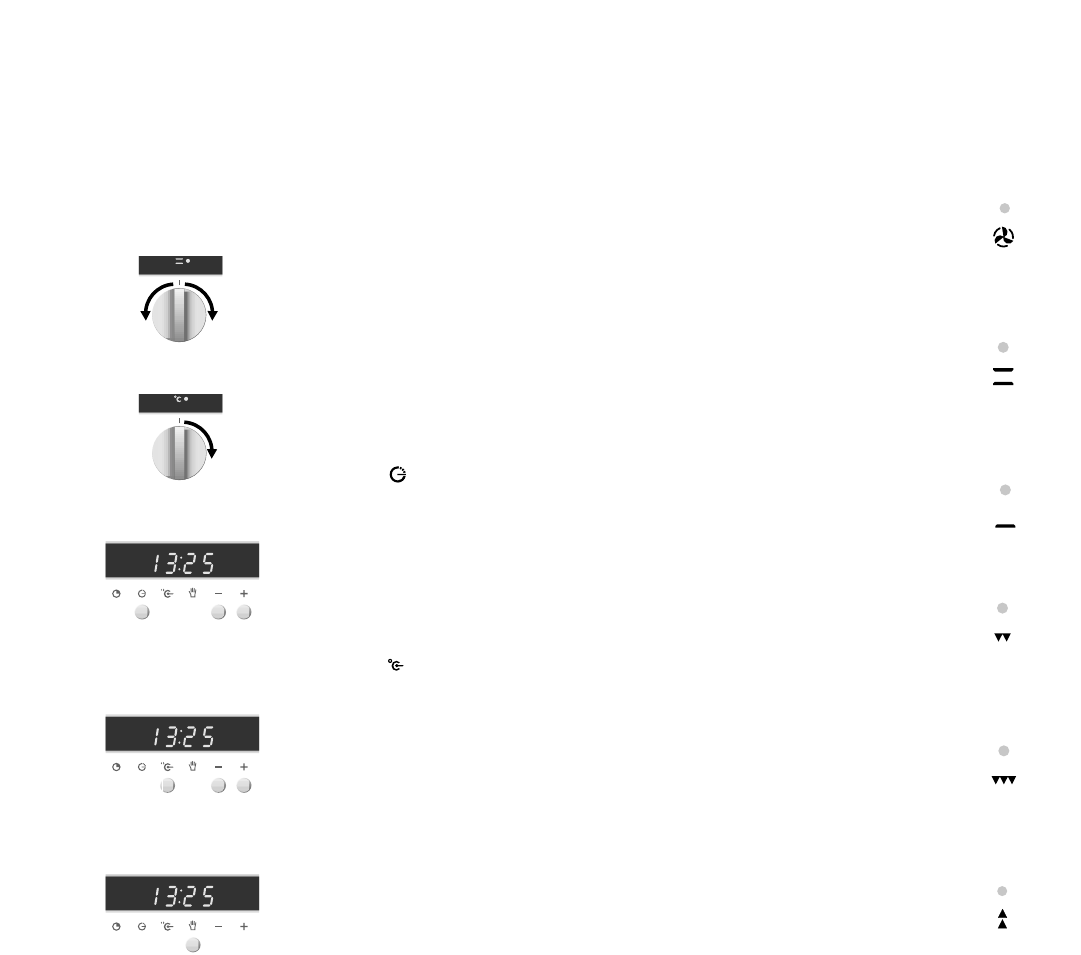
bediening
inschakelen
uitstellen starttijd/instellen eindtijd
U kunt het tijdstip uitstellen waarop de oven inschakelt.
Zet een gerecht in de oven. Stel de bereidingstijd in, en het
tijdstip waarop het gerecht klaar moet zijn.
De oven berekent zelf de starttijd, en schakelt na het
verstrijken van de bereidingstijd automatisch uit.
1 Kies een ovenfunctie door de knop op het gewenste
symbool te draaien.
2 Kies de gewenste temperatuur.
De temperatuur is traploos regelbaar.
3 Druk op de toets en houd de toets ingedrukt.
In het display verschijnt 0.00 en “AUTO” licht op.
4 Druk op de –/+ toetsen totdat de juiste baktijd bereikt is.
Vijf seconden na het loslaten van de toets verschijnt de
dagtijd weer. “AUTO” en
@
lichten op.
De oven is ingeschakeld.
5 Druk op de toets en houd deze ingedrukt.
Het display geeft de vroegst mogelijke eindtijd weer.
6 Druk op de –/+ toetsen totdat de juiste eindtijd bereikt is.
“AUTO” licht op,
@
dooft.
De oven schakelt automatisch in en uit. Ook klinkt er een
signaal.
uitschakelen
1 Draai de functieknop en de temperatuurknop op 0.
De indicatielampjes gaan uit, het toestel is uitgeschakeld.
2 Druk op de
,
toets.
Het toestel is ingesteld op handbediening.
eindtijd instellen
instellen
handbediening
baktijd instellen
functie kiezen
temperatuur instellen