526205
5
Zoom out
Zoom in
Previous page
1/49
Next page
NL 7
bediening
inschakelen
inschakelen zonder klok
1 Druk op de
,
toets om de oven op handbediening in te
stellen.
Het "hand"-symbool is zichtbaar in het display.
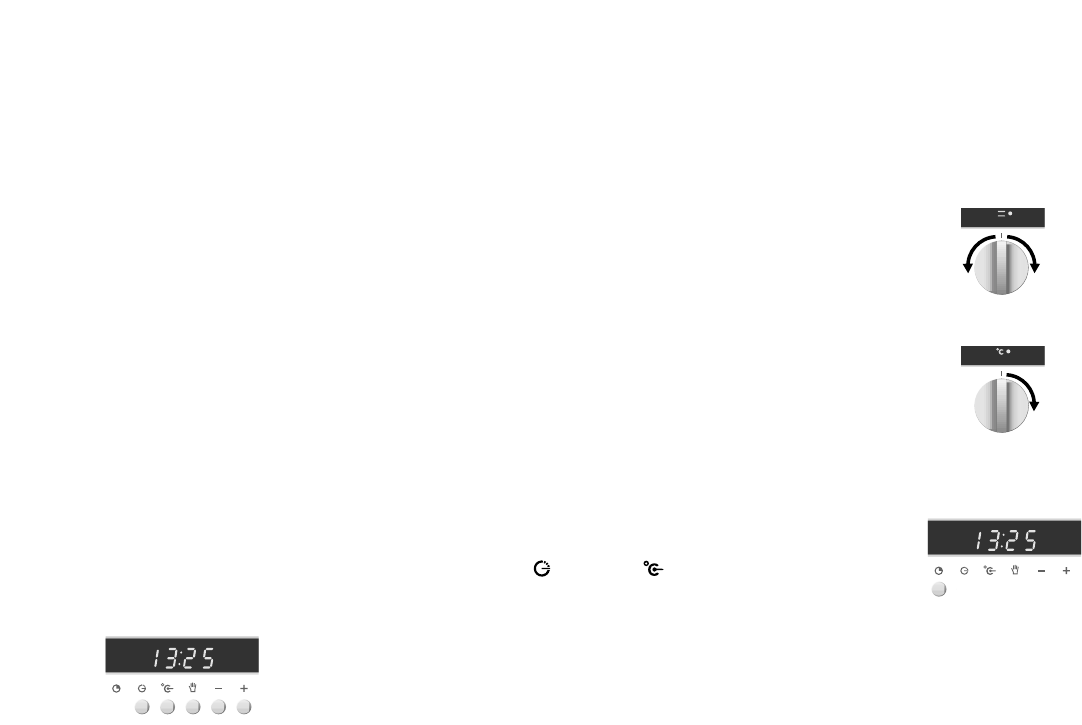
2 Kies een ovenfunctie door de knop op het gewenste
symbool te draaien.
De oven is nog niet ingeschakeld.
3 Kies de gewenste temperatuur.
De temperatuur is traploos regelbaar.
De oven is nu ingeschakeld.
kookwekker
De kookwekker geeft alleen een signaal na het verstrijken
van de tijd. De kookwekker schakelt de oven niet uit.
1 Druk op de |toets en houd deze ingedrukt.
0.00 en
@
lichten op.
2 Stel met de –/+ toetsen de tijd in.
| licht op. Vijf seconden na het loslaten van de toets
verschijnt de dagtijd.
ingebruikname
voor u gaat bakken
oven en toebehoren reinigen
Neem het toebehoren uit de oven. Reinig het toebehoren en
de binnenzijde van de oven met een mild reinigingsmiddel.
Schakel de oven één uur lang in op 250 °C (zie pagina 7).
Tijdens de fabricage gebruikte beschermingsvetten worden
dan verwijderd.
opmerking
Als de oven voor de eerste maal sterk verhit wordt, zult u
een “nieuwigheidsluchtje” ruiken. Dit is normaal. Schakel
eventueel de wasemkap in of open een raam.
Na het afkoelen de oven met warm water reinigen.
dagtijd instellen
1 Er zit een gewone klok op het display die de dagtijd
weergeeft. Druk tegelijk op de toets en de toets.
2 Druk op de –/+ toetsen, totdat de juiste tijd bereikt is.
“AUTO” blijft knipperen.
3 Druk op de
,
toets.
De dagtijd is vastgelegd en het toestel is ingesteld op
handbediening.
NL 6
functie kiezen
temperatuur instellen
tijd instellen
tijdklok
Als u geen dagtijd
hebt ingesteld,
knipperen 0.00 en
het woord “AUTO”.
5


Need help? Post your question in this forum.

Forumrules


Report abuse

Libble takes abuse of its services very seriously. We're committed to dealing with such abuse according to the laws in your country of residence. When you submit a report, we'll investigate it and take the appropriate action. We'll get back to you only if we require additional details or have more information to share.

Product:

For example, Anti-Semitic content, racist content, or material that could result in a violent physical act.

For example, a credit card number, a personal identification number, or an unlisted home address. Note that email addresses and full names are not considered private information.

Forumrules

To achieve meaningful questions, we apply the following rules:

Register

Register getting emails for ATAG OI 6011GR at:


You will receive an email to register for one or both of the options.


Get your user manual by e-mail

Enter your email address to receive the manual of ATAG OI 6011GR in the language / languages: English, German, Dutch, French as an attachment in your email.

The manual is 0,66 mb in size.


You will receive the manual in your email within minutes. If you have not received an email, then probably have entered the wrong email address or your mailbox is too full. In addition, it may be that your ISP may have a maximum size for emails to receive.

Others manual(s) of ATAG OI 6011GR

ATAG OI 6011GR Installation Guide - English, German - 2 pages

ATAG OI 6011GR Additional guide - Dutch - 1 pages

ATAG OI 6011GR Installation Guide - Dutch, French - 2 pages


The manual is sent by email. Check your email

If you have not received an email with the manual within fifteen minutes, it may be that you have a entered a wrong email address or that your ISP has set a maximum size to receive email that is smaller than the size of the manual.

The email address you have provided is not correct.

Please check the email address and correct it.

Your question is posted on this page

Would you like to receive an email when new answers and questions are posted? Please enter your email address.


Info