NL 3
verlichting
toestel inschakelen
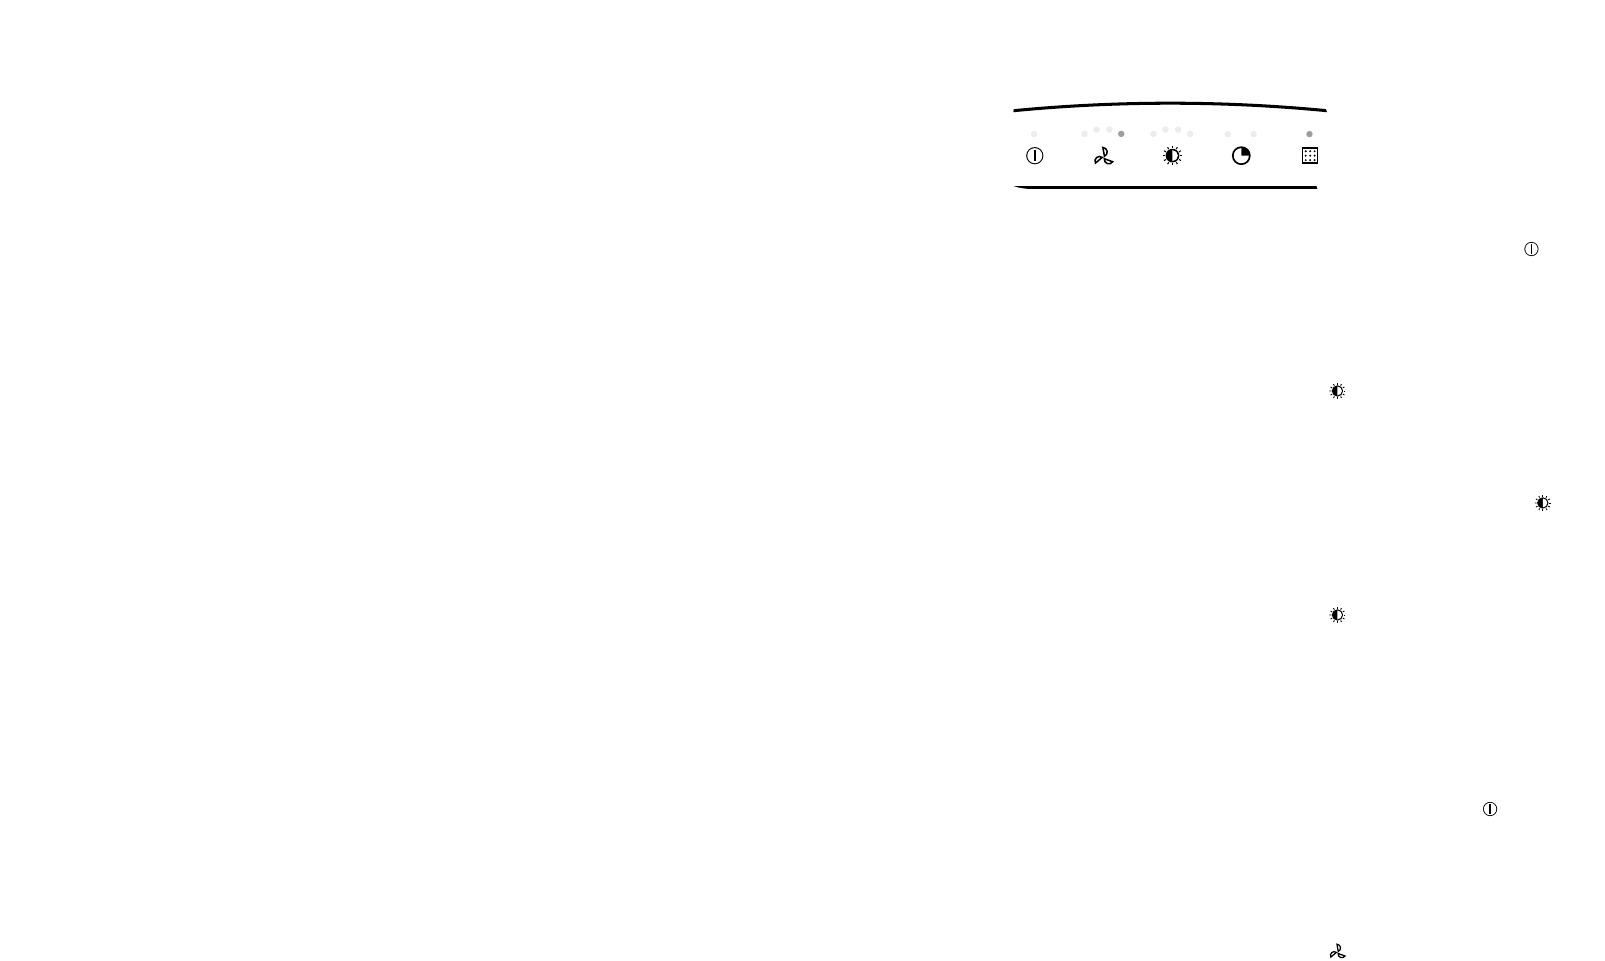
Schakel het toestel eerst in met de aan/uit toets ( ). Het
lampje boven de toets licht op. U kunt nu gebruik maken van
de overige functiesymbolen
verlichting inschakelen
Leg een vinger op het -symbool. De verlichting schakelt
in op stand 4. Door de vinger op de toets te houden kunt u de
lichtsterkte aanpassen (1-4). Na enkele seconden springt de
instelling naar de volgende stand (volgorde 4-3-2-1-0-1-2-3-4).
Het aantal oplichtende indicatielampjes boven het -
symbool geeft de lichtsterkte aan.
verlichting uitschakelen
Leg een vinger op het -symbool totdat de indicatie boven
het symbool dooft. De verlichting dooft ook als u het toestel
uitschakelt met de aan/uit toets.
toestel inschakelen
Schakel het toestel in met de aan/uit toets ( ). Het lampje
boven de toets licht op. U kunt nu gebruik maken van de
overige functiesymbolen.
ventilator inschakelen
Leg een vinger op het -symbool tot de door u gekozen
stand is bereikt. Als u continu een vinger op het symbool
houdt springt de instelling na enkele seconden een stand
verder (volgorde 0-1-2-3-4-3-2-1-0). De indicatie boven het
symbool geeft de stand aan.
NL 2
voor uw veiligheid
waar u op moet letten
Laat dit toestel door een erkend installateur
aansluiten. Schade ontstaan door verkeerd
aansluiten of verkeerd inbouwen valt niet onder
de garantie.
Maak het toestel spanningsloos voordat met
reparatie of schoonmaken wordt gestart. Bij
voorkeur door de stekker uit het stopcontact te
halen of de werkschakelaar op nul te zetten.
Flamberen onder een afzuigkap is niet
toegestaan. Door de hoge vlammen kan brand
ontstaan. Ook bij uitgeschakelde ventilator.
Houd bij het frituren altijd een oogje in het zeil.
Als het toestel wordt gebruikt in combinatie met
een apparaat dat gas of andere brandstoffen
verbruikt, moet gezorgd worden voor toevoer
van voldoende frisse lucht.
Schakel de afzuigkap in voordat u met koken
begint. Laat na het koken de afzuigkap nog
ca. 10 minuten aan staan. Dit kan ook
automatisch (zie "automatisch nadraaien").
Reinig het toestel regelmatig, zoals aangegeven
in 'hoe blijft het toestel mooi'. Hiermee
voorkomt u dat er een brandgevaarlijke situatie
ontstaat.
Maak eerst het toestel spanningsloos als u de
lampen wilt vervangen! Gebruik uitsluitend
dezelfde lampen met aangegeven wattage.
In verband met eventuele scherpe randen van
de ombouwkoker adviseren wij u tijdens de
montage van de koker werkhandschoenen te
gebruiken.