35
14.Nous octroyons une garantie de douze mois sur les réparations, limitée à la même défectuosité.
15.Hormis les cas où une responsabilité est imposée légalement, cette déclaration de conditions de garantie
exclut toute indemnisation de dommages extérieurs à l’appareil dont le consommateur voudrait faire
prévaloir les droits. Dans le cas d’une responsabilité reconnue légalement, la compensation n’excèdera pas
la valeur d’achat de l’appareil.
Ces conditions de garantie sont valables uniquement pour des appareils achetés et utilisés en Belgique. Pour
les appareils exportés, l’utilisateur doit d’abord s’assurer qu’ils satisfont aux conditions techniques (p. ex. : la
tension, la fréquence, les prescriptions d’installation, le type de gaz, etc.) pour le pays concernérespectif, et
qu’ils supportent les conditions climatiques et environnementales locales. Pour les appareils achetés à
l’étranger, l’utilisateur doit d’abord s’assurer qu ‘ils répondent bien aux qualifications requises en Belgique. Des
adaptations indispensables ou souhaitée ne sont pas couvertes par la garantie et ne sont pas possibles dans
tous les cas.
Le service clientèle se tient à votre disposition, également après expiration de la période de garantie.
Adresse de notre service clientèle :
ELECTROLUX HOME PRODUCTS BELGIUM
Bergensesteenweg, 719 – 1502 LEMBEEK
Tél. 02.3630444
38
Bevestiging aan de muur
Attentie!
Het apparaat dient om veiligheidsredenen aan de
muur bevestigd te worden.
U vindt de benodigde accessoires in het
bijgeleverde zakje:
twee hoeken
vier pluggen (voor bevestiging aan vaste muren)
vier pluggen (voor bevestiging aan tussenmuren)
vier schroeven
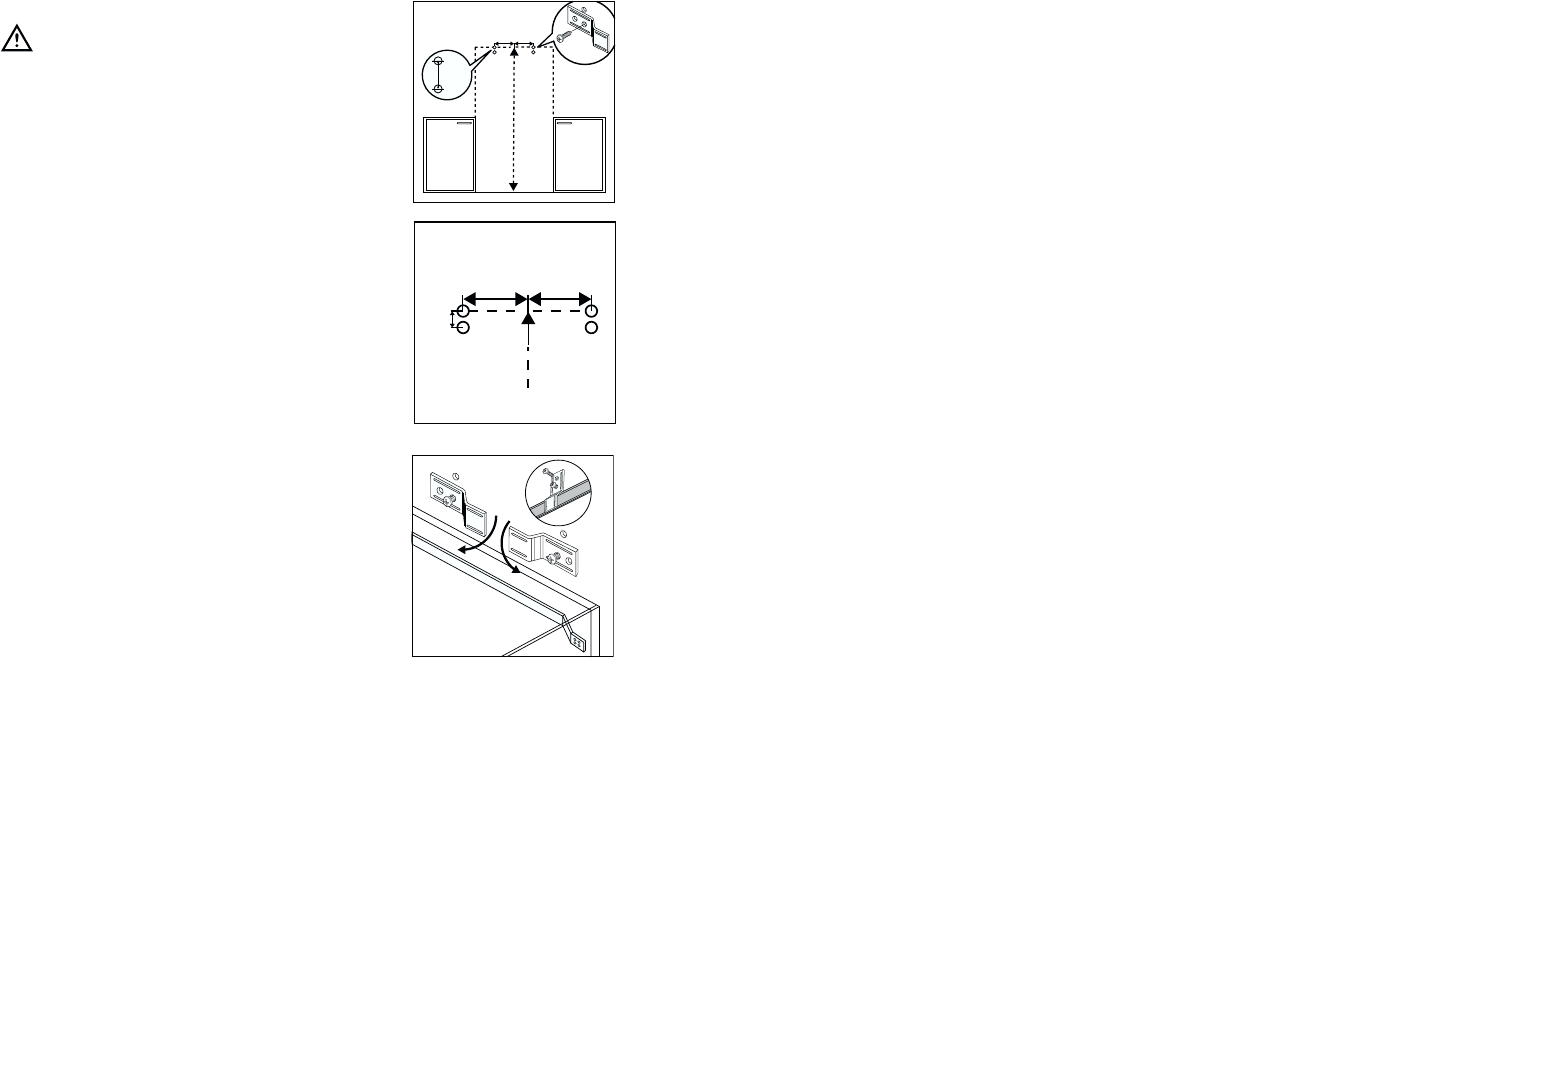
Als volgt te werk gaan:
1. Bepaal het midden van de positie waar u het
apparaat plaatsen wilt.
2. Meet 200 cm vanaf de vloer af. Waar hoogte en
midden elkaar kruisen, 15 cm naar links en naar
rechts aftekenen. Met een punt van 8mm twee
gaten boren.
3. De handeling herhalen (zie tekening)
Voor vaste muren:
4. de 4 metalen pluggen aanbrengen en de
schroeven verwijderen.
5. de hoeken horizontaal in de onderste gaten
bevestigen met de schroeven uit punt 4, zie
tekening.
6. Het apparaat bij de wand plaatsen en de hoeken
90° naar beneden draaien. Let erop dat het
onderste gedeelte van de hoeken tussen het
apparaat en de rand komt.
7. De laatste twee schroeven in de bovenste gaten
bevestigen en alle schroeven vastdraaien.
Voor tussenmuren (bv.gipswanden)
4. de juiste pluggen in de boorgaten aanbrengen.
5. de hoeken horizontaal in de onderste gaten
bevestigen met de schroeven uit punt 4, zie
tekening.
6. Het apparaat bij de wand plaatsen, de schroeven
uit de hoeken losdraaien en de hoeken 90° naar
beneden draaien. Let erop dat het onderste
gedeelte van de hoeken tussen het apparaat en
de rand komt.
7. Draai de losgedraaide schroeven weer vast en
eindig met het vastdraaien van de laatste twee
schroeven.
Tenslotte controleren of het apparaat stabiel staat.