NOTICE: MK58 is for long-distance real-me image transmission when installing
it on the aircra.
SWITCHING THE MODE
There are two modes of Pitch Follow Mode and Angle Mode.
Pitch Follow Mode allows the gimbal camera to track SteadyGrip in pitch
direcon. The Pitch Follow Mode LED status indicator will be solid green.
In Angle Mode, the camera lens scks to a fixed direcon instead of following the
movement of the SteadyGrip. The user can control the Pitch Direcon through
pitch control roller wheel.
NOTICE: The default mode of SteadyGrip is Pitch Follow Mode.
To Enter Angle Mode:
Press the Mode Switch Buon on the top of the SteadyGrip to exit the Pitch
Follow mode. The Pitch Follow Mode LED status indicator will be off. The Steady-
Grip will enter Angle Mode.
To Enter Pitch Follow Mode:
Press Mode Switch Buon again to enter Pitch Follow Mode. The Pitch Follow
Mode LED status indicator will be solid green.
NOTE: When SteadyGrip™ is in Pitch Follow status, the gimbal camera tracks
SteadyGrip™ in pitch direcon, and the gimbal pitch control roller wheel on
SteadyGrip™ is disabled.
WARNING: procedures, which if not properly followed, create the probability of
property damage, collateral damage and serious injury or create a high probability
of superficial injury.
Failure to exercise care while using this product and comply with the following
condions and guidance could result in product malfuncon, excessive heat, fire,
property damage, and ulmately injury.
Lithium lon baeries are not toys. For the purpose of the document Li-lon, Li-Po,
Li-Fe, NiCd or NiMH baeries will be described as "Baeries".
Handling and Storage:
● Never alter, puncture or impact Baeries or related components.
● Do not directly connect the terminals with metal objects. This will short-circuit
Baeries, resulng in heat and electrical discharge.
● Never store loose Baeries together, the Baeries' terminals may contact one
another causing a short circuit.
● Never expose Baeries to extreme temperatures or direct sunlight.
● Always disconnect Baeries when not in use.
Before the First Charge:
● Ensure baeries are not damaged, as this may cause a short circuit of fire. Charging
● Always refer to your charger's manual to ensure safe operaon.
● Always charge Baeries in an open area away from flammable materials, liquids and surfaces.
● Never charge Baeries that are hot to the touch (above 120°F)
If at any me Baeries become damaged, hot, or begin to balloon or swell,
disconnue charging (or discharging) immediately. Quickly and safely disconnect
the charger. Then place the Baeries and/or charger in a safe, open area away from
flammable materials in an approved Li-Po bag to observe. Aer one hour, remove
the Baeries from service. DO NOT connue to handle, aempt to use, or ship the
Baeries. Failure to follow these procedures can cause damage to Baeries,
personal property or cause serious injury.
Damaged or swollen Baeries can be unstable and very hot. DO NOT touch
baeries unl they have cooled. Dispose of baeries in the manner required by
your city, county, state or country. Contact the appropriate Yuneec Product
Support Office to speak to a service technician for more informaon.
In the event of fire, a Class D, dry chemical fire exnguisher must be used then
baeries must be placed inside of an approved Li-Po bag.
Addional Guidelines and Warnings:
● In the event of a crash, always quickly and safely disconnect and remove Baeries
from the model. Then follow the previously listed safety procedures.
● If the internal contents of Baeries come into contact with your skin, wash the
affected area(s) with soap and water immediately. If it comes into contact with your
eye(s), flush them with generous amounts of water for 15 minutes and seek
immediately medical aenon.
• Connect the equipment to an outlet on a circuit different from that to which the
receiver is connected.
This device complies with part 15 of the FCC rules. Operaon is subject to the
following two condions:
(1) This device may not cause harmful interference, and (2) this device must accept
any interference received, including interference that may cause undesired
operaon.
NOTE: This equipment has been tested and found to comply with the limits for a
Class B digital device, pursuant to part 15 of the FCC Rules. These limits are
designed to provide reasonable protecon against harmful interference in a
residenal installaon. This equipment generates, uses and can radiate radio
frequency energy and, if not installed and used in accordance with the instruc-
ons, may cause harmful interference to radio communicaons. However, there is
no guarantee that interference will not occur in a parcular installaon. If this
equipment does cause harmful interference to radio or television recepon, which
can be determined by turning the equipment off and on, the user is encouraged to
try to correct the interference by one or more of the following measures:
—Reorient or relocate the receiving antenna.
—Increase the separaon between the equipment and receiver.
—Connect the equipment into an outlet on a circuit different from that to which
the receiver is connected.
—Consult the dealer or an experienced radio/TV technician for help.
RF EXPOSURE WARNING
• This equipment must be installed and operated in accordance with provided
instrucons and the antenna(s) used for this transmier must be installed to
provide a separaon distance of at least 20 cm from all persons and must not be
co-located or operang in conjuncon with any other antenna or transmier.
End-users and installers must be provide with antenna installaon instrucons and
transmier operang condions for sasfying RF exposure compliance.
IC RADIATION EXPOSURE STATEMENT FOR CANADA
This device complies with Industry Canada licence-exempt RSS standard(s).
Operaon is subject to the following two condions: (1) this device may not cause
interference, and (2) this device must accept any interference, including interfer-
ence that may cause undesired operaon of the device.
Le présent appareil est conforme aux CNR d'Industrie Canada applicables aux
appareils radio exempts de licence. L'exploitaon est autorisée aux deux
condions suivantes : (1) l'appareil ne doit pas produire de brouillage, et (2)
l'ulisateur de l'appareil doit accepter tout brouillage radioélectrique subi, même si
le brouillage est suscepble d'en compromere le fonconnement.
This equipment complies with IC RSS-102 radiaon exposure limit set forth for an
uncontrolled environment.
Cet équipement respecte les limites d'exposion aux rayonnements IC définies
pour un environnement non contrôlé
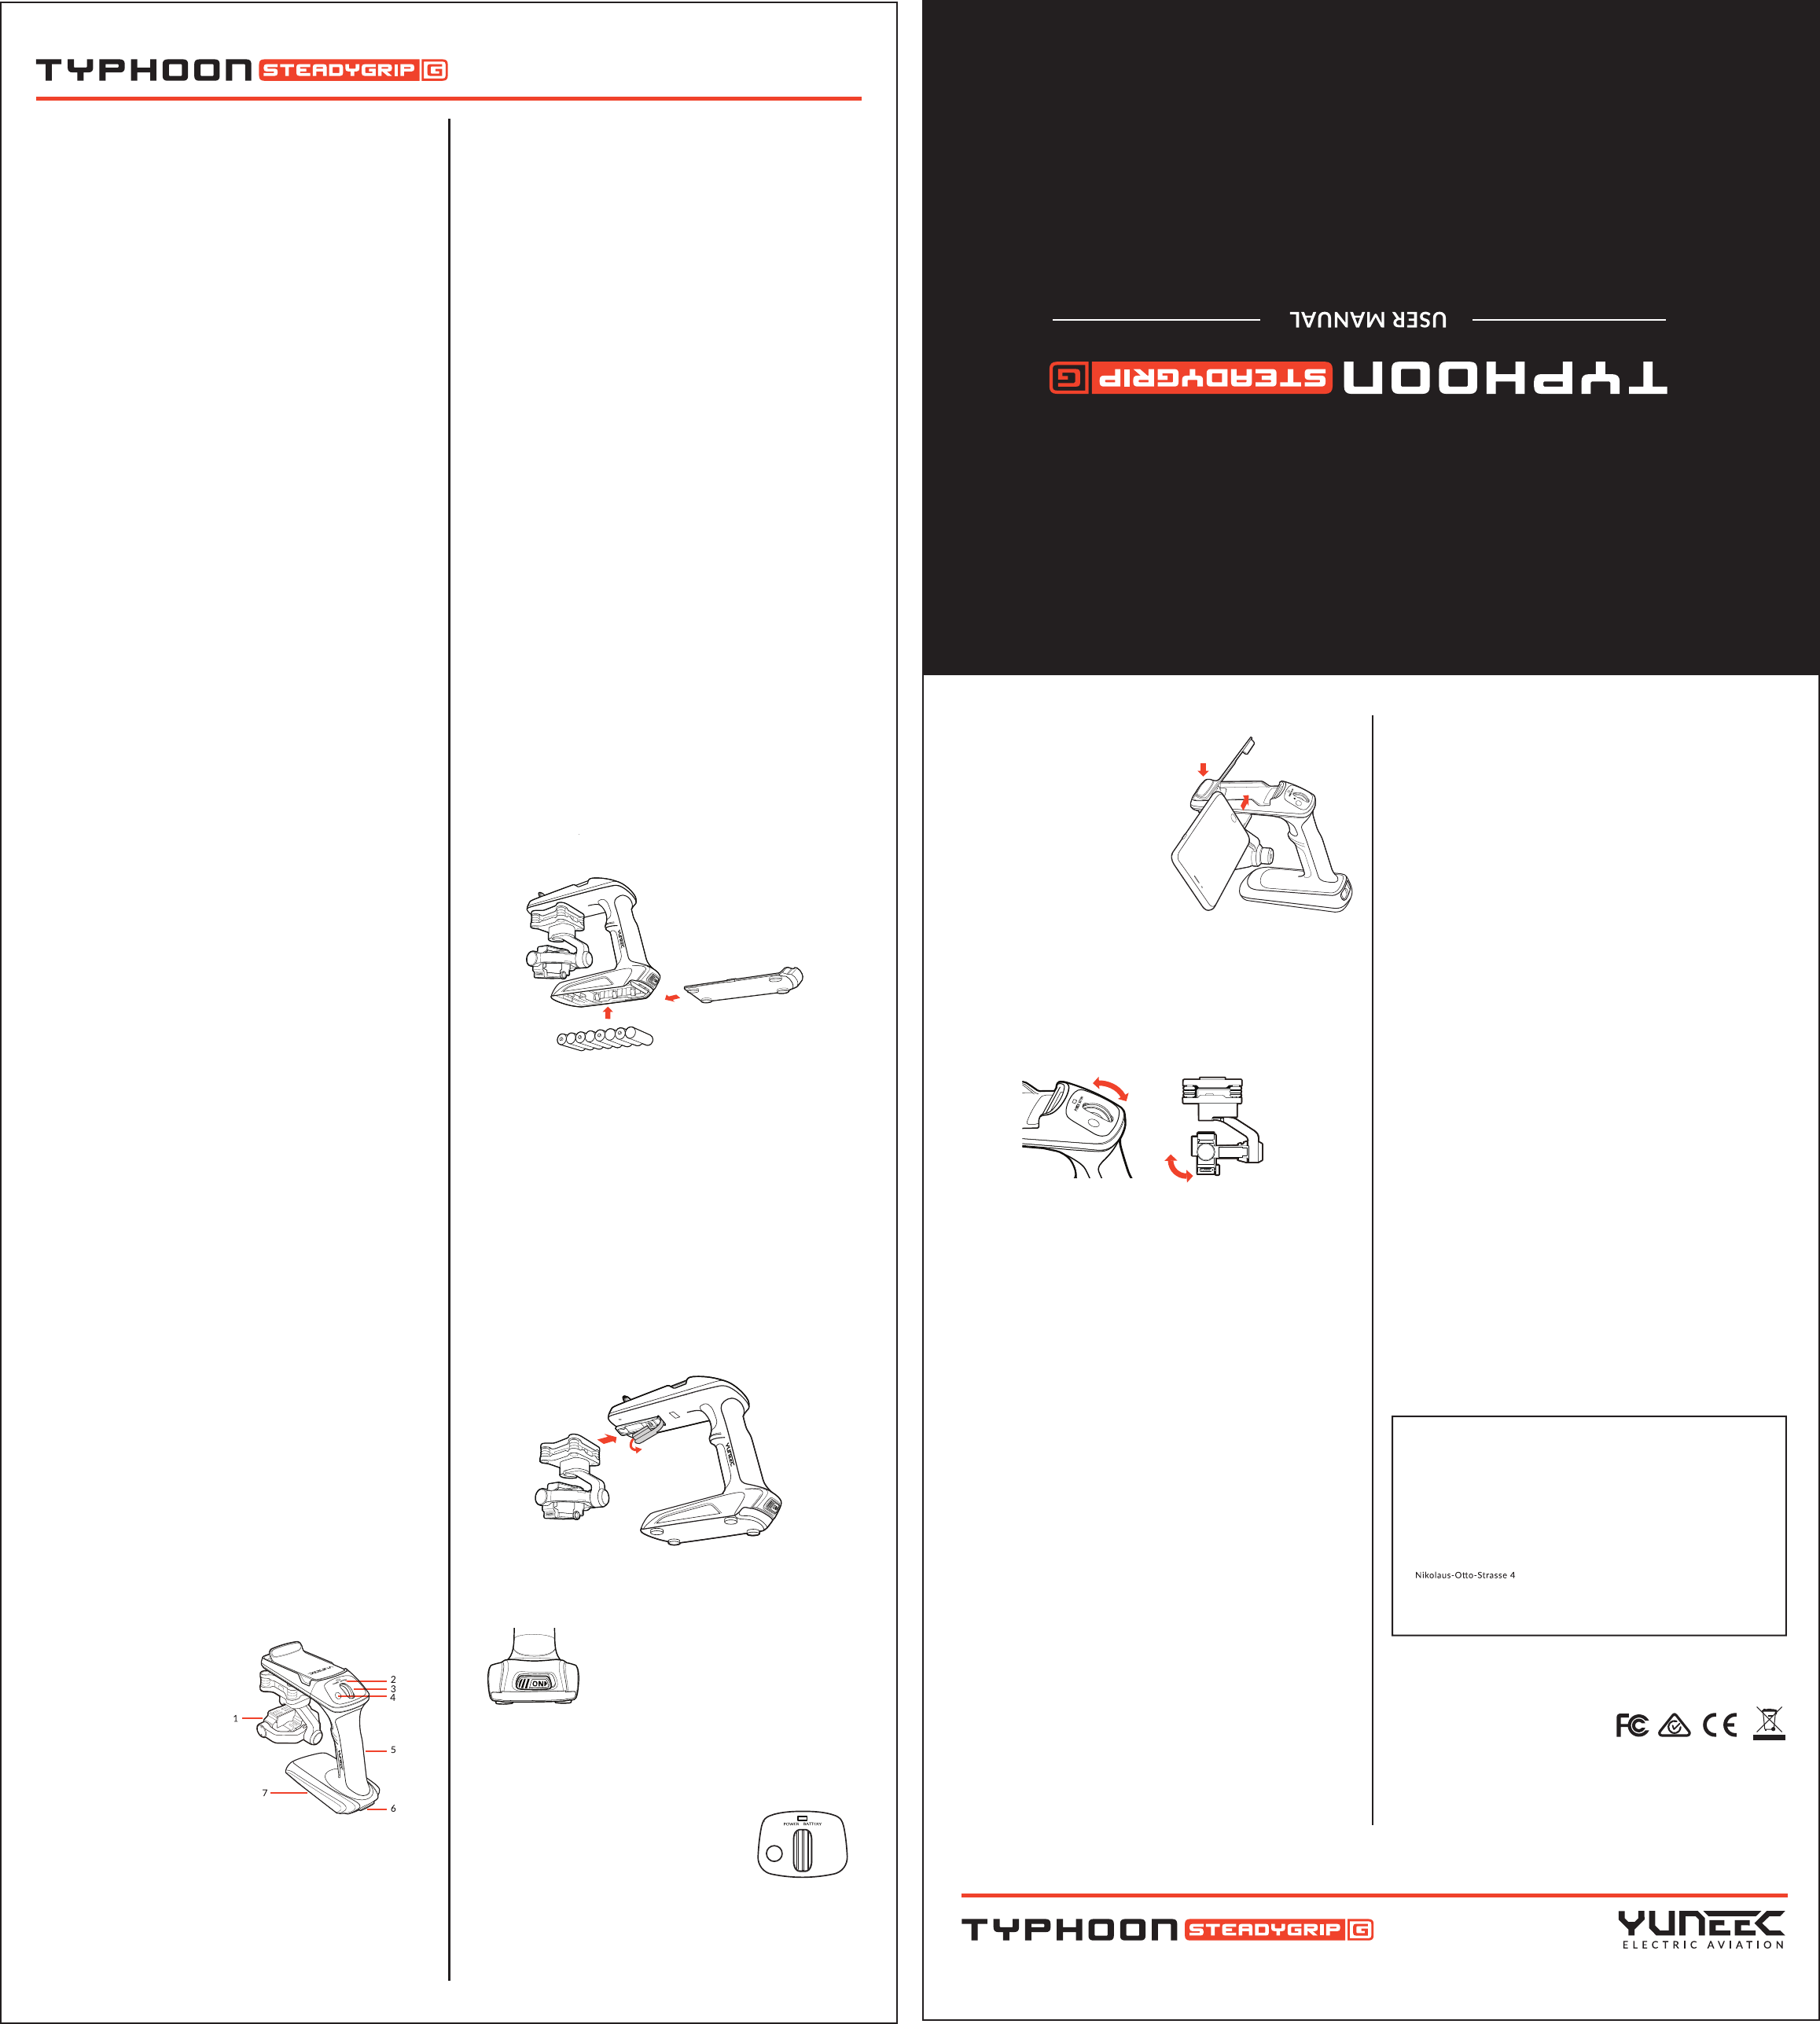
ATTACHING A MOBILE DEVICE TO THE STEADYGRIP™
Step 1) Press the Curved Lip at the top
front of the SteadyGrip™ as illustrated
and fit your Mobile Device with the
screen facing toward the Main LED and
Pitch Control Wheel.
Step 2) Bind your Mobile Device to the
GoPro®camera.
The SteadyGrip™ features a camera pitch controller that allows precise camera
angle control on the go. Simply roll the pitch control wheel forward to move the
camera pitch/angle downward and roll the pitch control wheel backward to move
the camera pitch/angle upward. Please review these instrucons along with the
illustraons to familiarize yourself on how to control the GB203 and GoPro®
camera with your SteadyGrip™.
USING THE CAMERA PITCH CONTROL WHEEL
INTRODUCTION
GROUND IMAGING SYSTEM
NOTICE: The GB203 can be supplied with power through SteadyGrip™ by the Lipo
Balance Connetor Charge Lead (sold seperately) when the contact is damaged.
SteadyGrip™ LED STATUS:
Main Status LED:
Upon Powering on: Green LED blinking for twice and
then solid GREEN
Low Voltage Warning: RED LED blinking slowly
Power Cut-off: RED LED blinking quickly
Pitch Follow Funcon on: GREEN LED solid
Pitch Follow Funcon off: GREEN LED blinking
USER MANUAL
Need help? Post your question in this forum.
Report abuse
Libble takes abuse of its services very seriously. We're committed to dealing with such abuse according to the laws in your country of residence. When you submit a report, we'll investigate it and take the appropriate action. We'll get back to you only if we require additional details or have more information to share.
Product:
Forumrules
To achieve meaningful questions, we apply the following rules:
First, read the manual;
Check if your question has been asked previously;
Try to ask your question as clearly as possible;
Did you already try to solve the problem? Please mention this;
Is your problem solved by a visitor then let him/her know in this forum;
To give a response to a question or answer, do not use this form but click on the button 'reply to this question';
Your question will be posted here and emailed to our subscribers. Therefore, avoid filling in personal details.
Register
Register getting emails for Yuneec Typhoon Steadygrip G at:
new questions and answers
new manuals
You will receive an email to register for one or both of the options.
Get your user manual by e-mail
Enter your email address to receive the manual of Yuneec Typhoon Steadygrip G in the language / languages: English as an attachment in your email.
The manual is 0,99 mb in size.
You will receive the manual in your email within minutes. If you have not received an email, then probably have entered the wrong email address or your mailbox is too full. In addition, it may be that your ISP may have a maximum size for emails to receive.
If you have not received an email with the manual within fifteen minutes, it may be that you have a entered a wrong email address or that your ISP has set a maximum size to receive email that is smaller than the size of the manual.
The email address you have provided is not correct.
Please check the email address and correct it.
Your question is posted on this page
Would you like to receive an email when new answers and questions are posted? Please enter your email address.