BEFORE MAKING CONNECTIONS, MAKE SURE THAT THE
AMPLIFIER IS SWITCHED OFF.
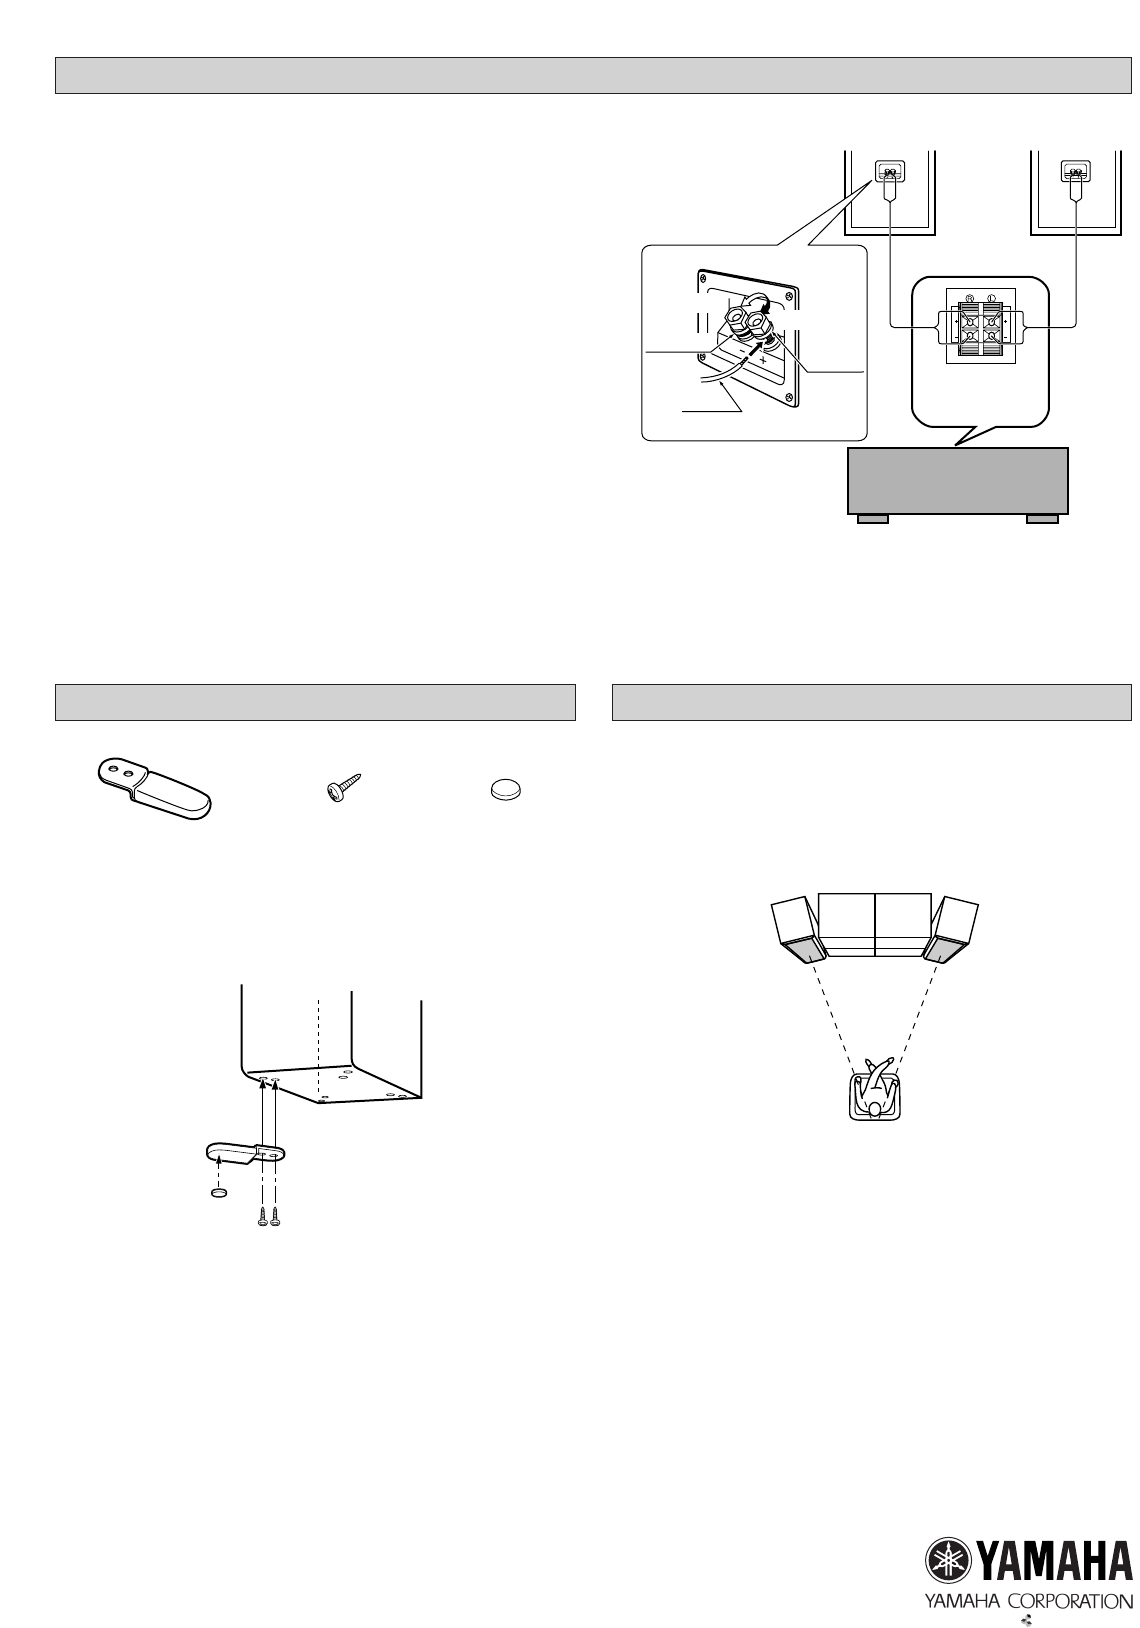
■ CONNECTIONS
● Connect the screw-type input terminals at the rear of the
speakers to the speaker output terminals of your amplifier with
the provided speaker cords.
● One side of the speaker cord is red and the other side is
black. Connect the (+) terminals on both the amplifier and the
speakers using this red side. Connect the (–) terminals on
both components using the black side of the cord.
● Connect one speaker to the left (marked L) terminals of your
amplifier, and another speaker to the right (marked R) termi-
nals, making sure not to reverse the polarity (+, –). If one
speaker is connected with reversed polarity, the sound will be
unnatural and lack bass.
Procedure:
1 Loosen the terminal knob.
2 Insert the bare speaker wire end properly into the terminal
hole. [Remove approx. 10 mm (3/8”) insulation from the
speaker cord.]
3 Tighten the knob.
4 Test the security of the connection by pulling lightly the cord
at the terminal.
Note
Do not let the bare speaker wires touch each other as this
could damage the speakers or the amplifier, or both of
them.
CONNECTION TO YOUR AMPLIFIER
Speaker (R)
Speaker output
terminals of the
amplifier
Speaker (L)
Loosen
Black (–)
Tighten
Red (+)
Red
Printed in Indonesia V500530
Amplifier
● Place the speakers on a sturdy vibration-free surface. If you
cannot obtain good bass quality when the speakers are placed
directly on the floor, insert a block etc. between the speakers
and the floor.
● Better stereo images will be obtained when the speakers are
slightly angled in towards the listeners.
Note
Bacause these speakers are not a magnetically shielded
type, there may be some influence on a TV picture depend-
ing on the type of TV or the placement of the speakers. In
such a case, place the speakers apart from the TV.
PLACING THE SPEAKERS
When placing the speakers, be sure to use the stands to
increase stability.
Use the 8 specified holes located on the base of the speaker.
Procedure:
1 Put a screw through the inside hole on the stand, and screw
it into the speaker at one of the outside holes on the base of
the speaker.
At this time, screw it untightly so that the stand can still be
moved.
2 Put another screw through the outside hole on the stand, and
screw it into the inside hole on the base of the speaker.
3 Tighten both of the screws firmly.
4 Attach a leg to the bottom of the end portion of the stand.
5 Attach the other stands to the other corners of the base of
the speaker in the same way and confirm that all 4 stands
have been firmly attached.
Note
Be carefull not to apply force to the side of the speaker, oth-
erwise the speaker may fall causing damage to the speaker
or personal injury.
ATTACHING THE STANDS
Stand x 8 Leg x 8Screw x 16