SPEAKER BRACKETS
SPM-10TV
INSTALLATION MANUAL
Thank you for selecting this Yamaha SPM-10TV speaker mounting brackets. This model is designed specially for use with
Yamaha NS-10MM speaker system.
Ⅲ PRECAUTIONS
Read the following precautions carefully before mounting
your NS-10MM using these brackets.
● Do not use these brackets for mounting speakers other
than NS-10MM.
● Mount these brackets on a TV rack etc. firmly by using
commercially available wood screws.
Mount the brackets properly and securely by following this
manual. If the brackets are mounted improperly, they may
fall down and you may be injured.
● Use commercially available wood screws which is proper
for using on the board of TV rack. If you use a wood
screw which is longer than the thickness of board and it is
tightened through the board, you may injure yourself in
the hand when you insert a hand into the TV rack.
● If your TV is a revolving type, mount the speakers and the
brackets so that they will not touch the TV when the TV is
revolved.
● Make sure to place these brackets on a flat surface. If
placed on an uneven surface, they may fall down and you
may be injured.
● To avoid accidents resulting from tripping over loose
speaker cables, fix them to the wall.
● Do not attempt to clean the brackets with chemical
solvents as this might damage the finish. To clean, wipe
with a dry, soft cloth.
● To prevent the brackets from discoloring or being
corroded, do not place the brackets where they will be
exposed to direct sunlight or excessive humidity.
● Secure placement or installation is the owner’s
responsibility. YAMAHA shall not be liable for any
accident caused by improper placement or
installation of the brackets.
Ⅲ ACCESSORIES
Pad A x 4
(VV777700)
Pad B x 1
(VV777800)
Hexagonal wrench x 1
(VV778000)
Two-sided tape x 2
(VV876500)
Bolt (diam. 4 mm) x 4
(VB514900)
Washer (diam. 4 mm) x 4
(ET500040, black)
Logo plate x 2
(VV777900)
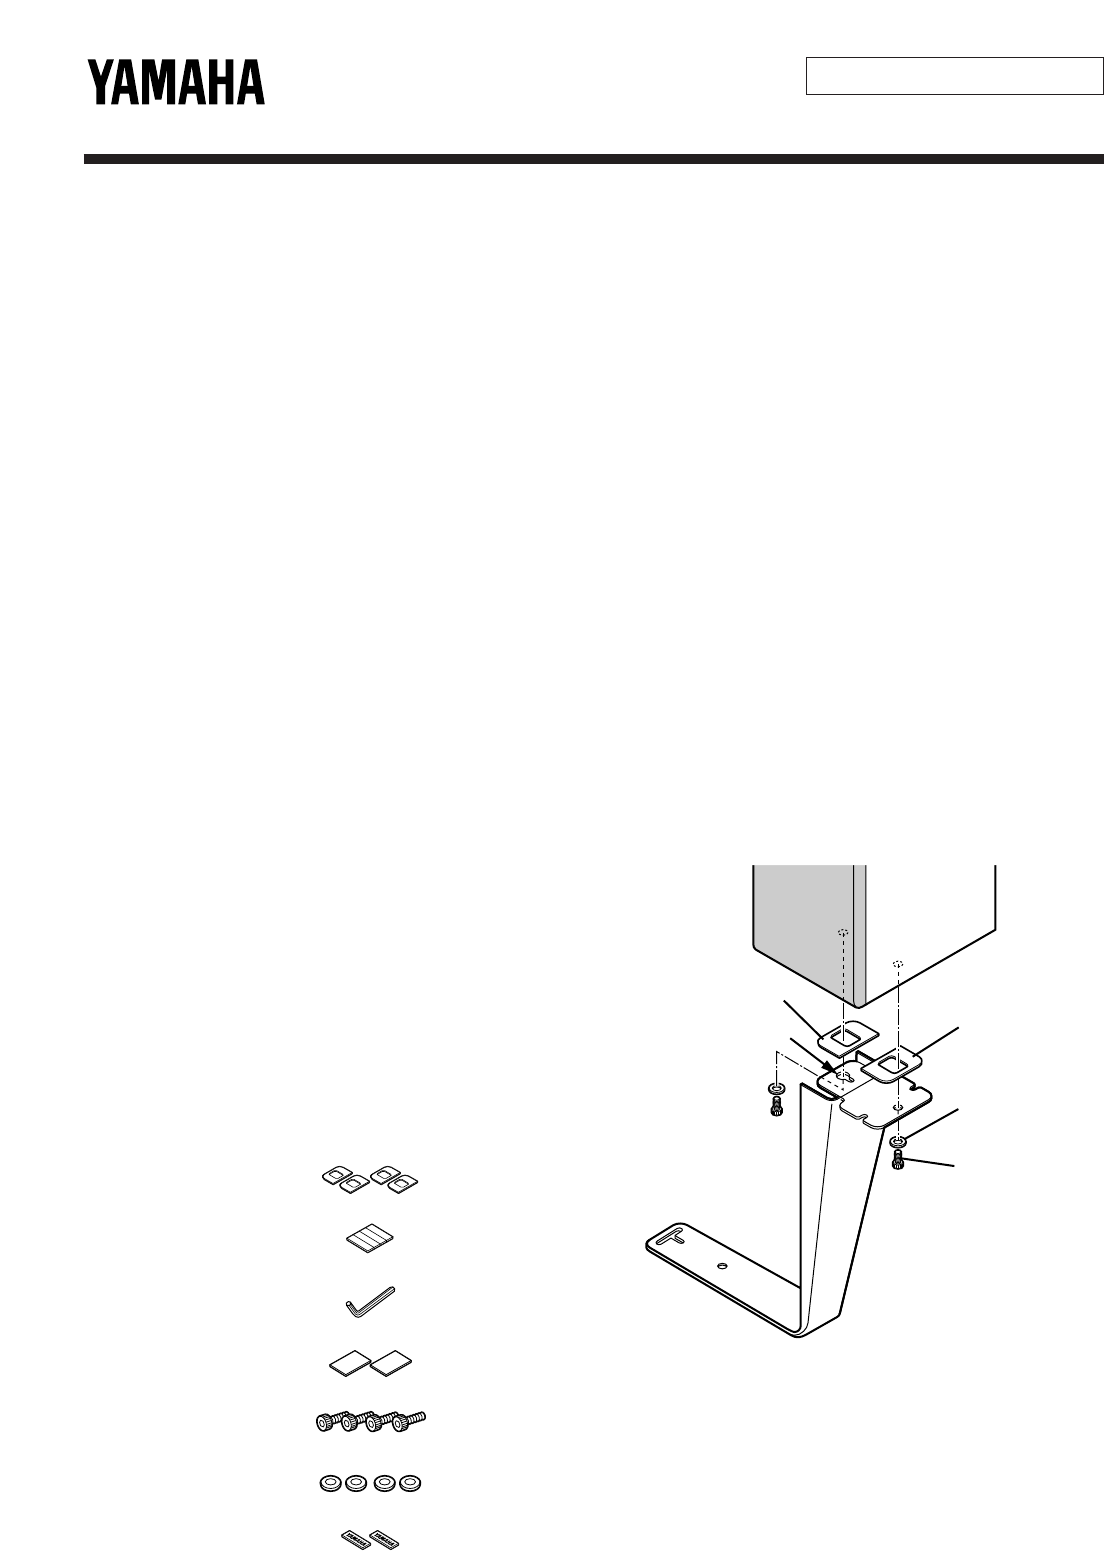
Ⅲ MOUNTING SPEAKERS
Notes
● Mount the speaker to the bracket so that the speaker
faces the front as figured below.
● Make mounting by using the provided bolts and washers.
For tightening bolts, use the provided hexagonal wrench.
Procedure
1. Put the provided pads A on the bracket as figured below.
(Put the pad A carefully. Putting and removing the pad
repeatedly may tear it off.)
2. Before mounting the speaker to the bracket, insert a bolt
and a washer into the hole on the bottom of the speaker
which is closer to the TV, and tighten the bolt to about
80%.
3. Pass the head of the bolt tightened on the speaker
through the hole (marked
*
on the figure above) on the
bracket, and slide the head of the bolt to the narrow part
of the hole.
4. Mount the speaker to the bracket by inserting a bolt and a
washer into the other hole as figured below.
5. Tighten both bolts fully.
Pad A
*
Pad A
Washer
(diam. 4 mm)
Bolt
(diam. 4 mm)
Special for use with NS-10MM
(Right side)