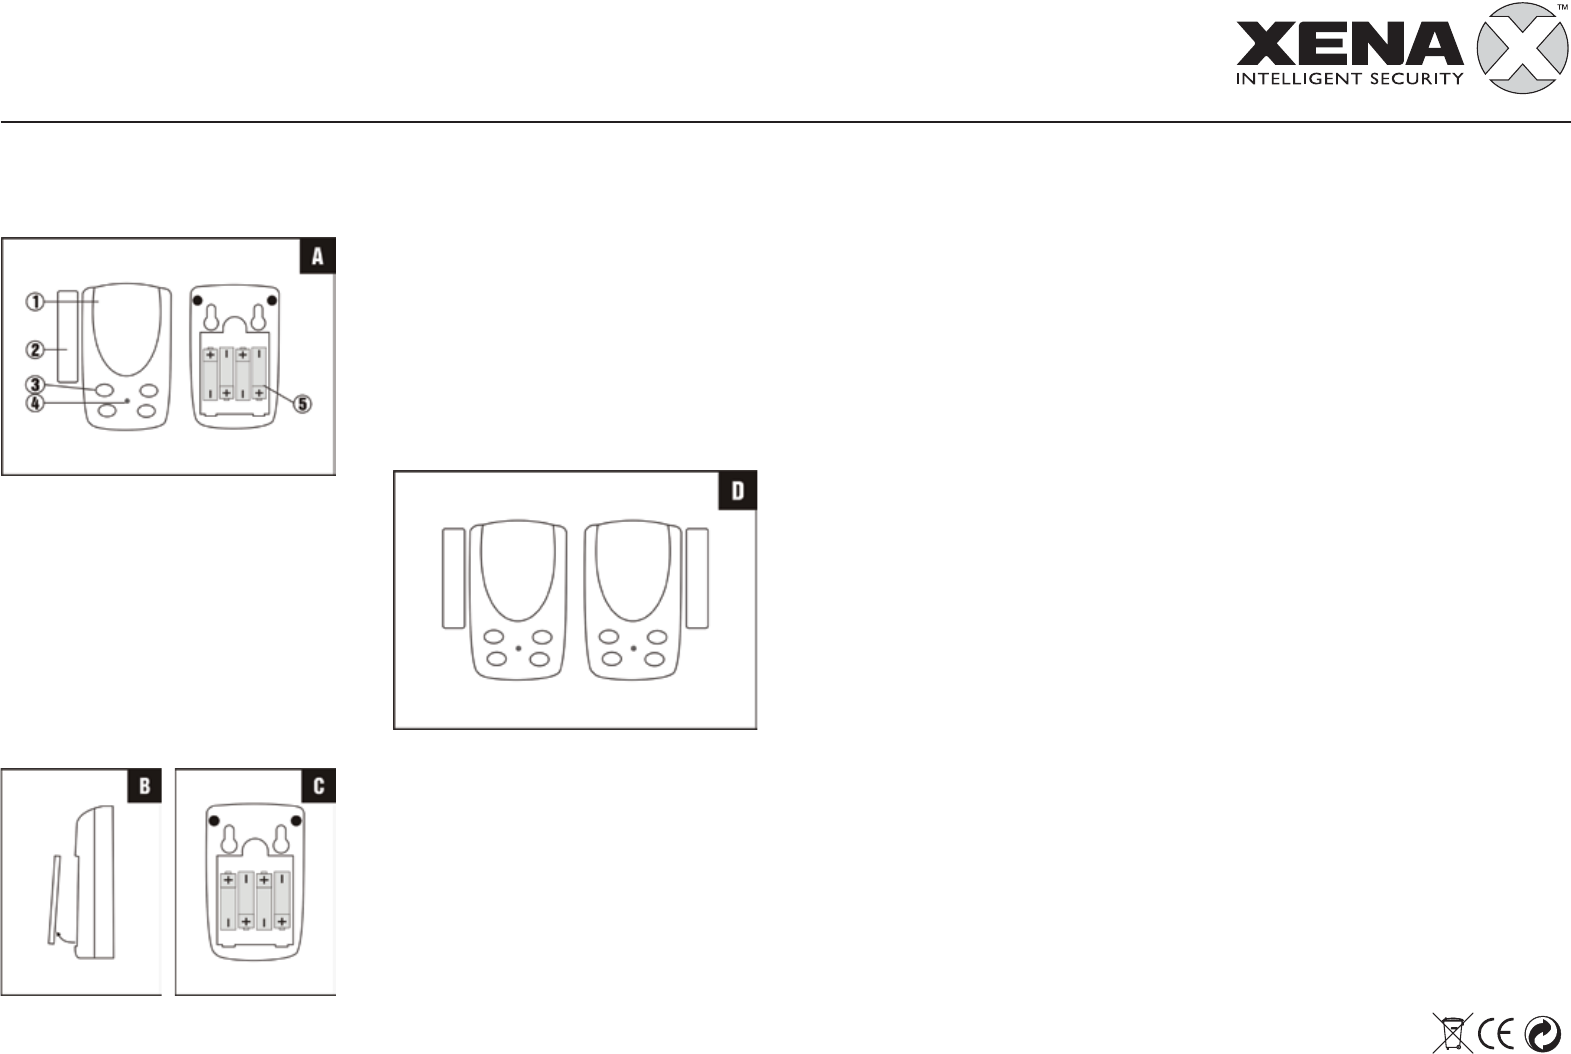
1. The battery compartment is accessed from the rear
of the alarm unit by removing the screw from the
back and lifting the back cover B.
2. Insert four (4) ‘AAA’ size batteries (not included)
following the polarity C.
3. When the last battery is inserted the alarm will
beep very loudly to indicate that the batteries are
installed properly. Replace the back cover and fix
with screw. The Battery Low LED will light when
the batteries need replacing.
NOTE: After removing the batteries, press number 4
before installing new ones. The alarm must be
re-programmed with your security code each time the
batteries are removed or replaced.
Programming the alarm
Immediately after inserting the batteries the desired 4 digit
security code must be set, simply press the desired 4 digits
on the keypad.
Installation
Alarm
Place the alarm in the desired location, preferably on the
door or window with the screws or adhesive velcro tape
supplied.
Magnetic contact
The magnetic contact must be aligned to the same level
next to the alarm so that contact can be made when the
door is closed, either on the left or right hand side D.
Operation
When exiting from the protected area
Press keypad number 4 and a confirmation tone will
indicate that the alarm is armed. You have 30 seconds in
which to vacate the area. After this time, if the contact is
broken the alarm will sound.
When entering the protected area
Simply type your 4 digit security code within 10 seconds.
This will disarm the alarm.
Care and maintenance
To clean the case, simply use a soft slightly damp cloth
with water and wipe dry immediately.
CAUTION: Never use chemicals to clean the case, as they
may cause damage to the plastic and cause the alarm not
to function.
Troubleshooting
The unit does not sound when the batteries
are installed
Ensure that the batteries are connected correctly according
to the diagram in the battery compartment
The alarm does not arm
Ensure that the back plate of the alarm unit is secure to
hold the batteries in place and that the red light comes on
when the keypad buttons are pressed
The red light on the base of the alarm unit is on
This is the “Battery Low Indicator”. The batteries need
replacing
Battery precautions
When using this product follow these precautions at all times.
• Use only the appropriate size batteries
• Be sure to follow the correct polarity when installing
the batteries as indicated in the battery compartment.
Incorrect polarity may cause damage to the alarm.
• Do not mix different types of battery such as Alkaline
and Carbon-zinc or old batteries with new.
• If the alarm is not used for long periods of time,
remove the batteries to prevent damage or injury from
possible battery leakage.
• Do not recharge batteries not intended to be recharged
as they can overheat and rupture. (Always follow the
manufacturer’s directions.)
061107
Need help? Post your question in this forum.
Report abuse
Libble takes abuse of its services very seriously. We're committed to dealing with such abuse according to the laws in your country of residence. When you submit a report, we'll investigate it and take the appropriate action. We'll get back to you only if we require additional details or have more information to share.
Product:
Forumrules
To achieve meaningful questions, we apply the following rules:
First, read the manual;
Check if your question has been asked previously;
Try to ask your question as clearly as possible;
Did you already try to solve the problem? Please mention this;
Is your problem solved by a visitor then let him/her know in this forum;
To give a response to a question or answer, do not use this form but click on the button 'reply to this question';
Your question will be posted here and emailed to our subscribers. Therefore, avoid filling in personal details.
Register
Register getting emails for Xena XA501 at:
new questions and answers
new manuals
You will receive an email to register for one or both of the options.
Get your user manual by e-mail
Enter your email address to receive the manual of Xena XA501 in the language / languages: English as an attachment in your email.
The manual is 0,15 mb in size.
You will receive the manual in your email within minutes. If you have not received an email, then probably have entered the wrong email address or your mailbox is too full. In addition, it may be that your ISP may have a maximum size for emails to receive.
The manual is sent by email. Check your email
If you have not received an email with the manual within fifteen minutes, it may be that you have a entered a wrong email address or that your ISP has set a maximum size to receive email that is smaller than the size of the manual.
The email address you have provided is not correct.
Please check the email address and correct it.
Your question is posted on this page
Would you like to receive an email when new answers and questions are posted? Please enter your email address.