Das Bedienfeld ist ausgeschaltet, das Gerät funktioniert nicht.
Das Gerät befindet sich möglicherweise im Stand-by-Modus.
Das Gerät kann ein Problem mit der Stromversorgung haben.
Schalten Sie das Gerät mit der „Stand-by“-Taste ein.
Überprüfen Sie:
- ob ein Stromausfall vorliegt
- ob der Stecker richtig in die Steckdose eingesteckt ist und jeder zweipolige Netzschalter sich in der richtigen
Position befindet (dadurch wird die Stromversorgung des Geräts ermöglicht)
- ob die Schutzvorrichtungen der elektrischen Anlage im Haushalt funktionieren
- ob das Netzkabel gebrochen ist.
Die Innenleuchte ist ohne Funktion.
Die Leuchte muss möglicherweise ausgetauscht werden.
Das Gerät befindet sich möglicherweise im Stand-by-Modus.
Modelle mit Glühlampe: Trennen Sie das Gerät von der Stromversorgung, prüfen Sie die Glühlampe und
wechseln Sie sie gegebenenfalls aus (siehe Abschnitt „Glühlampe oder LED ersetzen“).
Modelle mit LED-Leuchten: kontaktieren Sie den autorisierten technischen Kundendienst.
Schalten Sie das Gerät mit der „Stand-by“-Taste ein.
Die Temperatur in den Fächern ist nicht niedrig genug.Hierfür können verschiedene Gründe vorliegen (siehe Abhilfe).
Überprüfen Sie:
- ob die Türen korrekt schließen
- ob das Gerät neben einer Wärmequelle aufgestellt wurde
- ob die eingestellte Temperatur ausreichend ist
- ob die Luftzirkulation nicht durch zugesetzte Belüftungsöffnungen am Boden des Geräts behindert ist.
Wasser sammelt sich am Boden des Kühlfachs.Der Tauwasserablaufkanal ist verstopft. Reinigen Sie die Abflussöffnung (siehe Abschnitt „Wartung und Reinigung des Geräts“).
Die vordere Gerätekante in Höhe der Türdichtung ist warm.Hier liegt kein Defekt vor. Hierdurch wird die Bildung von Kondenswasser verhindert.Keine Gegenmaßnahme nötig.
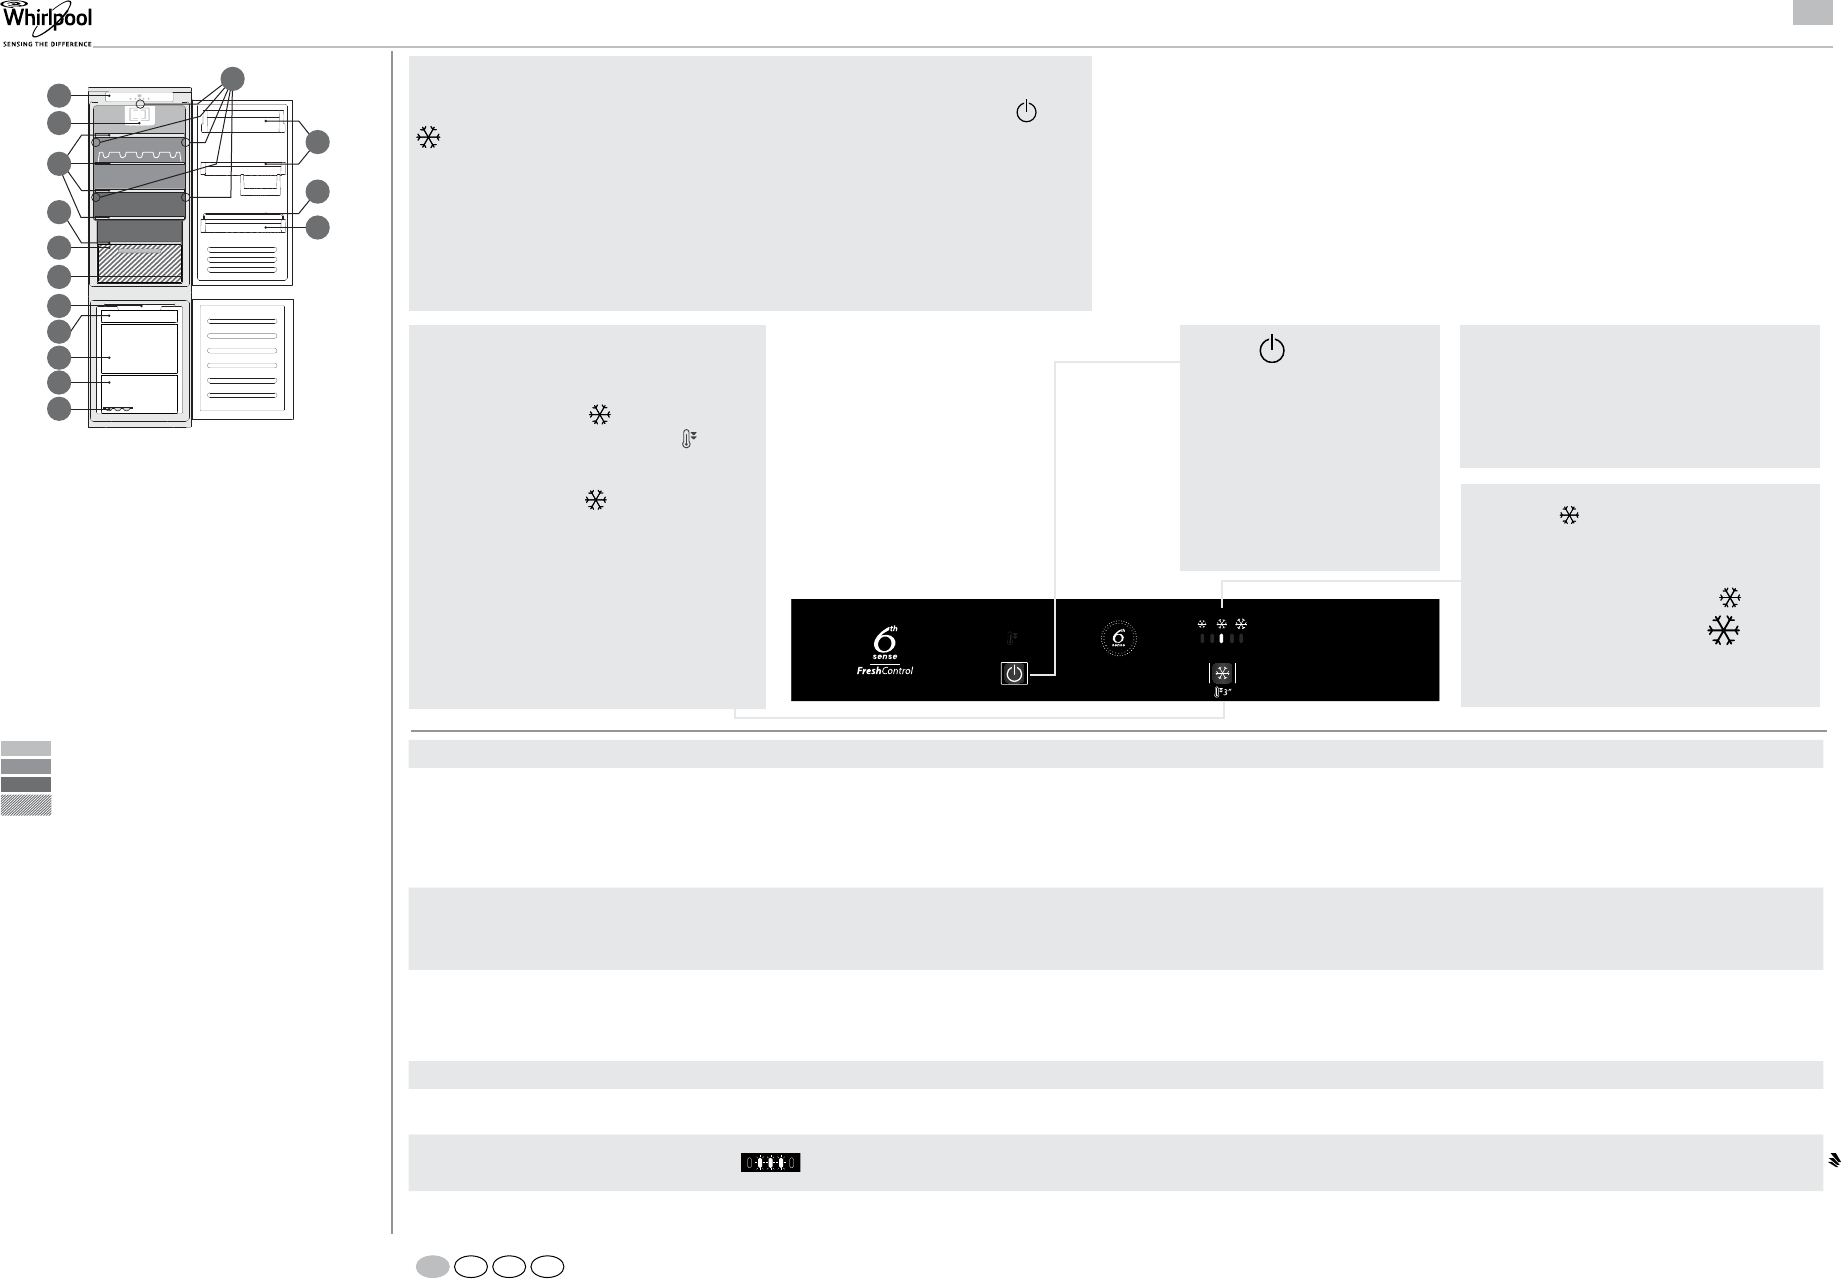
Die Temperaturanzeigen für das Kühlfach blinken wie abgebildet:
Störungsalarm
Dieser Alarm weist auf eine Störung in einem technischen Bauteil hin.
Kontaktieren Sie den autorisierten technischen Kundendienst.
Sie können das Gebläse ein-/ausschalten, indem Sie 3 Sekunden lang gleichzeitig die Tasten
und
drücken.
Das leuchtende Symbol 6th Sense Fresh Control (Sensor+) zeigt an, dass das Gebläse und somit die
Funktion 6th Sense Fresh Control (Sensor+) aktiv ist. Übersteigt die Umgebungstemperatur 27 °C, oder
es befinden sich Wassertropfen auf den Glasablagen, muss das Gebläse unbedingt eingeschaltet sein,
damit die Lebensmittel optimal konserviert werden. Die Deaktivierung des Gebläses sorgt für einen
wirtschaftlichen Energieverbrauch.
Hinweis: Das Gebläse wird nach einem Stromausfall oder nach Abschaltung des Geräts automatisch
wieder aktiviert.
Stand-by
Drücken Sie die taste 3 Sekunden
lang, um das Gerät auszuschalten.
Im Stand-by-Μodus leuchtet keines
der Symbole auf dem Display und
das Licht im Kühlfach leuchtet nicht.
Drücken Sie kurz auf die Taste, um
das Gerät wieder einzuschalten.
Hinweis: Bei diesem Vorgang
wird das Gerät nicht von der
Spannungsversorgung getrennt.
Schnell kühl
Drücken Sie 6 Stunden, bevor Sie große
Lebensmittelmengen zum Einfrieren in das
Gefrierfach geben oder um einfach das Kühlfach
herabzukühlen, die Taste
3 Sekunden lang. Ist
die Funktion aktiv, leuchtet das Symbol
auf.
Die Funktion wird nach 30 Stunden automatisch
abgestellt. Sie kann auch manuell abgestellt
werden, indem die Taste
erneut 3 Sekunden
lang gedrückt wird.
Hinweis: Tiefkühlware darf nicht in Kontakt mit den
einzufrierenden Lebensmitteln kommen.
KURZANLEITUNG
C
F
G
L
M
Q
O
E
N
A
B
I
H
P
C
G
H
M
N
R
P
F
O
D
A
B
L
I
Q
E
D
Image 2
Comparto Frigorifero
A. Pannello comandi
B.Ventola e ltro antibatterico e antiodore (a seconda del modello)
C. Luci a LED ( a seconda del modello)
D. Ripiani
E. Piano di copertura cassetto frutta e verdura
F. Cassetto frutta e verdura
G. Targhetta matricola (posta a lato del cassetto frutta e verdura)
O. Balconcini
P. Fermabottiglie (se in dotazione)
Q. Balconcino bottiglie
Zona meno fredda
Zona intermedia
Zona più fredda
Zona frutta e verdura
Comparto Congelatore
H. Stop Frost (se disponibile)
I. Cassetto superiore (zona di conservazione alimenti congelati e surgelati)
L. Cassetto centrale (zona di conservazione alimenti congelati e surgelati)
M. Cassetto inferiore (zona di congelamento)
N. Contenitore cubetti ghiaccio (se in dotazione)
Image 3
Comparto Frigorifero
A. Pannello comandi
B.Ventola e ltro antibatterico e antiodore (a seconda del modello)
C. Luci a LED ( a seconda del modello)
D. Ripiani
E. Comparto speciale "Zero Gradi" (a seconda del modello)
F. Piano di copertura cassetto frutta e verdura
G. Cassetto frutta e verdura
H. Targhetta matricola (posta a lato del cassetto frutta e verdura)
P. Balconcini
Q. Fermabottiglie (se in dotazione)
R. Balconcino bottiglie
Zona meno fredda
Zona intermedia
Zona più fredda
Zona frutta e verdura
Comparto Congelatore
I. Stop Frost (se disponibile)
L. Cassetto superiore (zona di conservazione alimenti congelati e surgelati)
M. Cassetto centrale (zona di congelamento)
N. Cassetto inferiore (zona di conservazione alimenti congelati e surgelati)
O. Contenitore cubetti ghiaccio (se in dotazione)
C
F
G
L
M
Q
O
E
N
A
B
I
H
P
C
G
H
M
N
R
P
F
O
D
A
B
L
I
Q
E
D
Image 2
Comparto Frigorifero
A. Pannello comandi
B.Ventola e ltro antibatterico e antiodore (a seconda del modello)
C. Luci a LED ( a seconda del modello)
D. Ripiani
E. Piano di copertura cassetto frutta e verdura
F. Cassetto frutta e verdura
G. Targhetta matricola (posta a lato del cassetto frutta e verdura)
O. Balconcini
P. Fermabottiglie (se in dotazione)
Q. Balconcino bottiglie
Zona meno fredda
Zona intermedia
Zona più fredda
Zona frutta e verdura
Comparto Congelatore
H. Stop Frost (se disponibile)
I. Cassetto superiore (zona di conservazione alimenti congelati e surgelati)
L. Cassetto centrale (zona di conservazione alimenti congelati e surgelati)
M. Cassetto inferiore (zona di congelamento)
N. Contenitore cubetti ghiaccio (se in dotazione)
Image 3
Comparto Frigorifero
A. Pannello comandi
B.Ventola e ltro antibatterico e antiodore (a seconda del modello)
C. Luci a LED ( a seconda del modello)
D. Ripiani
E. Comparto speciale "Zero Gradi" (a seconda del modello)
F. Piano di copertura cassetto frutta e verdura
G. Cassetto frutta e verdura
H. Targhetta matricola (posta a lato del cassetto frutta e verdura)
P. Balconcini
Q. Fermabottiglie (se in dotazione)
R. Balconcino bottiglie
Zona meno fredda
Zona intermedia
Zona più fredda
Zona frutta e verdura
Comparto Congelatore
I. Stop Frost (se disponibile)
L. Cassetto superiore (zona di conservazione alimenti congelati e surgelati)
M. Cassetto centrale (zona di congelamento)
N. Cassetto inferiore (zona di conservazione alimenti congelati e surgelati)
O. Contenitore cubetti ghiaccio (se in dotazione)
DEFRITNL
Need help? Post your question in this forum.
Report abuse
Libble takes abuse of its services very seriously. We're committed to dealing with such abuse according to the laws in your country of residence. When you submit a report, we'll investigate it and take the appropriate action. We'll get back to you only if we require additional details or have more information to share.
Product:
Forumrules
To achieve meaningful questions, we apply the following rules:
First, read the manual;
Check if your question has been asked previously;
Try to ask your question as clearly as possible;
Did you already try to solve the problem? Please mention this;
Is your problem solved by a visitor then let him/her know in this forum;
To give a response to a question or answer, do not use this form but click on the button 'reply to this question';
Your question will be posted here and emailed to our subscribers. Therefore, avoid filling in personal details.
Register
Register getting emails for Whirlpool ART 9811 at:
new questions and answers
new manuals
You will receive an email to register for one or both of the options.
Get your user manual by e-mail
Enter your email address to receive the manual of Whirlpool ART 9811 in the language / languages: German as an attachment in your email.
The manual is 0,47 mb in size.
You will receive the manual in your email within minutes. If you have not received an email, then probably have entered the wrong email address or your mailbox is too full. In addition, it may be that your ISP may have a maximum size for emails to receive.
If you have not received an email with the manual within fifteen minutes, it may be that you have a entered a wrong email address or that your ISP has set a maximum size to receive email that is smaller than the size of the manual.
The email address you have provided is not correct.
Please check the email address and correct it.
Your question is posted on this page
Would you like to receive an email when new answers and questions are posted? Please enter your email address.