77220
2
Zoom out
Zoom in
Previous page
1/4
Next page
EERSTE GEBRUIK
Sluit het apparaat aan op de waterleiding en het elektriciteitsnet (zie de Installatiehandleiding).
Op het moment van de elektrische aansluiting worden er van tevoren in de fabriek ingestelde
temperaturen op het display weergegeven.
Houd de resetknop voor de alarmen ingedrukt indien de temperatuurindicator oplicht en het
geluidssignaal geactiveerd is (dit betekent dat het alarm voor een langdurige black-out zich heeft
geactiveerd).
Opmerking: Na de in werking stelling is het noodzakelijk 2/3 uur te wachten voordat de geschikte
conserveringstemperatuur voor een normale lading van het product bereikt is.
RICHTLIJNEN VOOR HET SELECTEREN VAN DE FUNCTIES
Stand-by
Deze functie dient om zowel het koelvak als het vriesvak buiten werking te stellen. Om deze functie te
activeren houdt u de stand-by knop 3 seconden lang ingedrukt: beide displays gaan uit en op het display
aan de linkerkant gaat een streepje aan. Om de normale werking te herstellen voert u dezelfde procedure
uit totdat de temperaturen die daarvoor ingesteld waren weer op het display weergegeven worden.
Opmerking: Bedenk hierbij wel dat het apparaat niet is afgekoppeld van de elektrische voeding.
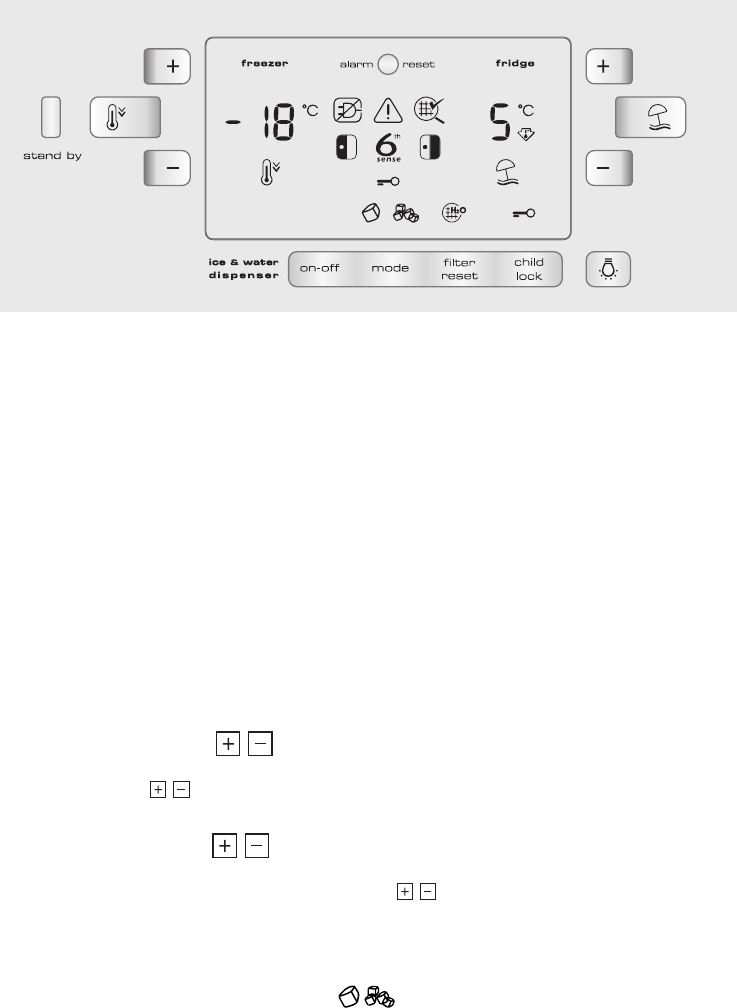
Temperatuur vriesgedeelte
De ideale temperatuur die in de fabriek ingesteld wordt is -18°C. Om de temperatuur te veranderen
houdt u de knoppen , ingedrukt totdat de gewenste waarde bereikt wordt die op het display
weergegeven wordt.
Temperatuur koelgedeelte
De ideale temperatuur die in de fabriek ingesteld wordt is °5C.
Om de temperatuur te veranderen houdt u de knoppen , ingedrukt totdat de gewenste waarde
bereikt wordt die op het display weergegeven wordt.
On/off
De on/off toets maakt het mogelijk om de ijsmaker aan of uit te schakelen. Als de ijsmaker ingeschakeld is
wordt op het display een van de twee symbolen aangegeven.
HOE U HET APPARAAT MOET GEBRUIKEN
17
2


Need help? Post your question in this forum.

Forumrules


Report abuse

Libble takes abuse of its services very seriously. We're committed to dealing with such abuse according to the laws in your country of residence. When you submit a report, we'll investigate it and take the appropriate action. We'll get back to you only if we require additional details or have more information to share.

Product:

For example, Anti-Semitic content, racist content, or material that could result in a violent physical act.

For example, a credit card number, a personal identification number, or an unlisted home address. Note that email addresses and full names are not considered private information.

Forumrules

To achieve meaningful questions, we apply the following rules:

Register

Register getting emails for Whirlpool 20 RID 4L A+ at:


You will receive an email to register for one or both of the options.


Get your user manual by e-mail

Enter your email address to receive the manual of Whirlpool 20 RID 4L A+ in the language / languages: Dutch as an attachment in your email.

The manual is 0,3 mb in size.


You will receive the manual in your email within minutes. If you have not received an email, then probably have entered the wrong email address or your mailbox is too full. In addition, it may be that your ISP may have a maximum size for emails to receive.

Others manual(s) of Whirlpool 20 RID 4L A+

Whirlpool 20 RID 4L A+ User Manual - English - 10 pages

Whirlpool 20 RID 4L A+ User Manual - German - 4 pages

Whirlpool 20 RID 4L A+ User Manual - Dutch - 9 pages


The manual is sent by email. Check your email

If you have not received an email with the manual within fifteen minutes, it may be that you have a entered a wrong email address or that your ISP has set a maximum size to receive email that is smaller than the size of the manual.

The email address you have provided is not correct.

Please check the email address and correct it.

Your question is posted on this page

Would you like to receive an email when new answers and questions are posted? Please enter your email address.


Info