8
GUIDE TO THE INSIDE PARTS
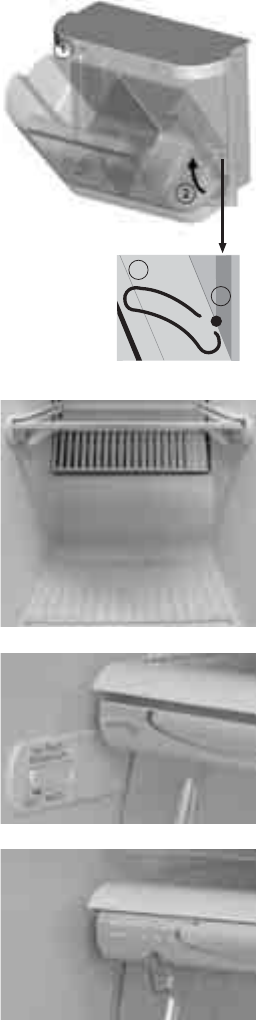
FRESH FOOD COMPARTMENT (if available)
The fresh food compartment has a tilting movement that facilitates
the introduction and the removal of food.
Opening, removal and replacing of the Fresh Food
compartment.
Open the Fresh Food compartment by pressing one of the
buttons (1), while at the same time pulling the compartment as far
as it will go. To close follow the inverse procedure. To remove the
Fresh Food compartment proceed as above instructions and then
lightly rotate and remove the compartment from it seat (2). To
replace the compartment insert the external lateral guides of the
container (3a) in their seats near the retaining pins (3b).
Note: Do not store any food in metal or sharp packaging inside
the fresh food compartment as this could damage the surface of
the compartment itself.
Removing the crisper or meat drawer:
1. slide the drawer out as far as it goes;
2. with one hand underneath the drawer, lift and pull it out;
3. the drawer will come off the runners and can be pulled out
further;
4. to remove it completely, the drawer must be turned: front end
up, rear end down.
Loading procedure
Maximum storage capacity can be obtained by removing the two
bottom drawers/baskets from the freezer compartment. Make
sure that the air vents are not obstructed by the food (this applies
to units with capacity lower than 715 litres).
Meat drawer temperature control device
• The cold air is conveyed inside the meat drawer through an
opening between the refrigerator compartment and the freezer
compartment. In this way the temperature inside the meat
drawer is kept lower than the rest of the refrigerator. The air
flow can be adjusted by means of the special slider.
• To store vegetables in the meat drawer, shift the control device
all the way to the left, to the vegetables setting. This avoids
possible damage due to the vegetables freezing.
Crisper moisture control device
• The level of humidity inside the crisper can be adjusted by
moving the slider in the desired position.
• By moving the slider to the far right, humidity will be eliminated
from the compartment. This setting is better for preserving
fruits and vegetables with skin.
• By moving the slider to the far left, humidity is maintained inside
the compartment. This setting is better for preserving leaf
vegetables.