2
Instructions for Use :
IMPORTANT : Read before charging.
SAFETY WARNING and NOTES Batteries emit
EXPLOSIVE GASES - prevent flame or sparks near batteries.
Disconnect AC power supply before making or breaking DC/battery connections. Battery acid is highly corrosive. Wear
protective clothing and avoid contact. In case of accidental contact wash immediately with soap and water. Check that the
battery posts are not loose; if so, have the battery professionally assessed. If the battery posts are corroded, clean with
a copper
wire brush; if greasy or dirty, clean with a rag damped in detergent. Only use the charger if the input & output
leads and connectors are in good, undamaged condition. If the input cable is damaged, it is essential to have it replaced
without delay by the manufacturer, his authorised service agent or a qualified workshop, to avoid danger. Protect your char-
ger from
damp and humidity, acid and acid fumes both during use and in storage. Damage resulting from failure to do so
is not covered
by warranty. Distance the charger from the battery during charging to avoid acid contamination. Place the
charger on a hard, flat surface, but NOT on plastic, textile or leather. An optional wall mounting bracket is available.
EXPOSURE TO LIQUIDS :
When placed on a horizontal flat surface this charger is designed to withstand exposure
to liquids accidentally spilled or splashed onto the casing from above, or to light rainfall. However, prolonged exposure is
inadvisable and longer service life will be obtained by minimizing such exposure. Failure of the charger due to oxidation
resulting from the eventual penetration of liquid into the electronic components is not covered by warranty.
CONNECTING TO BATTERY : To connect the battery to the charger, 2 sets of interchangeable connection sets are
supplied, the one with crocodile clamps for charging the battery off-vehicle, the other with metal eyelets for permanent
connection to the battery posts for easy connection to maintain the battery on-vehicle. When charging a car battery, or if
using the battery clamps, first disconnect & remove the battery from the vehicle and place it in a well ventilated area.
NOTE : If the battery is deeply discharged (and possibly sulphated), it is essential to disconnect the battery from the
vehicle before connecting the charger for recovery. The recovery mode circuit will not engage if it senses that the bat-
tery is still connected in a vehicle wiring circuit effectively offering a lower resistance than the battery on its own. If the
posts are solid, consult a professional service agent for assistance in attaching the metal eyelets to the battery posts.
Distance the polarised two-pole connector (for connection to the charger) as far as possible from the battery and make sure
it cannot foul any moving part of the vehicle and cannot be damaged by sharp edges. To prevent grime, dirt & damp from
entering the polarised connector, firmly close its resealable rubber protective capsule each time you disconnect the char-
ger at the two-pole connector. Replace any burnt fuse only with a similar new fuse of identical type and rating, T 7.5A.
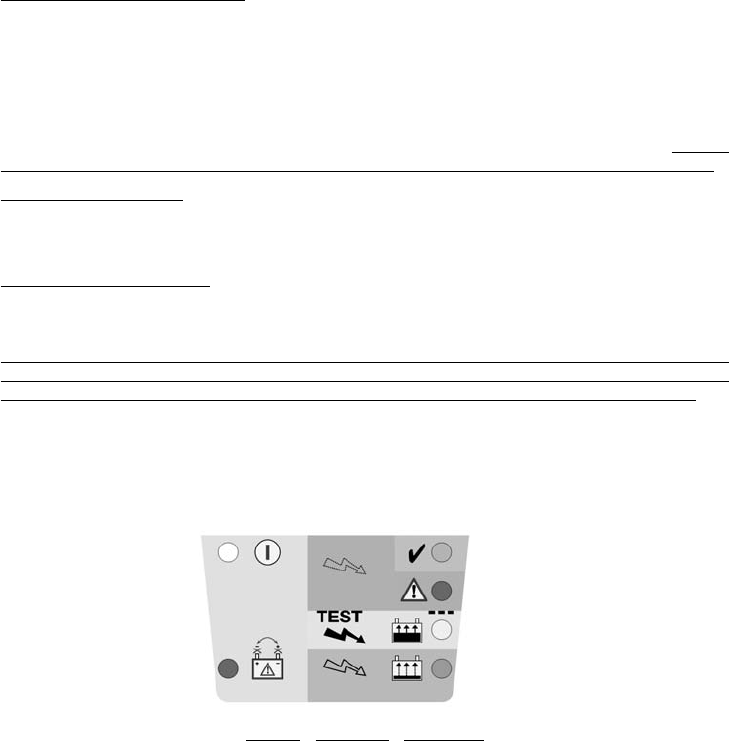
LED (light emitting diode) indicator information panel
Using the OptiMate
1) Connect the charger to the battery : RED clamp to POSITIVE (POS, P, +) terminal and BLACK clamp to NEGATIVE (NEG, N,
–) terminal.
2) Connect the charger to a mains supply socket providing AC supply of 220 to 240V. The «POWER ON» LED should illumi-
nate. If not, check your AC supply and the connection to it. If the «INVERSE POLARITY» LED indicates, your battery connec-
tions are inverted. The charger is protected against this error; no damage will result and it will automatically de-activate.
Disconnect clamps and reconnect correctly.
3) The orange RECOVERING LED (bottom right on LED panel) will light when all correct connections are made and if the bat-
tery voltage is above 2 Volts. If the battery is very flat (deep-discharged or sulphated) the orange LED may continue to indi-
cate for up to 2 hours while a special high voltage (about 20V maximum) is applied to force a very small fixed current
(200mA) into the battery in a recovery attempt. After 2 hours maximum, or, as soon as the battery can accept the normal
charging programme, (which for most batteries will occur immediately on connection) the orange RECOVERING LED will be
replaced by the yellow CHARGING LED.
AC Power ON
GREEN. Battery charged and ready
for use (GOOD BATTERY).
RED. WARNING condition : read RED
LED clause below.
ORANGE. Battery badly discharged/
slightly sulphated; RECOVERING.
YELLOW. Battery discharged, but
charging normally (CHARGING).
INVERSE POLARITY
Wrong battery connections.