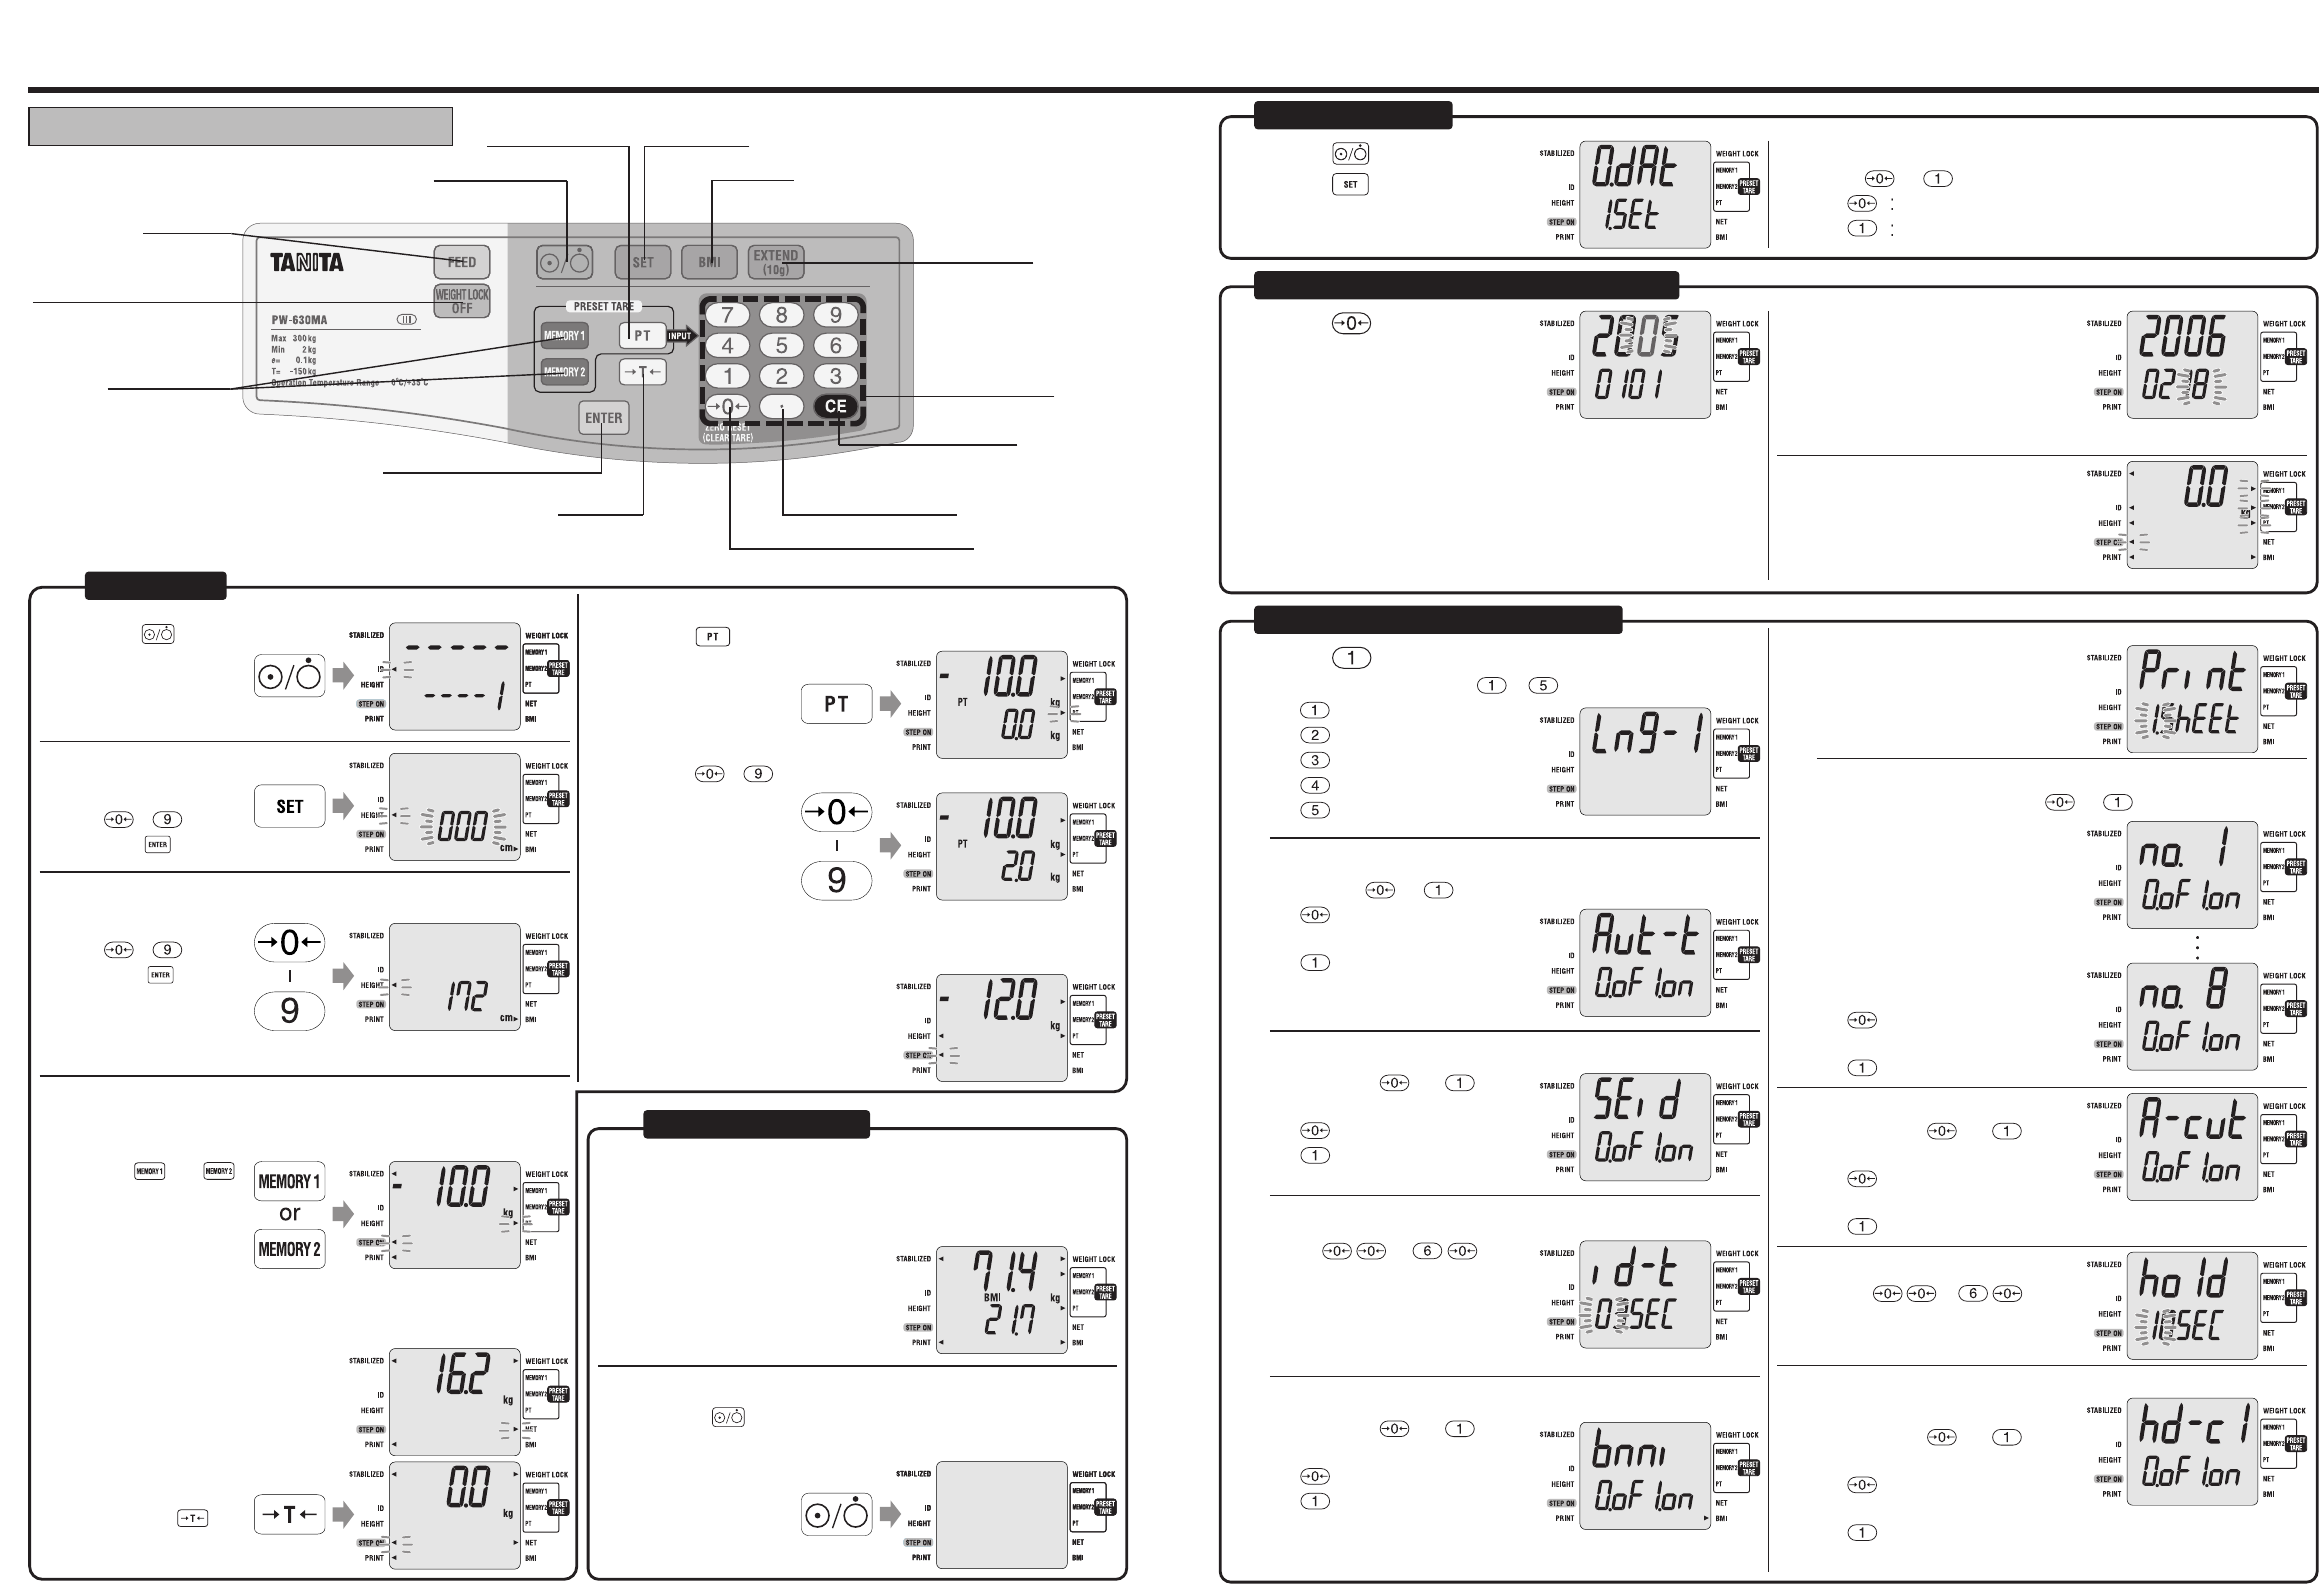
Control Panel
Feed key
ON / OFF key
Preset Tare key
BMI key
Decimal point key
Setting key
Extend key
Clear key
Numeric keys
Enter key
Zero reset (Clear tare) key
Tare key
Memory key
Weight Lock Off key
Press .
* In the case that ID
number is not input,
it moves to the step 3.
1
Turn OFF the power
Press the key.
The display goes off.
7
Input the ID number
(1) Input by pressing
- .
(2)Press .
2
3
Preparation
Weight measurement
Input the height
(1) Input by pressing
- .
(2) Press .
*In the case that OFF is
set in the “Setting of
the BMI”, it moves to
the step 4.
4
In the case to use the tare
(1) Place an object
(wheelchair, etc.)
to register on the
Platform.
(2) When WEIGHT
LOCK mark lights
up, press .
6
Make a measurement
Get on the centre of the Platform, and the measured value is
displayed. After displaying the measurement result, it is
printed out according to setting. After that, it automatically
returns to the ID input screen.
* In the case that the BMI is on, the
weight is displayed at the top
line, and the BMI is displayed at
the bottom line.
5
Input the clothing weight
(1) Press . 0.0 kg is displayed at the bottom line.
(3) While memory 1 or Memory 2 were set, total weight will be
displayed at the top line and PT should be lights up, then
STEP ON is flashing.
(2) Press - to input the clothing weight.
Quick Manual
As necessary, please copy and use.
Input the tare
*
In the case that the tare is not input, it moves to the “5 Input the clothing weight”.
In the case to use the preset tare
Press or .
The registered tare is
displayed, and the
s
to show the memory
number of the used
preset tare lights up, and the
s
to show the input instruction of
the clothing weight flashes.
Press .
Press .
1
Determine the setting mode
Input or with the numeric key, as necessary.
Setting of the date and time
Setting of each item
2
Change of setting
Press on the setting
screen
The input screen of the date and
time setting is displayed.The top
line is for the year, and the
bottom line for the month.
3
4
Setting of the date and time
(above in the step 2)
Returns to the
measurement screen
When all the input is completed,
it automatically returns to the
measurement screen.
5
3
Set the automatic reading of the preset tare
Input either or with the numeric key.
: Automatic reading is
not used.
: Automatic reading is
used.
4
Setting of each item
(above in the step 2)
Set ON / OFF of the ID number
Input either or with
the numeric key.
: ID number is not used.
: ID number is used.
5
Set the checking time of the ID number
Input – with
the numeric keys. (When
measuring, after the inputted
seconds have passed, it moves to
the next step.)
6
Set whether to display the BMI
Input either or with
the numeric key.
: Does not used the BMI.
: Used the BMI.
7
Set the number of
sheets to print
Input the number of sheets to
print with the numeric key.
8
10
Set the weight lock time
Input
–
with
the numeric keys.
11
Set the function to automatically release the
display fix
Input either or with
the numeric key.
:
Does not release the
weight lock automatically.
: Releases the weight lock automatically.
After input, it automatically returns to the measurement screen.
12
Set the print items
For each number, input either or with the numeric key.
no. 1: TANITA
no. 2: Model name
no. 3: Date and time
no. 4: ID number
no. 5: Height
no. 6: Weight and tare
no. 7: BMI
no. 8: BMI graph
: Does not print the
item
: Prints out the item
9
Input the current time
Input the numeric value from the
top line in order according to
flashing. When the date is
inputted, the time input screen is
automatically displayed.
Press on the setting screen
Language Selection. Input – with the numeric keys.
: English
: French
:German
: Italian
: Spanish
Set the automatic cutting
Input either or with
the numeric key.
: Does not automatically
cut after printing.
: Automatically cuts after printing.