1. Use fan only for purposes described in the instruction manual.
2. To protect against electrical shock do not immerse unit, plug, or cord in water or spray with liquids.
3. This appliance is not intended for use by persons (including children) with reduced physical, sensory or mental capabilities, or lack of experience
and knowledge, unless they have been given supervision or instruction concerning use of the appliance by a person responsible for their safety.
Children should be supervised to ensure that they do not play with the appliance.
4. Unplug from outlet when not in use, when moving fan from one location to another, before putting on or taking off parts and before cleaning.
5. Do not operate in the presence of explosive and/or flammable fumes.
6. Do not place fan or any parts neat an open flame, cooking or other heating appliances.
7. Do not operate any appliance with a damaged cord, plug, after the appliance malfunctions, or has been dropped/damaged in any manner.
8. The use of attachments not recommended or sold by the appliance manufacturer may cause hazards.
9. Do not let the cord hang over the edge of a table, counter, or come in contact with hot surfaces.
10. Do not operate without fan. grills properly in place.
Note: If you experience a problem, please return the fan to the place of the original purchase or see your warranty. Do not attempt to open the motor
housing yourself. Doing so may void your warranty and cause damage to the fan or personal injury.
If the supply cord is damaged, it must be replaced by the manufacturer or its service agent or a similarly qualified person in order to avoid a hazard.
PRODUCTINTRODUCTION
OPERATING INSTRUCTIONS
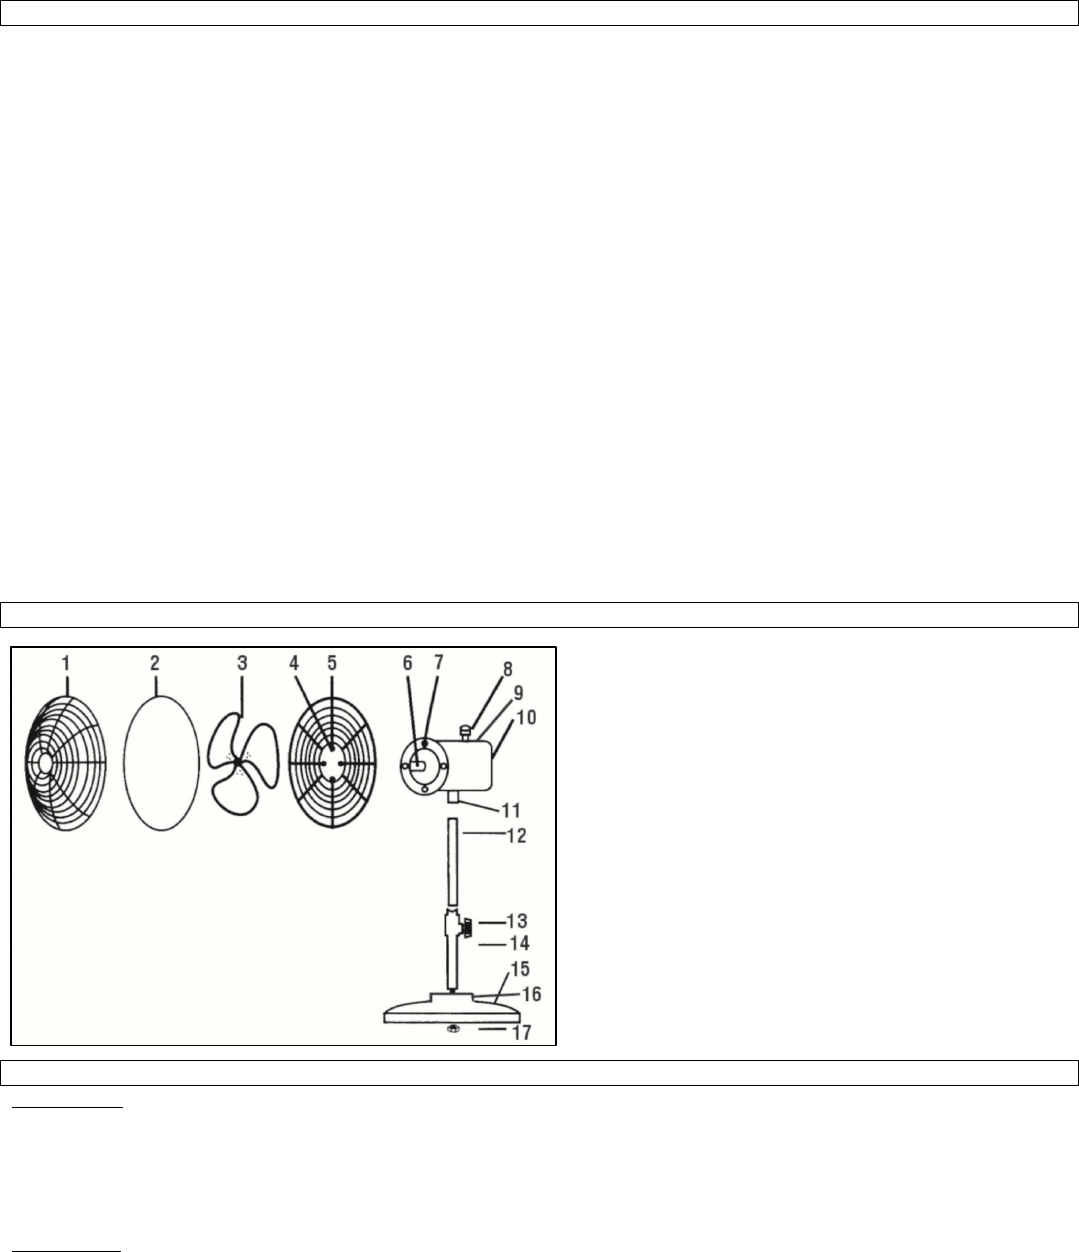
Head Assembly:
STEP1:Unscrew the 4 lock screw on the face of the fan housing, handle the rear grill to the motor housing by matching its 4 screw hole to the 4
screw hole on the front motor housing, then screw the lock screw to lock the rear grill and the front motor housing.
STEP2:insert the motor shaft into the fan blade by matching the motor shaft spindle to the D-shaped cut-out on fan blade, then screw the lock screw.
STEP3:Center the front grill. Allganing the logo, so it is horizontal and parallel to the floor, place onto the rear grill, and snap in place. Secure by
tightening the grill button screw at the bottom of the rear grill.
Pole Assembly:
Unscrew the screw in locking shaft at the bottom of fan housing. insert the upper extension pole to the locking shaft with the right hole position.
Base/Pole Assembly
Unscrew the screw at the bottom of the lower extension pole, and insert the pole through the base, then handtighten the base screw to securely
Libble takes abuse of its services very seriously. We're committed to dealing with such abuse according to the laws in your country of residence. When you submit a report, we'll investigate it and take the appropriate action. We'll get back to you only if we require additional details or have more information to share.
Product:
Forumrules
To achieve meaningful questions, we apply the following rules:
First, read the manual;
Check if your question has been asked previously;
Try to ask your question as clearly as possible;
Did you already try to solve the problem? Please mention this;
Is your problem solved by a visitor then let him/her know in this forum;
To give a response to a question or answer, do not use this form but click on the button 'reply to this question';
Your question will be posted here and emailed to our subscribers. Therefore, avoid filling in personal details.
Register
Register getting emails for Suntec CoolBreeze 4000 SVM at:
new questions and answers
new manuals
You will receive an email to register for one or both of the options.
Get your user manual by e-mail
Enter your email address to receive the manual of Suntec CoolBreeze 4000 SVM in the language / languages: English as an attachment in your email.
The manual is 0,21 mb in size.
You will receive the manual in your email within minutes. If you have not received an email, then probably have entered the wrong email address or your mailbox is too full. In addition, it may be that your ISP may have a maximum size for emails to receive.
The manual is sent by email. Check your email
If you have not received an email with the manual within fifteen minutes, it may be that you have a entered a wrong email address or that your ISP has set a maximum size to receive email that is smaller than the size of the manual.
The email address you have provided is not correct.
Please check the email address and correct it.
Your question is posted on this page
Would you like to receive an email when new answers and questions are posted? Please enter your email address.