IMPORTANT: READ THROUGH ALL INSTRUCTIONS BEFORE BEGINNING TO USE YOUR PEDOMETER
BATTERY CAUTION:
• Non-rechargeable batteries are not to be recharged
• Rechargeable batteries must be removed before recharging
• Rechargeable batteries only to be recharged under adult supervision
• Different types of batteries must not be mixed
• New and used batteries not to be mixed
• Exhausted batteries to be removed
• Do not dispose of battery in fire; battery may explode or leak
• Do not dispose of product in fire; battery may explode or leak
TO OPERATE YOUR NEW PEDOMETER
1. Remove the plastic film from the LCD display on the front of the pedometer.
2. Slowly pull the battery protector from the battery door located on the back to activate your pedometer.
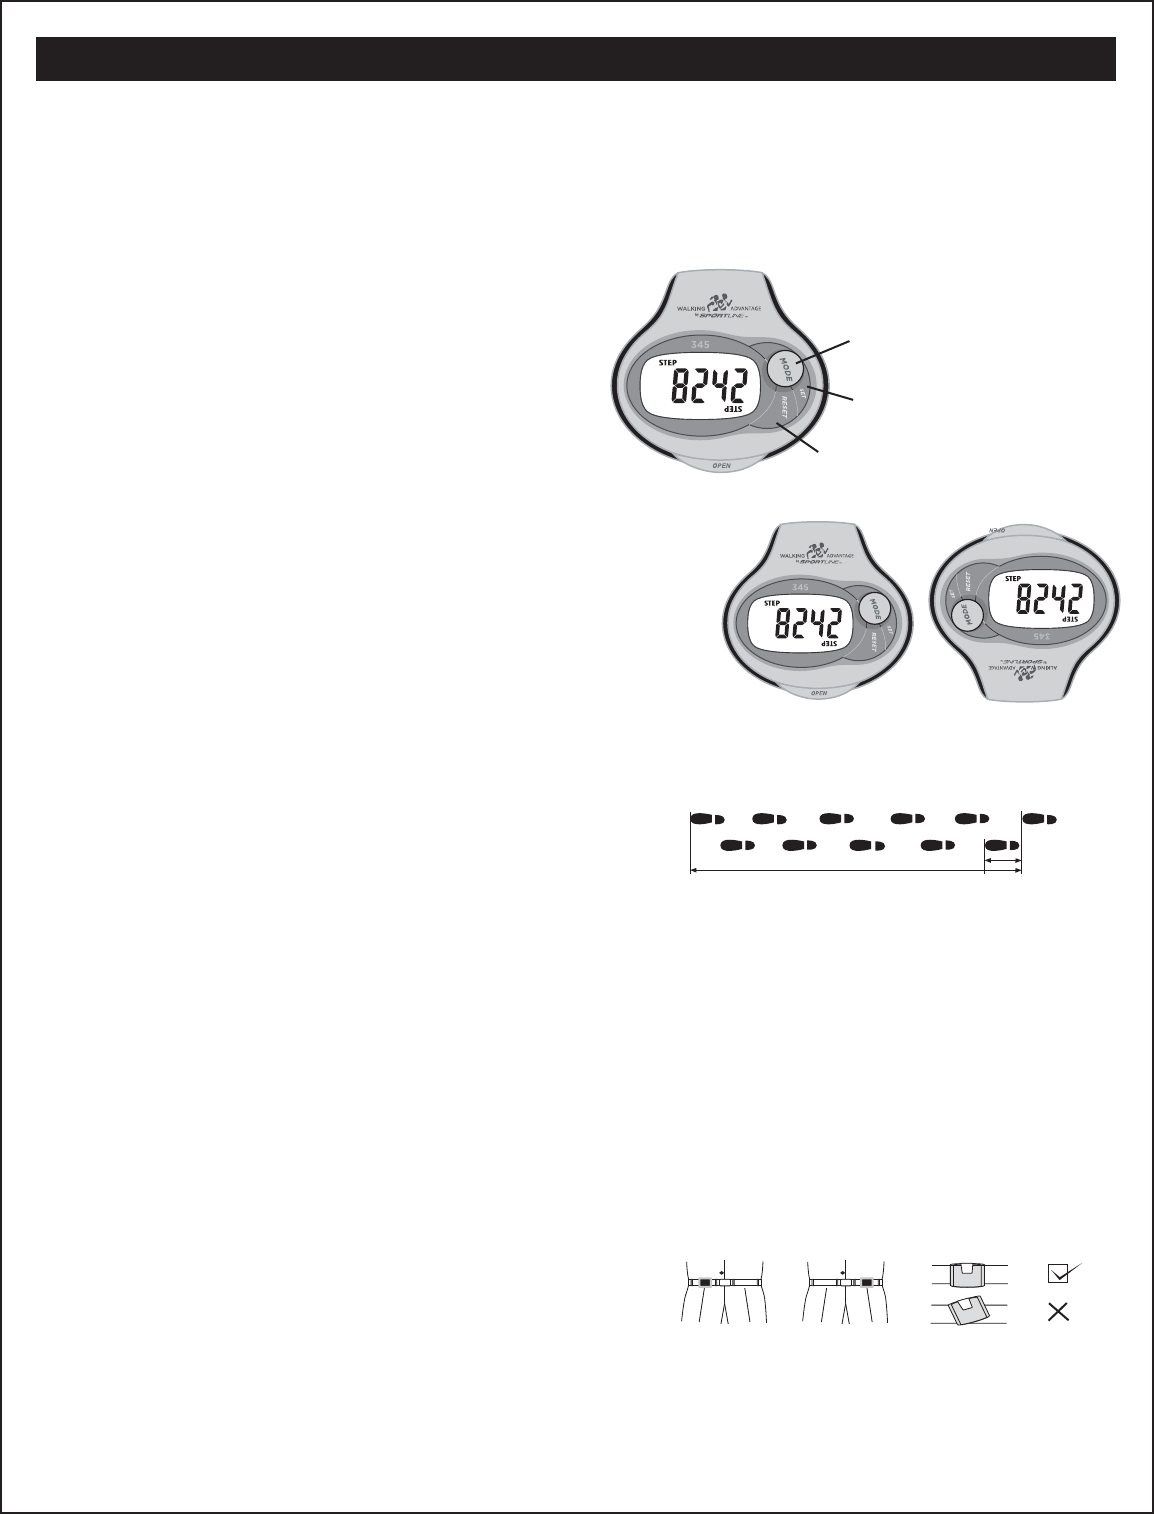
EXPLANATION OF BUTTON FUNCTIONS
BUTTON A – RESET: This button has three functions:
1. To change from miles to kilometers measurements.
2. To reset pedometer back to zero in STEP, DISTANCE or CALORIE modes.
3. To increase hours in CLOCK setting mode.
BUTTON B – SET: Used for setting stride length, weight, and time of day. Also used to increase minutes in CLOCK setting mode.
BUTTON C – MODE: Allows you to choose the MODE you want in the sequence of STEP, DISTANCE, CALORIE and CLOCK.
DISPLAY OPTIONS AVAILABLE
This pedometer can measure in four modes:
STEP: Shows how many steps you have walked (from 0 to 99999).
DISTANCE: Shows the distance you have walked in miles or kilometers (from 0 to 99.999).
CALORIES: Calculates the number of calories you have burned during your exercise period (from 0 to 9999.9).
CLOCK: In addition to the above measurements, this pedometer also has a CLOCK mode that provides the time of day.
REVERSIBLE DISPLAY
This pedometer has a unique feature that allows the display to reverse so that you can read it from two positions…
a) Reads in standard format when held upright in your hand;
b) Automatically reverses when the LCD display is lifted upward so the data can be read without removing it from your waistline during your exercise program.
TO SET UP YOUR PEDOMETER
1. Decide first whether you want your pedometer’s DISTANCE mode to operate in miles or kilometers.
2. Determine if the DISTANCE mode is currently set to MILE or KM by hitting the MODE button. If already set to your desired measurement, please skip to "Input Your Stride Length".
3. If you need to change from MILE to KM or vice versa, press and hold the RESET button for 5 seconds. This will change Stride setting measurements from inches to centimeters and weight setting measurements from pounds to kilograms as well.
INPUT YOUR STRIDE LENGTH (range 12-96 inches or 30 – 240 cm; the default values are 30 inches/75 cm):
1. Walk 10 steps.
2. Measure the distance you have walked either from heel-to-heel or toe-to-toe.
3. Divide the distance covered by the number of steps.
4. Example: Distance covered in 10 steps = 360 inches. Divide the number of inches by the number of steps (360 inches divided by 10) = 36 inches.
IMPORTANT: Please remember that the length of your stride while walking is different than the length of your stride while running. If you plan to use this pedometer for both types of exercise, you will have to reprogram your stride length when you go
from one to the other.
HOW TO ENTER YOUR STRIDE LENGTH
1. Press the MODE button (C) on the display panel to DIST (DISTANCE).
2. Press the SET button to enter the setting mode, then press (
B) repeatedly to enter your personal stride length. Each press advances your stride by one inch or one centimeter. Stride range is 12 - 96 inches or 30 - 240 cm.
NOTES:After five seconds the display will return to the DIST mode. If you want to go to the DIST mode immediately, press the MODE button (C).
The pedometer will only count up. It will count up to 96 inches/240 cm before dropping down to 12 inches/30 cm to allow you to count up from there if your stride is less than the default value.
HOW TO SET THE CALORIE COUNTER
In order to measure your calories, you must enter your weight into the pedometer’s memory. To do this follow these steps:
1. Press the MODE button (C) on the display panel to KCAL (Calories).
2. Press the SET button (B) , then continuously press (B)to enter your personal weight. Each press advances your weight by 1 pound or 1 kilogram (Range 60 to 300 lbs. or 30 to 135 kg; the default values are 100 lbs./45 kg).
NOTE: After 5 seconds, the display will return to the KCAL mode. If you want to go to the KCAL mode immediately, press the MODE button (C) .
HOW TO SET THE CLOCK
1. Press the MODE button (C) to CLOCK .
2. Press the SET button (B) to enter the setting mode. Display will flash.
3. Press (A) to set HOURS. Press (B) to set minutes. (A=AM, P=PM). Must be entered while numbers are still flashing – if flashing stops before time is entered, press set again.
4. Clock will return to CLOCK mode after 6 seconds. If you want to go to the CLOCK mode immediately, press the MODE button (C) .
HOW TO WEAR YOUR PEDOMETER
1. Pedometer case MUST be closed in order to operate properly.
2. Clip the unit to your belt or to the top of your shorts or trousers as close as possible to the crease line of your pant.
3. The pedometer must always be horizontal and be parallel to the ground. Do not attach at an angle or sideways as false readings will result.
TO START YOUR EXERCISE
1. Press the RESET button (A) for 2 seconds. The display will show zero. All measurement functions (STEPS, DISTANCE, CALORIES) will reset to zero.
2. Begin exercising. The unit will keep track of your steps, distance and calories burned.
3. By pressing the MODE
button (C) you can switch to other modes to get those readings as well.
Libble takes abuse of its services very seriously. We're committed to dealing with such abuse according to the laws in your country of residence. When you submit a report, we'll investigate it and take the appropriate action. We'll get back to you only if we require additional details or have more information to share.
Product:
Forumrules
To achieve meaningful questions, we apply the following rules:
First, read the manual;
Check if your question has been asked previously;
Try to ask your question as clearly as possible;
Did you already try to solve the problem? Please mention this;
Is your problem solved by a visitor then let him/her know in this forum;
To give a response to a question or answer, do not use this form but click on the button 'reply to this question';
Your question will be posted here and emailed to our subscribers. Therefore, avoid filling in personal details.
Register
Register getting emails for Sportline 345 at:
new questions and answers
new manuals
You will receive an email to register for one or both of the options.
Get your user manual by e-mail
Enter your email address to receive the manual of Sportline 345 in the language / languages: English as an attachment in your email.
The manual is 0,09 mb in size.
You will receive the manual in your email within minutes. If you have not received an email, then probably have entered the wrong email address or your mailbox is too full. In addition, it may be that your ISP may have a maximum size for emails to receive.
If you have not received an email with the manual within fifteen minutes, it may be that you have a entered a wrong email address or that your ISP has set a maximum size to receive email that is smaller than the size of the manual.
The email address you have provided is not correct.
Please check the email address and correct it.
Your question is posted on this page
Would you like to receive an email when new answers and questions are posted? Please enter your email address.