3 4
Open the door/load the laundry/
press the programme selector/
set the programme
1
2
Drying
Drying
ʑ
a
a
a
ʑ
+
Ôc
Ô
s a
Ûü Ö÷ ×÷ Õ
Ö÷ a
×÷
a
Õ÷ '
Ô
Close the door
3
ʋ
ʋ
ʋ
ʋ
ʋ
ʋ
ʋ
ʋ
ʋ
ʋ
ʋ
Never start the dryer if it is damaged.
Inform your after-sales service.
Inspect the
dryer
Sort the laundry
Remove all items from pockets.
Check for cigarette lighters.
The drum must be empty prior to loading.
See programme overview on page 7.
Make sure your hands are dry.
Hold the plug only.
Connect the
mains plug
Empty the condensation container
If the condensation outlet is to be installed, it is not
necessary to empty the condensation container. a
separate Instructions for condensation drain.
Empty the container after each drying cycle, and not during
the cycle.
1. Remove the container, holding it level.
2. Pour out the condensation. Push the container back in
until it clicks into place.
You must also observe the a Installation and maintenance
instructions, Page 3.
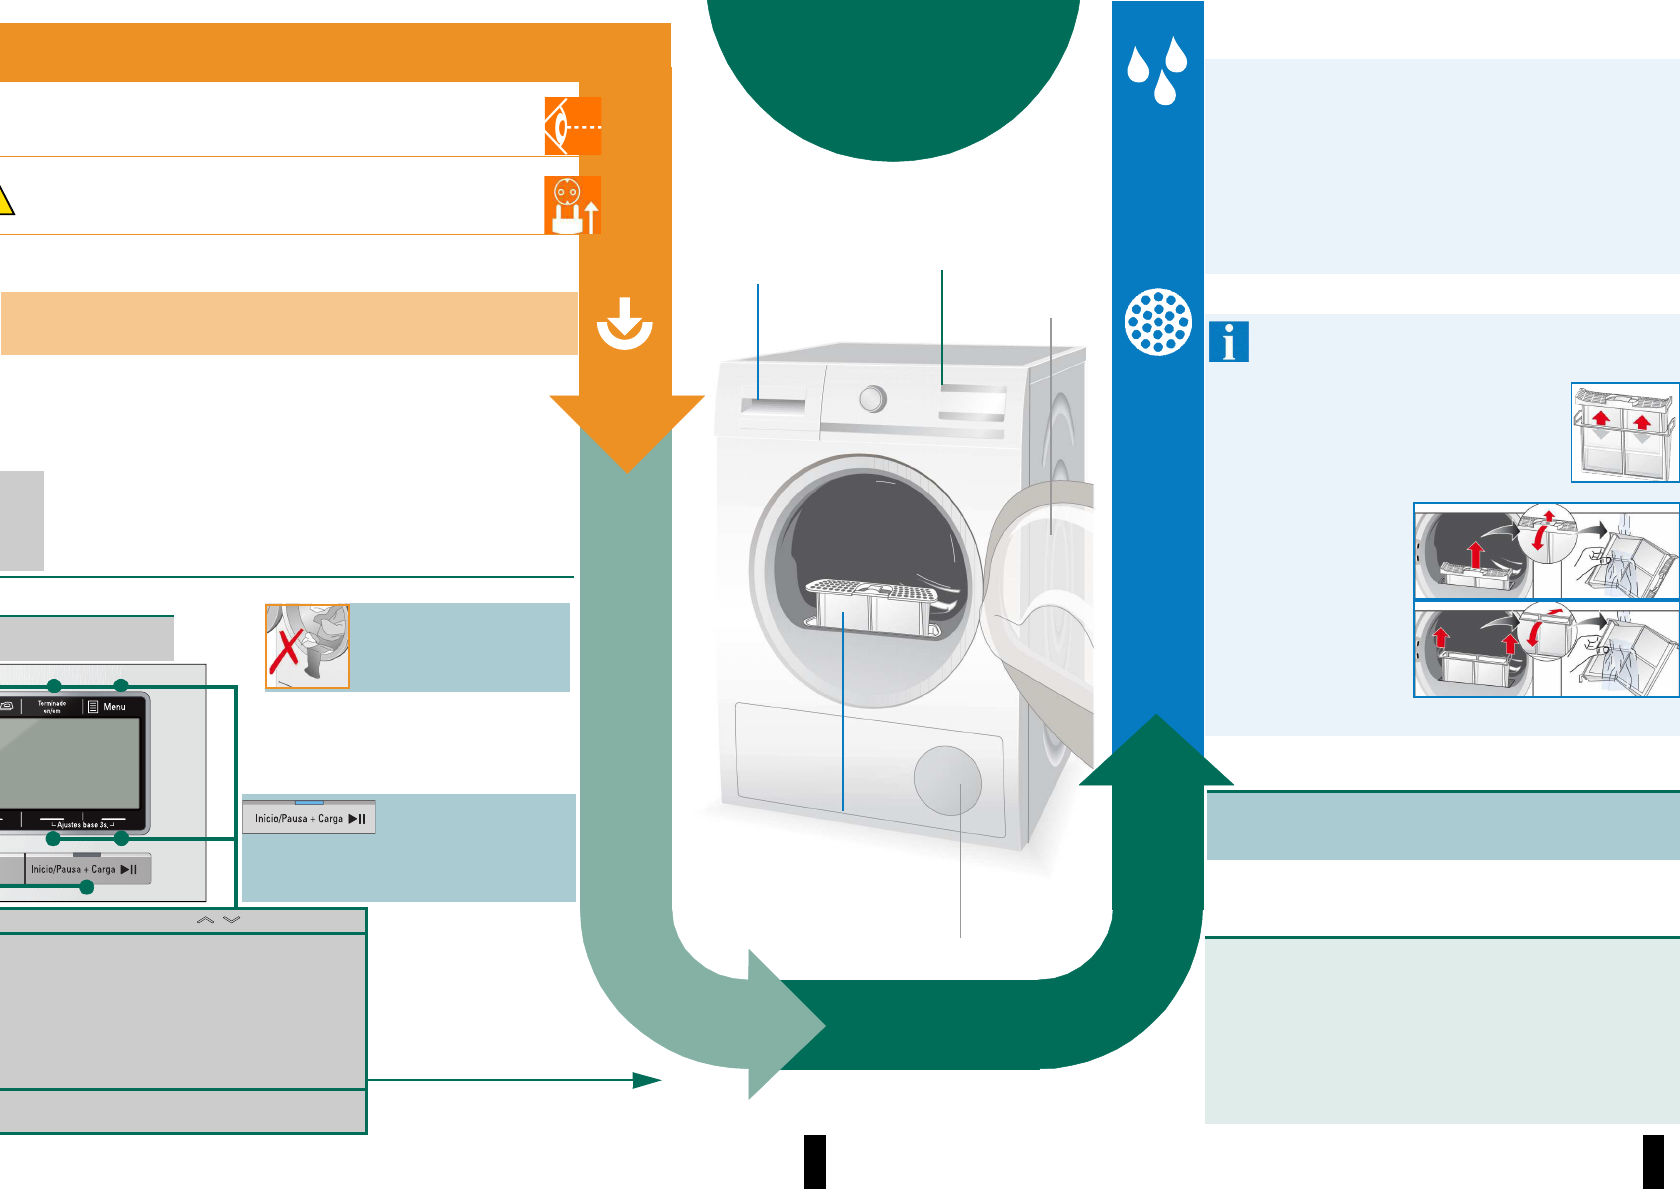
Clean the fluff filters
The fluff filter consists of two parts.
Clean the inner and outer fluff filter after
every drying cycle.
1. Open the door. Remove fluff from the
door/door area.
2. Pull out the inner
and outer fluff filter
and open them out.
3. Remove any fluff,
rinse both fluff filters
under running water
and dry thoroughly.
4. Fold the fluff filters
closed, put them
back together and reinsert into the appliance.
End of the programme ...
Interrupt the programme
1 Open the door or press the Inicio/Pausa + Carga
(Start/Pause)
Ø button; the drying cycle is cancelled.
2 Add or remove laundry and close the door.
3 If required, select a new programme and additional
functions. Press the Inicio/Pausa + Carga
(Start/Pause)
Ø button. The Terminado en/em
(Finish in) time is updated after a few minutes.
hc
(
'c
)c
a
a
a
a
a
a
a
a
a
Remove the laundry and switch off
the dryer
5
4
Condensation
container with filter
Fascia panel
Two-part fluff
filter
Air inlet
Door
aInstallation and maintenance instructions, Page 1
Clean fluff filters reduce energy consumption.
ogramme
Change the functions in the display using the buttons ? >
C/board Dry Extra, +cC/board Dry, ÔcIron Dry
Ô
Reduced ironing function can be set up to 120 mins
Time delay / sChildlock
Ûü
Ö÷Spin Speed, ×÷Adjust drying level, Õ÷low heat
end signal, button signal, auto power-off and language
Ø
Display panel / Buttons
Select the
Inicio/Pausa +
Carga Ø
(Start/Pause) button
Further information
can be found on Page 5
ʋ
ʋ
a