800.798.7398
8 9
www.sharkrocket.com
STORAGE
RANGEMENT
ALMACENAMIENTO
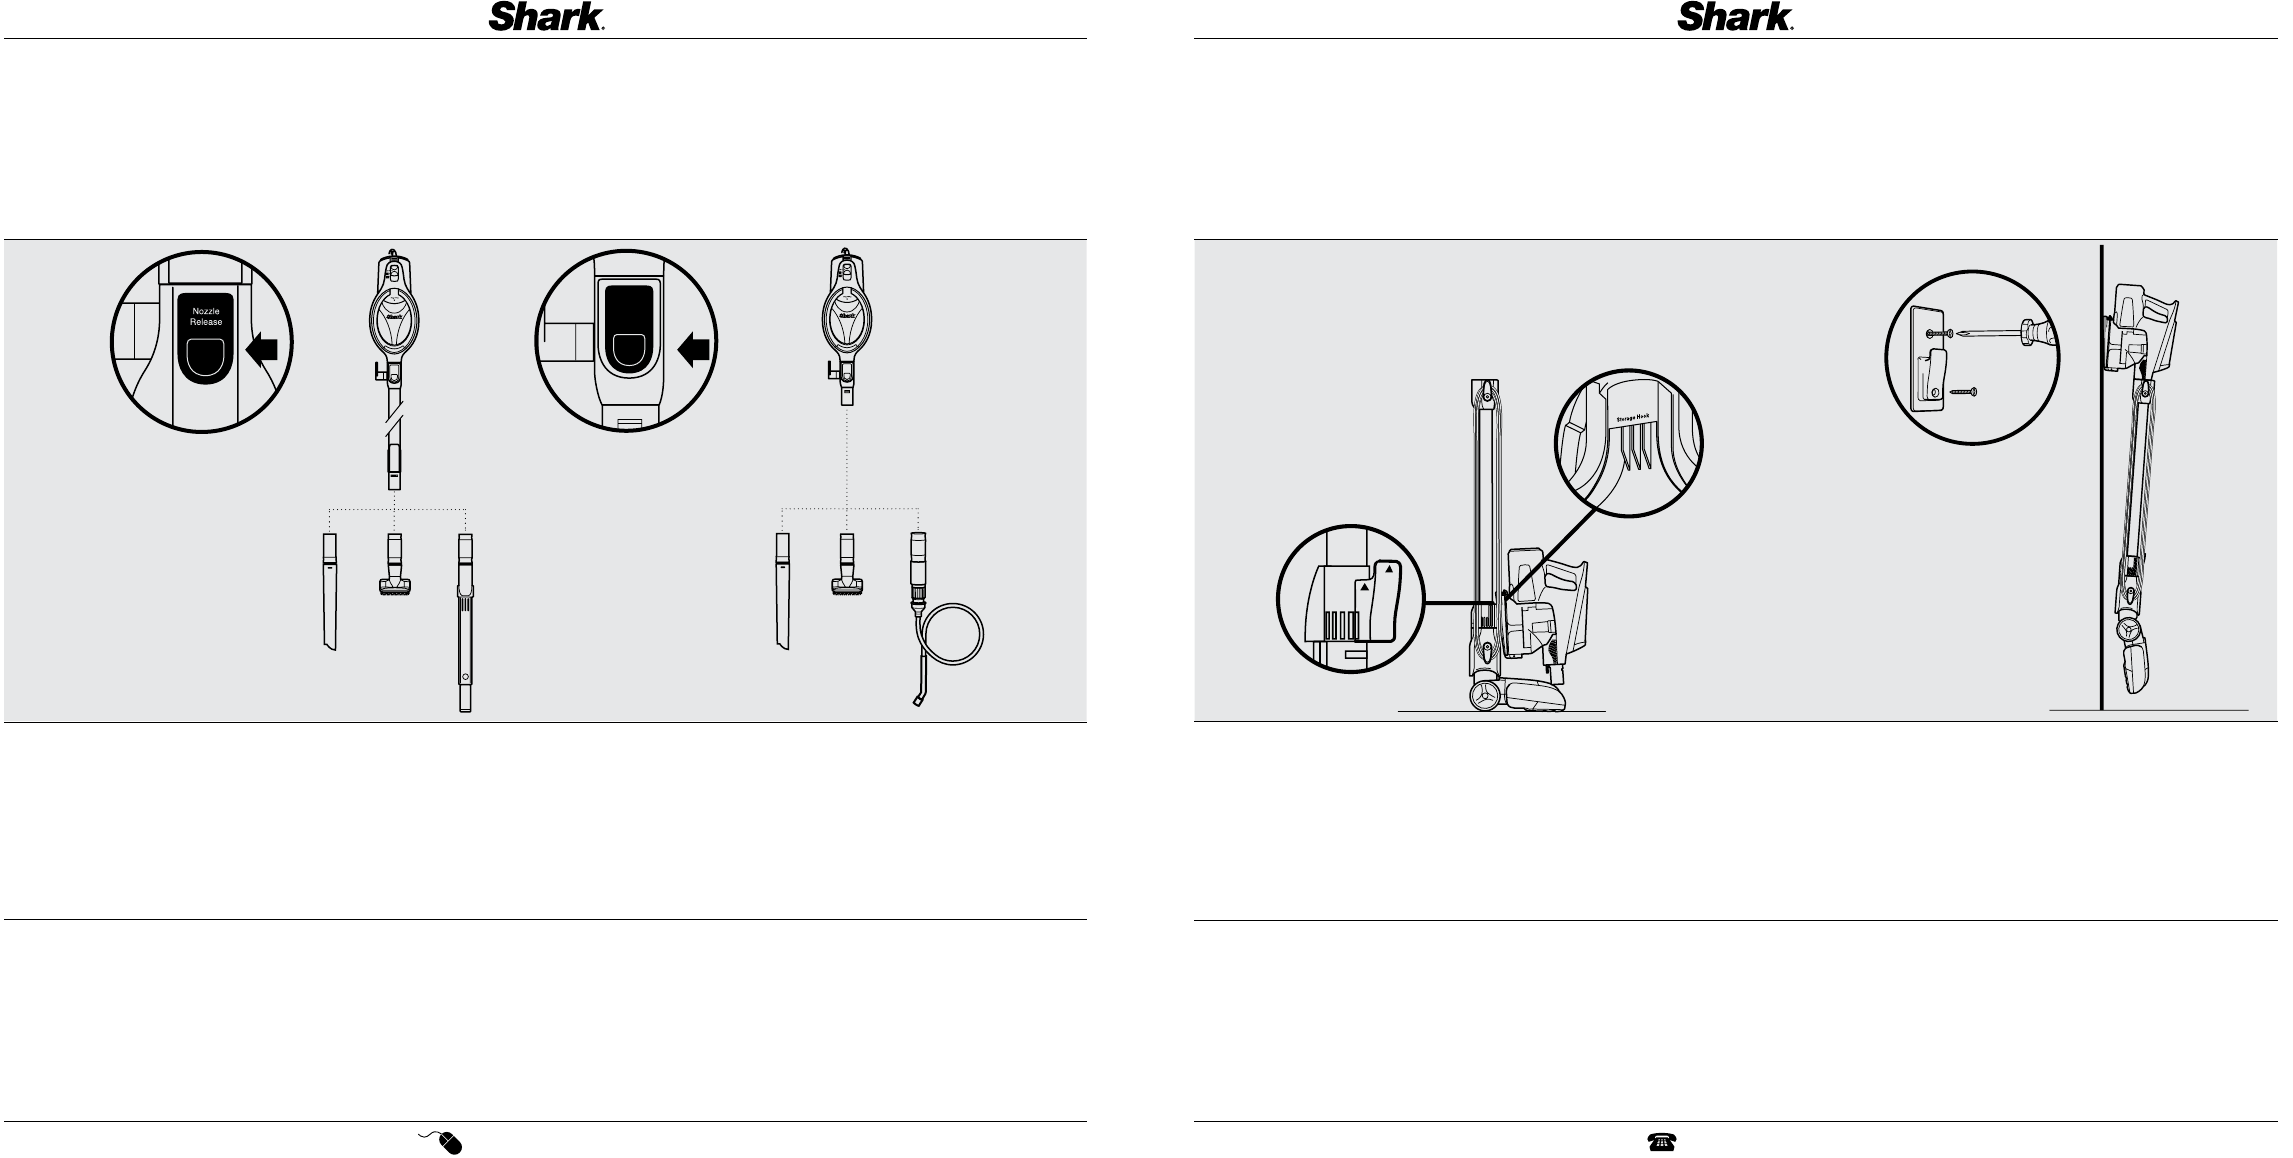
ABOVE FLOOR
CLEANING
NETTOYAGE
AU-DELÀ DU SOL
PARA LIMPIAR
POR ENCIMA DEL
PISO
This vacuum has the reach to clean up above
floors or in tight spaces by using the tube. It
also has the convenience of a handheld vacuum
when using it without the tube.
1 Press the colored button on the floor nozzle and
pull to disconnect it from the end of the tube.
Attach desired cleaning accessory.
2 Press the colored button on the top of the tube
and pull to disconnect it from the handheld
portion. Attach desired cleaning accessory.
NOTE: Select cleaning accessories are included
with this model. Additional accessories are
available for purchase at
www.sharkrocket.com or by calling
800.798.7398.
For a list of what is included with this model,
refer to inside flap of box.
Grâce au tube, la portée de cet aspirateur vous
permet de nettoyer des endroits au-delà du
sol ou difficiles à atteindre. Cet appareil offre
également les avantages d’un aspirateur portatif
lorsqu’il est utilisé sans tube.
1 Enfoncez le bouton coloré de la brosse à
planchers afin de la dégager du tube. Fixez
l’accessoire que vous souhaitez utiliser.
2 Enfoncez le bouton coloré près de l’extrémité
supérieure du tube afin de dégager celui-ci de
la section portative. Fixez l’accessoire que vous
souhaitez utiliser.
REMARQUE: Ce modèle comprend certains
accessoires de nettoyage. Il est possible
d’acheter des accessoires supplémentaires en
visitant le site www.sharkrocket.com ou en
appelant au 1-800-798-7398.
Pour une liste de ce qui est inclus avec ce
modèle, reportez-vous au rabat intérieur de la
boîte.
Esta aspiradora tiene alcance como para
limpiar por encima del piso o en lugares de
difícil acceso usando el tubo. También tiene
la conveniencia de una aspiradora portátil al
usarla sin el tubo.
1 Presione el botón de color del cabezal para
pisos y tire para desconectarlo del extremo del
tubo. Coloque el accesorio de limpieza deseado.
2 Presione el botón de color del extremo del tubo
y tire para desconectarlo de la parte portátil.
Coloque el accesorio de limpieza deseado.
NOTA: Algunos accesorios de limpieza vienen
incluidos con este modelo. Accesorios
adicionales se pueden comprar en www.
sharkrocket.com o llamando al 800.798.7398.
Por una lista de lo que viene incluido con este
modelo, consulte la pestaña interna de la caja.
There are 2 recommended ways to store this
vacuum.
OPTION 1: Press the colored button on the
top of the tube and pull to separate it from the
handheld portion of the vacuum. There is a hook
on the bottom of the handheld portion. Hook it
onto the hanger that is on the bottom portion
of the tube. Wrap the cord around the 2 cord
hooks. The unit is now ready to be stored.
OPTION 2: Use the wall mount that was
included in the vacuum box. Using a Philips
head screwdriver, find a spot on the wall on
which you would like to store this vacuum.
Place each screw through the two holes in
the wall mount and screw them into the wall.
There is a hook on the bottom of the handheld
portion. Hook it onto the hanger that is on the
wall mount.
If you have drywall, use the plastic anchors
provided before screwing wall mount in place.
Nous vous recommandons l’un des deux modes
de rangement suivants.
OPTION 1: Enfoncez le bouton coloré près de
l’extrémité supérieure du tube afin de dégager
celui-ci de la section portative de l’aspirateur.
La partie inférieure de la section portative
est dotée d’un crochet. Accrochez-le sur le
support au bas du tube. Enroulez le cordon
autour des deux supports d’enroulement du
cordon. L’appareil est maintenant prêt pour le
rangement.
OPTION 2: Utilisez le support mural compris
dans l’emballage de l’aspirateur. Déterminez
l’endroit où vous souhaitez fixer le support
mural pour ranger l’aspirateur. Prenez un
tournevis à tête cruciforme. Insérez les vis dans
les deux trous du support mural et vissez-les
dans le mur. La partie inférieure de la section
portative est dotée d’un crochet. Accrochez-le
sur le support du crochet mural.
Si vos murs sont faits de cloisons sèches,
insérez les chevilles en plastique fournies avant
de visser le support mural en place.
Existen dos formas recomendadas para guardar
esta aspiradora.
OPCIÓN 1: Presione el botón de color del
extremo del tubo y tire para separarlo de la
parte portátil. Hay un gancho en la parte de
abajo de la parte portátil. Engánchelo en el
gancho que está en la parte de abajo del tubo.
Enrosque el cable alrededor de los dos ganchos
para el cable. La unidad está lista para ser
guardada.
OPCIÓN 2: Use el soporte para pared que vino
incluido en la caja de la aspiradora. Con un
destornillador Phillips, elija un lugar en la pared
en el que le gustaría guardar su aspiradora.
Coloque cada tornillo a través de los dos
orificios del soporte de pared y atorníllelos en
la pared. Hay un gancho en la parte de abajo de
la parte portátil. Engánchelo en el gancho que
está en el soporte de pared.
Si tiene paneles de yeso, use los anclajes
plásticos incluidos antes de atornillar el soporte
de pared en su lugar.
1 2