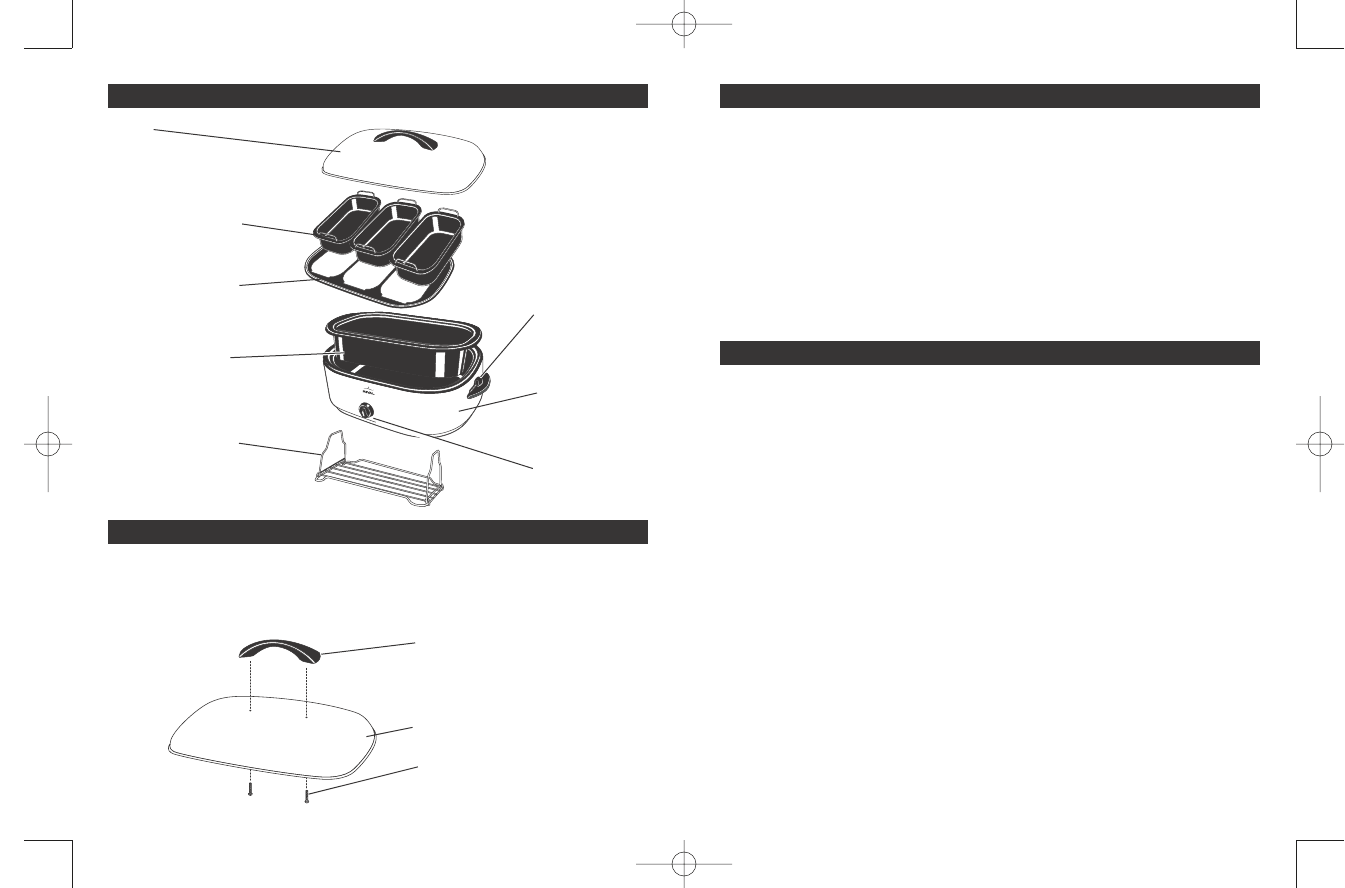
559840
3
Zoom out
Zoom in
Previous page
1/8
Next page
-5-
Always use the REMOVABLE ROASTING PAN in the roaster oven
when cooking.
NOTE: Never place food or liquid directly into the ROASTER OVEN BODY.
•Avoid the steam vents when removing or lifting the LID.
Significant amounts of heat escape whenever the LID is removed;
therefore the cooking time must be extended. Avoid frequent
removal of the LID for checking cooking progress or stirring.
•To use the LID REST feature, hold the LID upright by the HANDLE
and place the edge of the LID under the metal tabs just above either
side HANDLE.
Convenience foods can be baked in the roaster oven. Place container
on ROASTING RACK. Follow package directions.
Meats roasted in your Roaster Oven will be moist and tender. For
additional browning, brush oil or butter over the meat before cooking.
Lowering temperature and cooking longer will also give meat a
crisper, darker brown skin.
•To create a darker roasted, crispier skin poultry, do not add liquids (with
the exception of the basting butter or oil) until there are only 30
minutes left of cooking.
1. Remove all packaging materials.
2. Wash the REMOVABLE ROASTING PAN, ROASTING RACK, BUFFET
SERVER FRAME, SERVING DISHES and LID in hot, soapy water using
a sponge or wash cloth. Rinse thoroughly.
3. The outside of the ROASTER OVEN BODY may be cleaned with a soft
cloth and warm soapy water. Wipe dry. Do not use abrasive cleaners.
Do not immerse the ROASTER OVEN BODY in water.
NOTE: Due to manufacturing process, some smoke and odor may be
noticed during the first use. This should disappear after the first heating
of the Roaster Oven.
TIPS FOR ROASTING
PREPARING YOUR ROASTER OVEN FOR USE
18 Quart
Roaster Oven
KNOW YOUR ROASTER OVEN
LID
REMOVABLE
SERVING DISHES
BUFFET SERVER
FRAME
REMOVABLE
ROASTING PAN
REMOVABLE
ROASTING RACK
LID
REST
ROASTER
OVEN BODY
TEMPERATURE
CONTROL
-4-
1. LID HANDLE
2. LID
3. SCREWS
1. Locate the LID, LID HANDLE.
2. Unscrew the SCREWS from the LID HANDLE.
3. Use the screw driver to screw one end of the LID HANDLE first.
HOW TO ASSEMBLE YOUR LID
RO180BR-C/188BR06EM2.qxd 11/9/06 4:55 PM Page 5
3


Need help? Post your question in this forum.

Forumrules


Report abuse

Libble takes abuse of its services very seriously. We're committed to dealing with such abuse according to the laws in your country of residence. When you submit a report, we'll investigate it and take the appropriate action. We'll get back to you only if we require additional details or have more information to share.

Product:

For example, Anti-Semitic content, racist content, or material that could result in a violent physical act.

For example, a credit card number, a personal identification number, or an unlisted home address. Note that email addresses and full names are not considered private information.

Forumrules

To achieve meaningful questions, we apply the following rules:

Register

Register getting emails for Rival RO188BR at:


You will receive an email to register for one or both of the options.


Get your user manual by e-mail

Enter your email address to receive the manual of Rival RO188BR in the language / languages: English as an attachment in your email.

The manual is 0,5 mb in size.


You will receive the manual in your email within minutes. If you have not received an email, then probably have entered the wrong email address or your mailbox is too full. In addition, it may be that your ISP may have a maximum size for emails to receive.

The manual is sent by email. Check your email

If you have not received an email with the manual within fifteen minutes, it may be that you have a entered a wrong email address or that your ISP has set a maximum size to receive email that is smaller than the size of the manual.

The email address you have provided is not correct.

Please check the email address and correct it.

Your question is posted on this page

Would you like to receive an email when new answers and questions are posted? Please enter your email address.


Info