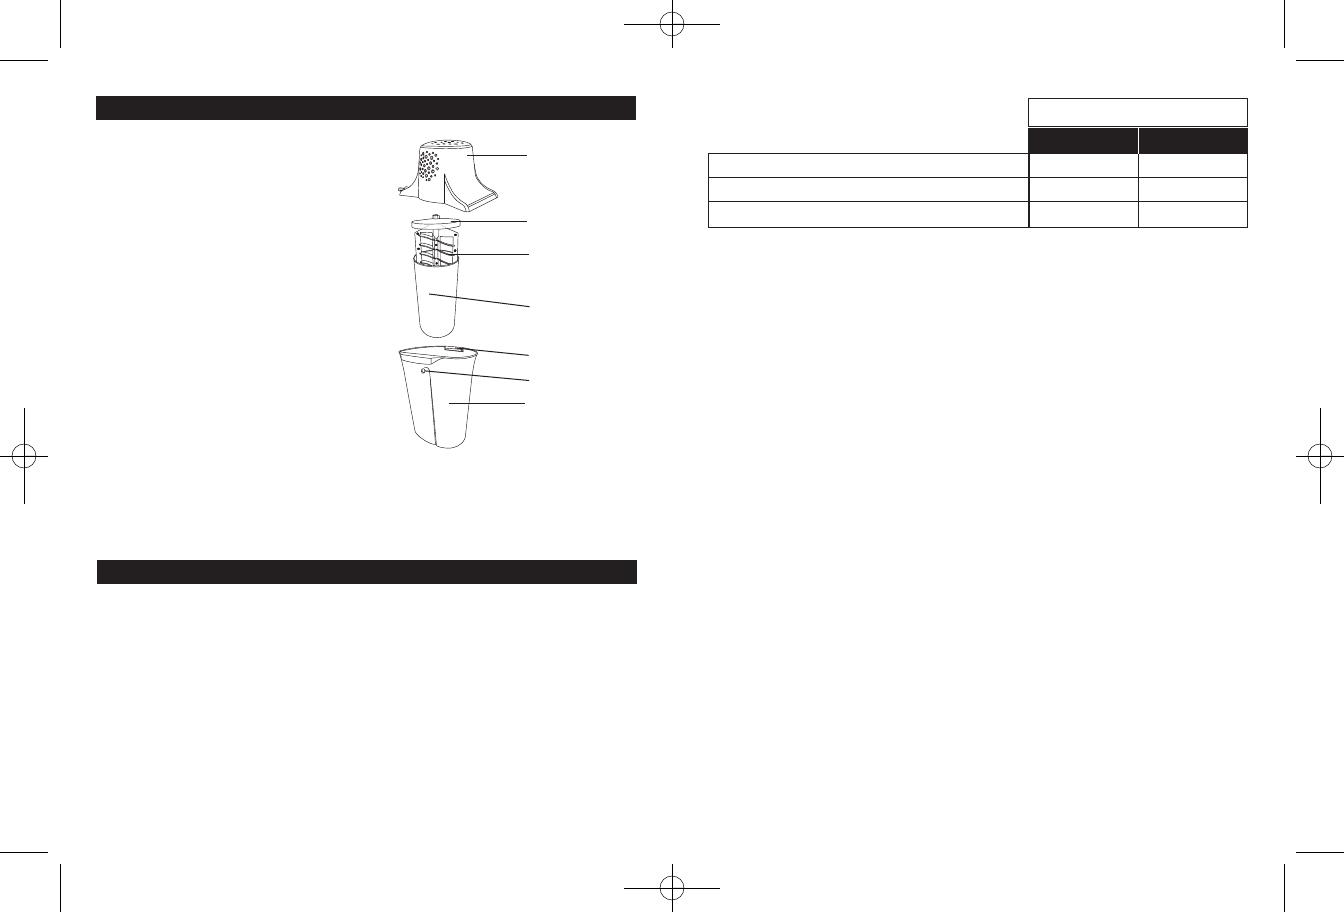
• MOTOR DRIVE
Top mounted. Engages stem of
DASHER and locks to bucket.
• COVER
Tab in COVER fits notch in ice
cream can.
• DASHER
Stem on top fits through hole
in center of COVER, and
engages MOTOR DRIVE.
• ICE CREAM CAN
Container holds ice cream
mixture.
• DRAIN HOLE
Allows salt water to flow freely
out of BUCKET.
• BUCKET
MOTOR DRIVE tabs secure BUCKET. DRAIN HOLE located near top of
BUCKET. Holds rock salt and ice.
4. Place filled ICE CREAM CAN in BUCKET. Make sure ICE CREAM CAN is
centered and engages with bottom of BUCKET.
5. Place MOTOR DRIVE over ICE CREAM CAN so that stem of DASHER
engages hole in bottom of MOTOR DRIVE. Rotate ICE CREAM CAN
slightly until MOTOR DRIVE engages ICE CREAM CAN COVER. Rotate
the motor counter clockwise to secure tabs underneath motor into the
bucket. Plug power cord into 120 volt AC outlet.
6. While ice cream maker is running, distribute 2 inches of ice around
bottom of BUCKET. Sprinkle approximately
1
/4 cup salt uniformly over
layer of ice. (See “Important points”) NOTE: The DASHER does not
move, the ICE CREAM CAN turns around it.
7. Continue adding layers of ice, with salt between layers, until ice level
reaches top of rotating ICE CREAM CAN. NOTE: Should ice cream
maker stop before churning is complete (approximately 20-40 minutes),
check to see if large ice cubes are jammed against the rotating ice
cream can. (See “Important Points”)
8. Ice cream should churn about 20-40 minutes or until motor stops.
Unplug and remove MOTOR DRIVE.
9. Clear ice and salt away from top of ICE CREAM CAN. Wipe carefully to
remove salt and water before removing the COVER. Lift out DASHER
and scrape clean with a rubber spatula. Pack ice cream down into ICE
CREAM CAN.
KNOW YOUR ICE CREAM MAKER
-4- -5-
HOW TO USE YOUR ICE CREAM MAKER
NOTE: Before using for the first time, wash all parts except MOTOR DRIVE
(see “HOW TO CLEAN YOUR ICE CREAM MAKER”).
1. Pour chilled ice cream mixture into cooled ICE CREAM CAN. Fill ICE
CREAM CAN only
3
/4 full, as mixture will expand during freezing.
2. Insert DASHER. Be sure that bottom of DASHER fits the indentation at
bottom of ICE CREAM CAN.
3. Place COVER on ICE CREAM CAN.
ROCK SALT for making ice cream
ROCK SALT for hardening ice cream
CRUSHED ICE for making and hardening ice cream
3 Cups
2 Cups
5-10 lbs.
4 Cups
3 Cups
10-15 lbs.
4 Quart 6 Quart
MAKER SIZE
For best results use Rival Rock Salt
DASHER
MOTOR DRIVE
COVER
ICE CREAM CAN
BUCKET SLOTS
BUCKET
DRAIN HOLE
FRRVCB40_60_08EM1.qxd:8804_8806_07EM1.qxd 10/16/08 8:58 AM Page 5