5.3 Setting the clock
Keep pressing the RIGHT side until the clock symbol appears in the display. Then
keep the LEFT side pressed down until the 24 hour display blinks. Use the RIGHT
side to select between the 12/24 hour display of the CLOCK and conrm by
pressing the LEFT side. The hours display will then start blinking. Now pressing
the RIGHT side will increase the hours value. When you have the hours value you
want, press the LEFT side and the minutes display will start blinking. Now keep
pressing the RIGHT side until you have the minutes value you want. To conrm your
setting press the LEFT side. You have now completed the settings and the bicycle
computer is ready for use.
5.4 Bicycle computer check
To check that the bicycle computer and sensor have been correctly installed,
press the LEFT side to activate the display. Ensuring that the computer is rmly
attached to the computer mount, turn the front wheel of your bicycle and the
speed will be displayed.
5.5 Restart/Reset
To reset entered and saved data, you have to remove the battery from the compu-
ter for a short time, and repeat the settings (refer to section 5.1).
5.6 Automatic starting/stopping of readings
You don’t have to switch on the bicycle computer each time before use (in time
display). When you start riding, all the readings will automatically start until the bi-
cycle comes to rest. The bicycle computer will automatically switch to power saving
mode, if the bicycle is not in use for a period longer than approx. 5 minutes.
6. MODES/FUNCTIONS
After starting up the bicycle computer, the display will show the last selected
display function.
Speed: is continuously calculated and updated, and shown in the upper part of
the display. Measuring range: 0.1 – 99.9 Km/h
Press the RIGHT side to switch between the following modes:
ODO (total distance travelled): ·
All kilometres (miles) travelled will be stored.
Maximum memory: 9999.999
MXS (maximum speed): ·
The maximum speed attained will be stored.
Maximum memory: 99.9
AVS (average speed) ·
Maximum memory: 99.9
The clock symbol (time) ·
SCAN (Scan function): ·
Rolling function display: keep pressing the RIGHT side until you reach the
SCAN mode (the word SCAN will appear in the display). In this mode, the DST,
MXS, AVS and TM functions will automatically be displayed in approx.
3 second intervals.
Background lighting: ·
Briey pressing the LEFT side will light up the background lighting for approx.
3 seconds.
One-off quick scan run-through: ·
If you keep the RIGHT side pressed down for approx. 2 seconds, a one-off quick
scan run-through will be made with the background lit up.
TM (journey time / journey chronometer): ·
Automatically started when journey begins.
Maximum memory: 9 hrs 59 min 59 sec
DST (journey distance): ·
Automatically started when journey begins. Maximum memory: 999.999
Speed tendency: ·
The wheels on the bicycle symbol (top left part of display) will rotate forwards
or backwards depending on whether you are riding more quickly or slowly then
your average speed.
6.1 Resetting the route data (DST, TM, AVS) to zero
Press the RIGHT side to display (DST). Then press the LEFT side and keep pressed
down for approx. 3 seconds. The 3 route data readings (journey distance, journey
time, average speed) will be reset to zero.
6.2 Resetting the maximum speed to zero
Keep pressing the RIGHT side until the maximum speed (MXS) is displayed and
then keep the LEFT side pressed down for 3 seconds. The maximum speed (MXS)
will be reset to zero.
7. REplaCINg ThE baTTERIES
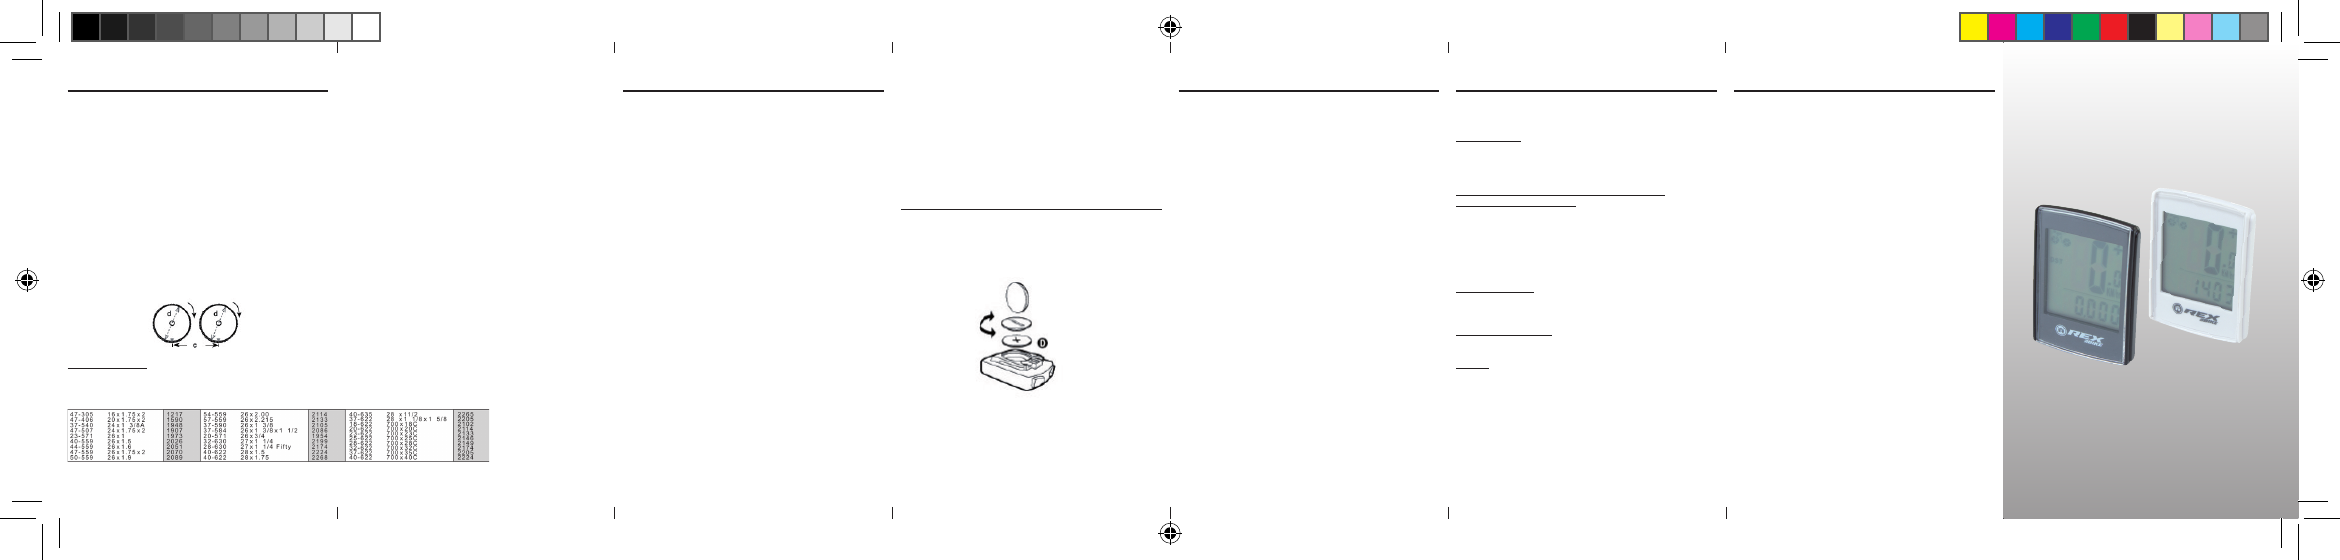
7.1 Bicycle computer
Unscrew the lid of the battery compartment (located on the underside of the
bicycle computer) using a coin. Insert the battery so that the plus pole (+) is vis-
ible. Replace the lid and screw shut. After the batteries are inserted, all the settings
must be repeated (refer to section 5.2 Setting the tyre size).
10. WaRRaNTY pROVISIONS
Bicycle computer article no.: 0528
This bicycle computer is provided with a 2-year warranty. The warranty period starts
from the date of purchase (purchase receipt, proof of purchase). During the war-
ranty period, address any complaints you may have to your dealer or the service
address provided below. During this period we will correct free of charge all faults
caused by material defects or malfunctioning.
Batteries, defects caused by improper handling, a fall, impact and the like are
excluded from the warranty. Please note that the warranty period is not affected by
any repair or replacement. The 2-year warranty period starting from the purchase
date shall remain in effect.
After the warranty period has expired, you will still be able to send the defective
bicycle computer to the service address provided below to be repaired. Any repairs
caused after the warranty period has expired are, however, subject to charge. After
prior telephone contact, please send your properly packaged bicycle computer
(with your purchase receipt) with sufcient postage to the following address:
Prophete GmbH u. Co. KG
Lindenstrasse 50
D-33378 Rheda-Wiedenbrück
Phone: +49 (0) 5242 4108-59
Fax: +49 (0) 5242 4108-73
Email: service@prophete.net
Website: www.prophete.de
5. INITIal OpERaTION
We recommend that you rst carefully read the operating instructions, before using
the bicycle computer the rst time.
5.1 Switching on the bicycle computer for the rst time
Before you can use the bicycle computer for the rst time, you must make a few
settings. Insert the battery (refer to section 7.1). The rst display will be the input
for the tyre size “2124”.
The rst digit of the tyre size setting will blink (refer to Table 5.2). You can increase
the number by pressing the RIGHT side. When the value you want appears, press
the LEFT side – the next digit will start blinking. Repeat this process until you
have set all the numbers of the tyre size correctly. You now have the opportunity
to set for kilometres or miles. Press the RIGHT side for miles. To save your setting,
press the LEFT side.
5.2 Setting the tyre size
After inserting the battery (section 7.1) or changing the tyre size, you have to
repeat the procedure described in section 5.1.
Determining the tyre size: mark the front tyre and the ground at the same spot, or
alternatively, use the valve for orientation. Rotate the wheel through one revolution
and measure the distance covered in mm. This is your entry value. Or alternatively,
use the table below for orientation.
8. DEClaRaTION OF CONFORMITY
It is hereby conrmed that the designated product conforms to the fundamental
requirements of the following European guidelines:
2004/108/EG EMV guideline
European Parliament and Council guideline from 15.12.2004
2006/95/EG Low voltage guideline
European Parliament and Council guideline from 12.12.2006
The conformity of this product with the guidelines is established by its full
compliance with the harmonised and non-harmonised standards.
9. DESCRIpTION OF ERRORS
In the event of an error occurring, please check the following points rst, before
you make any complaint about the bicycle computer.
Speed not displayed
Check for correct magnet/sensor alignment ·
Check batteries ·
The display will not work if the batteries are too weak ·
Incorrect speed reading, or speed is displayed when not in motion,
or maximum speed display is too high
Check that you have the right setting for the tyre size ·
Check that you have the right km/miles setting ·
Check that magnet and sensor are correctly positioned ·
It is possible that unknown atmospheric or RF disturbances, atmospheric or ·
radio interferences, high-voltage power lines, railway lines etc. may also cause
an incorrect speed display.
No display (blacked out)
Too high temperature, or display is exposed to direct sunlight. Display will return
to normal when cooled off.
Display shows erratic numbers
Remove bicycle computer battery and reinsert.
No display
Check the batteries ·
Check that the batteries are inserted the right way round (+/-). ·
bICYClE COMpUTER
OpERaTINg INSTRUCTIONS
Art. No.: 0528 | 6 Functions