15
Instalación
Montaje trasero DIN
Instalación usando los orificios
roscados en el lado de este producto
• Fijación de este producto a la
ménsula de montaje de radio de
fábrica. (Fig. 15) (Fig. 16) (Fig. 17)
Seleccione una posición en donde los
orificios de la ménsula y los orificios
roscados de este producto se alineen
(queden fijos), y apriete los tornillos en
2 lugares sobre cada lado. Utilice
cualquiera de los tornillos de fijación
(4 × 3 mm), tornillos de fijación (5 × 6
mm) o tornillos de cabeza embutida (5
× 6 mm), dependiendo en la forma del
tornillo de los orificios roscados en la
ménsula.
*1 Utilice solamente tornillos de fijación
(4 × 3 mm).
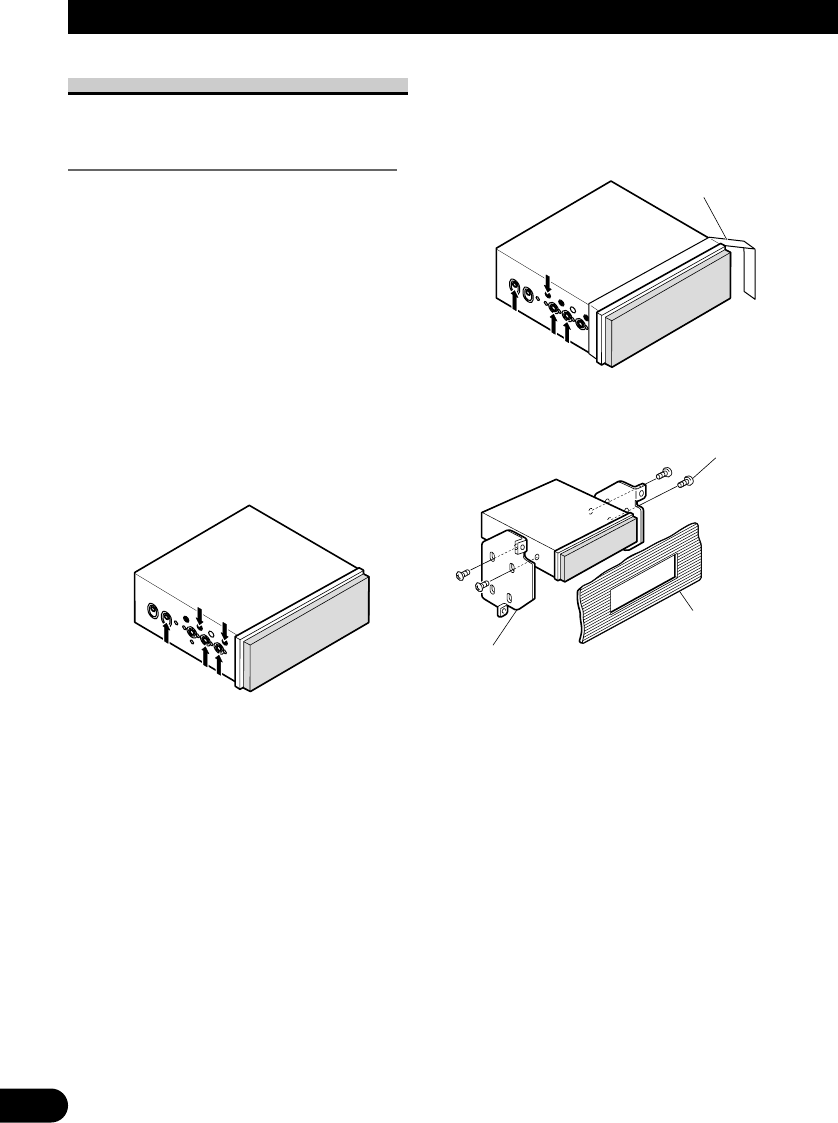
Fig. 15
• Cuando instale en un espacio poco
profundo, utilice los orificios de
tornillos siguientes. En este caso,
fije la cinta oculta en las partes que
se proyectan desde el tablero de
instrumentos.
Fig. 16
*2 Si los orificios de tornillo de la ménsula y los
orificios de tornillo de esta unidad no están
alineados, utilice una lima para ampliar los
orificios de tornillo de la ménsula de modo
que correspondan a los orificios de tornillo de
esta unidad. Apriete los tornillos en 2 sitios
en cada lado.
Fig. 17