RC2573GR DFU # 3135-xxx-xxxxx 08/12/02
4
When the CLON99BK first establishes communication with the Philips iTV, an on-screen prompt instructs the user to PRESS POWER. THE
MENU THAT WILL THEN APPEAR DEPENDS UPON WHETHER THE POWER COMMAND IS SYSTEM 0 (GUEST MODE) OR
SYSTEM 7 (SETUP MODE). ONLY THE RG4172BK / RC2573GR SETUP REMOTES CAN ISSUE SYSTEM 7 SETUP-MODE
POWER COMMANDS.
A setup-mode power command invokes the six-item CLON99BK SmartLoader menu (see below, left) that includes menu items to download
(read) television settings into the SmartLoader, erase the SmartLoader memory, and perform a system test.
A guest-mode remote POWER command or television front panel POWER command invokes an abbreviated menu (see below, right) from which
you can only upload (write) the settings currently stored in the SmartLoader to the television. This is intended to simplify uploading settings to
a large number of televisions, requiring only the guest-room remote, or no remote at all (assuming the front panel has not been locked out).
NOTE: The settings stored in the SmartLoader must match the memory type of the television to which you wish to upload.
Please consult the CLON99BK Instructions For Use (3135 015 14061) for more information.
Six-Item SmartLoader Menu
(Requires Setup Remote)
Press POWER; Setup Remote In Setup Mode
PHILIPS SMARTLOADER 99
SYSTEM VERSION D.0
1 - READ TV
2 - WRITE TV WITH SETTINGS
3 - WRITE TV WITHOUT SETTINGS
4 - ERASE SMARTLOADER MEMORY
5 - SYSTEM TEST
6 - EXIT SMARTLOADER
STORED MEMORY TYPE 01, 04
Write-Only SmartLoader Menu
(Press POWER On Front Panel, Guest Remote
or Setup Remote In Guest Mode)
PHILIPS SMARTLOADER 99
SYSTEM VERSION D.0
PRESS CH/UP TO WRITE TV
PRESS POWER TO EXIT SYSTEM
STORED MEMORY TYPE 01, 04
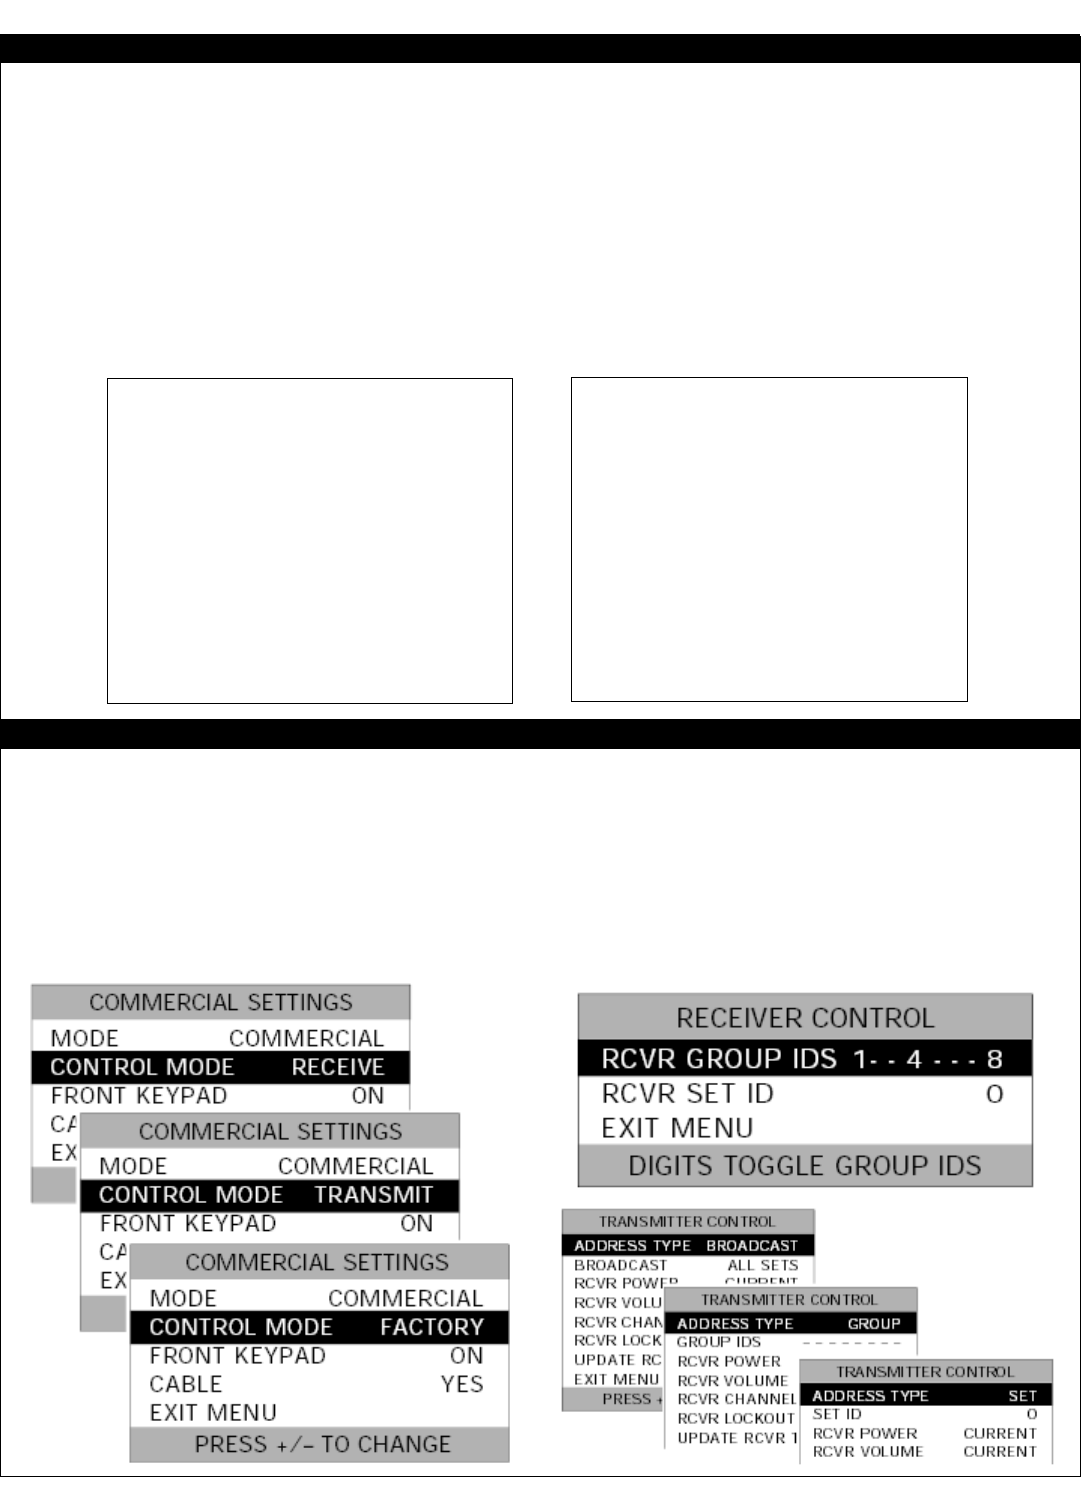
The alpha / soft keys on the RG4172BK / RC2573GR setup remote are required during the setup of the Philips iTV Net1Card. The functions
of the alpha keys are not affected by the setup remote’s mode. The A key is used to configure the Net1Card’s control mode (Receive,
Transmit, Factory, or Computer). The commercial settings menu appears when the A key is pressed. If the Net1Card is configured as a receiv-
er, then when the D key is pressed, the Receiver Control menu appears, allowing the card’s ID number and stand-alone groups to be configured.
If the Net1Card is configured as a transmitter, then when the D key is pressed, the Transmitter Control menu appears, from which stand-alone
commands can be sent to the Net1 client televisions.
Please consult the Net1Card instruction booklet (IB7975E002) for additional information.
“A” Key Net1Card Menu
“D” Key Net1Card Menus
USING THE SETUP REMOTE RG4172BK / RC2573GR WITH THE CLON99BK SMARTLOADER
USING THE SETUP REMOTE RG4172BK / RC2573GR WITH THE NET1CARD