INSTALLATIE
23
22
STORINGEN
Algemeen
Dit toestel mag alleen door een erkend
gastechnisch installateur aangesloten
worden.
Het toestel wordt niet aangesloten op een
rookgas-afvoerkanaal.
Elektrische aansluiting
230 V - 50 Hz
De elektrische aansluiting moet voldoen aan
de nationale en lokale voorschriften. Voor
Nederland is dit onder andere NEN 1010. Zie
ook gegevensplaatje en aansluitschema.
Het gegevensplaatje bevindt zich in de
opberglade.
Zorg ervoor dat het aansluitsnoer niet met
onderdelen die heet worden in aanraking kan
komen.
Stopcontact en stekker moeten ten allen tijde
bereikbaar blijven.
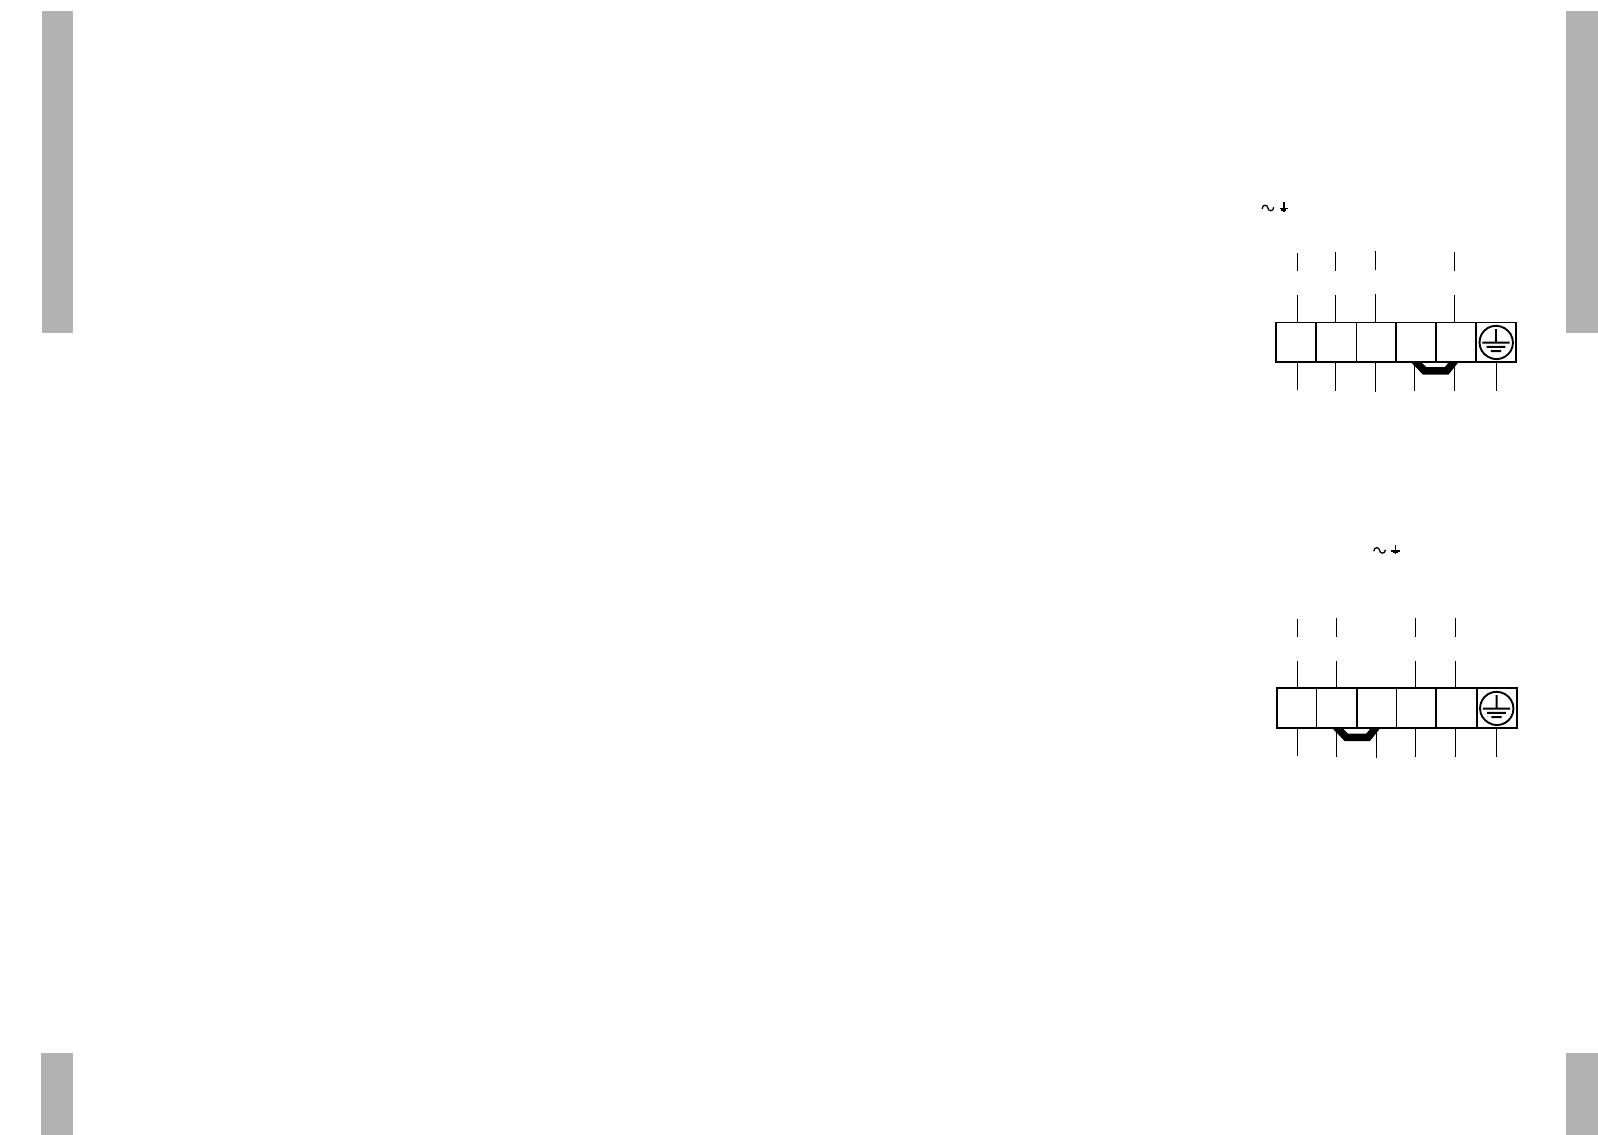
Aansluitschema's
3-fase-aansluiting met 0
De aansluitkabel is aangesloten zoals op het
onderstaande schema staat aangegeven
( ).
fig. 19: Aansluitschema
2-fase-aansluiting
Wanneer dat noodzakelijk is kunt u de
aansluiting wijzigen in een zogenaamde 2-fase
aansluiting ( ), conform het
onderstaande schema.
fig. 20: Aansluitschema
Storingen zelf verhelpen
Mocht het toestel niet naar wens
functioneren, controleer dan eerst of u de
storing zelf kunt verhelpen met behulp van de
onderstaande aanwijzingen. Vaak is maar een
kleinigheid de oorzaak van de storing.
Oven wordt niet warm
– Verkeerde temperatuur ingesteld.
– Stel de oventemperatuur opnieuw in.
– Thermostaat defect.
– Oven uitzetten en service dienst bellen.
Klok werkt niet (indien van toepassing)
– Geen stroomtoevoer.
– Steek de stekker in het stopcontact.
– Zekering in de meterkast defect.
– Vervang de zekering.
Oven of grill wordt niet warm
– Zekering in de meterkast defect.
– Vervang de zekering.
– Verkeerde temperatuur ingesteld.
– Stel de oventemperatuur opnieuw in.
– Thermostaat defect.
– Oven uit zetten en servicedienst bellen.
– Klok (indien van toepassing) niet goed
ingesteld.
– Stel de klok op de juiste wijze in (zie
pag. 13).
Ovenverlichting brandt niet
– Geen stroomtoevoer.
– Steek de stekker in het stopcontact.
– Lamp defect.
– Maak het toestel spanningsloos door de
stekker uit het stopcontact te trekken of
door de hoofdschakelaar in de meterkast
om te draaien. Draai het glaskapje links
achterin de oven los. Vervang het lampje.
Draai het glaskapje weer vast. Let op de
juiste plaats van de afdichting.
Schakel de zekering weer in.
Let op: Gebruik alleen lampjes van 15 W,
die tot 300 °C hittebestendig zijn.