328519
31
Zoom out
Zoom in
Previous page
1/32
Next page
59
MONTAGE
Montage
Ofentür mit Links- oder Rechtsanschlag
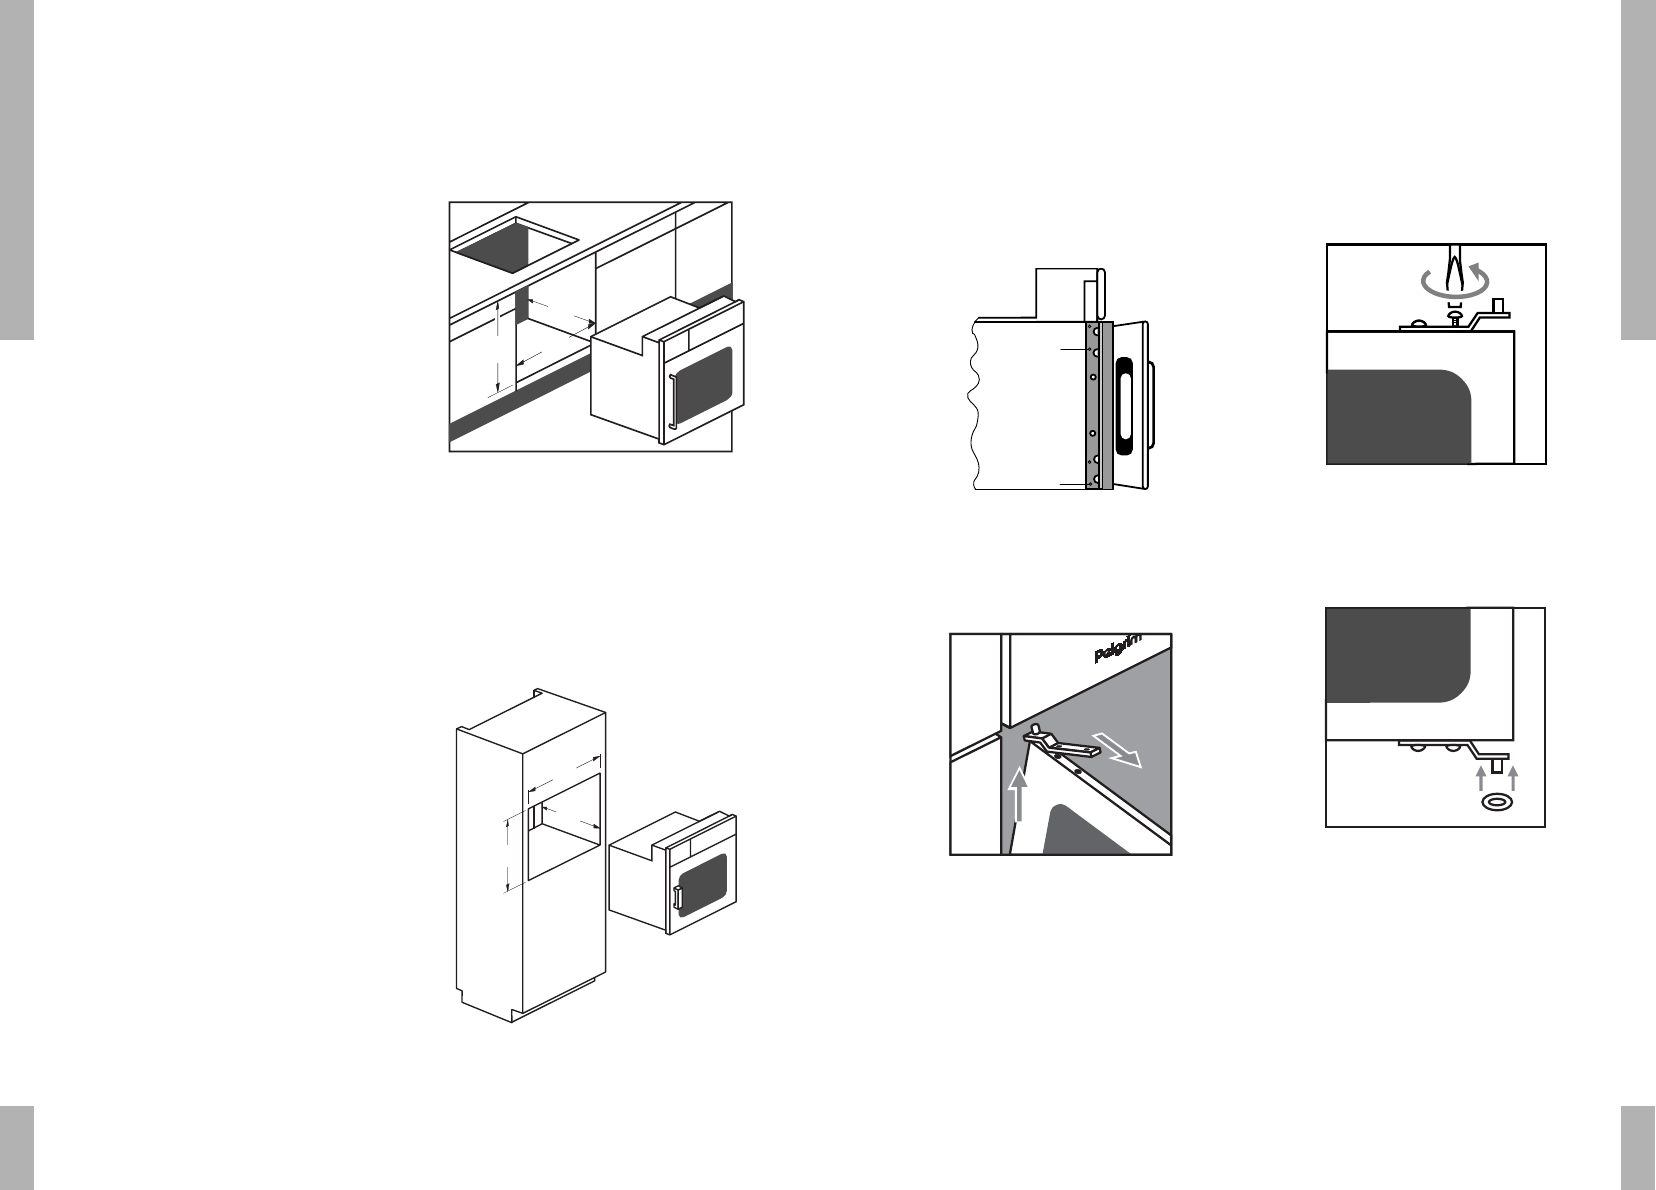
Die Schutzleiste durch Entfernen der
Befestigungsschrauben 1 und 2 abnehmen
(siehe Abb. 7). Leiste abnehmen und
Schrauben wieder andrehen.
Das obere Scharnier durch Lösen der 2
Schrauben abnehmen. Die Tür aus dem
unteren Scharnier heben (siehe Abb. 7a).
Das Scharnier wieder an der Tür
befestigen.
Die Tür andersherum drehen, so daß sich
der Handgriff auf der anderen Seite
befindet.
Das Scharnier, das sich nun auf der oberen
Seite befindet, entfernen (Abb. 7b).
Achtung: der Ring gehört zum unteren
Scharnier.
Die Tür in das untere Scharnier schieben.
Den Ring zwischen Scharnier und
Scharnierhalterung legen (siehe Abb. 7c).
Nun das obere Scharnier anbringen.
Schutzleiste an der gegenüberliegenden
Seite anbringen.
Lösen Sie den Aufnahmezapfen der
Türverriegelung und bringen Sie ihn auf der
anderen Seite an.
Abb. 7a
Abb. 7b
1
2
Abb. 7
Abb. 7c
58 INSTALLATION
Installation
Allgemeines
Wenn das Gerät nicht mit einem
Anschlußkabel mit Stecker ausgestattet ist,
ist es ausschließlich von einem Fachman an
das Lichtnetz anzuschließen.
Beachten Sie:
Auf dem Schild mit elektrischen Angaben
wird der Anschlußwert und die erforderliche
Netzspannung angegeben. Das Anschließen
des Gerätes hat nach den örtlich und
national geltenden Vorschriften zu erfolgen.
Elektrischer Anschluß
230 V -50 Hz.
Anschlußkabel mit Stecker
Anschlußschemen
An der Hintenseite des Gerätes befindet
sich ein Etikett mit den Anschlußschemen.
Kombination des Ofens mit einem Pelgrim-
Gaskochfeld (siehe Abb. 5)
Bitte ziehen Sie vor dem Einbau dieser
Kombination die Bedienungsanleitung des
Kochfelds zu Rate.
Solo-ofen (siehe Abb. 6)
Ofen an das Stromnetz anschließen.
Ofen in den Schrank schieben.
Ofentür öffnen und mit 2 Schrauben je
Seitenwand festschrauben.
600
550
560
Abb. 5
595
550
560
Abb. 6
31


Need help? Post your question in this forum.

Forumrules


Report abuse

Libble takes abuse of its services very seriously. We're committed to dealing with such abuse according to the laws in your country of residence. When you submit a report, we'll investigate it and take the appropriate action. We'll get back to you only if we require additional details or have more information to share.

Product:

For example, Anti-Semitic content, racist content, or material that could result in a violent physical act.

For example, a credit card number, a personal identification number, or an unlisted home address. Note that email addresses and full names are not considered private information.

Forumrules

To achieve meaningful questions, we apply the following rules:

Register

Register getting emails for Pelgrim osk 992 col at:


You will receive an email to register for one or both of the options.


Get your user manual by e-mail

Enter your email address to receive the manual of Pelgrim osk 992 col in the language / languages: English, German, Dutch, French as an attachment in your email.

The manual is 0,31 mb in size.


You will receive the manual in your email within minutes. If you have not received an email, then probably have entered the wrong email address or your mailbox is too full. In addition, it may be that your ISP may have a maximum size for emails to receive.

The manual is sent by email. Check your email

If you have not received an email with the manual within fifteen minutes, it may be that you have a entered a wrong email address or that your ISP has set a maximum size to receive email that is smaller than the size of the manual.

The email address you have provided is not correct.

Please check the email address and correct it.

Your question is posted on this page

Would you like to receive an email when new answers and questions are posted? Please enter your email address.


Info