Baking Bread
1
Remove the bread pan and
set the kneading blade
Place the measured ingredients
in the bread pan
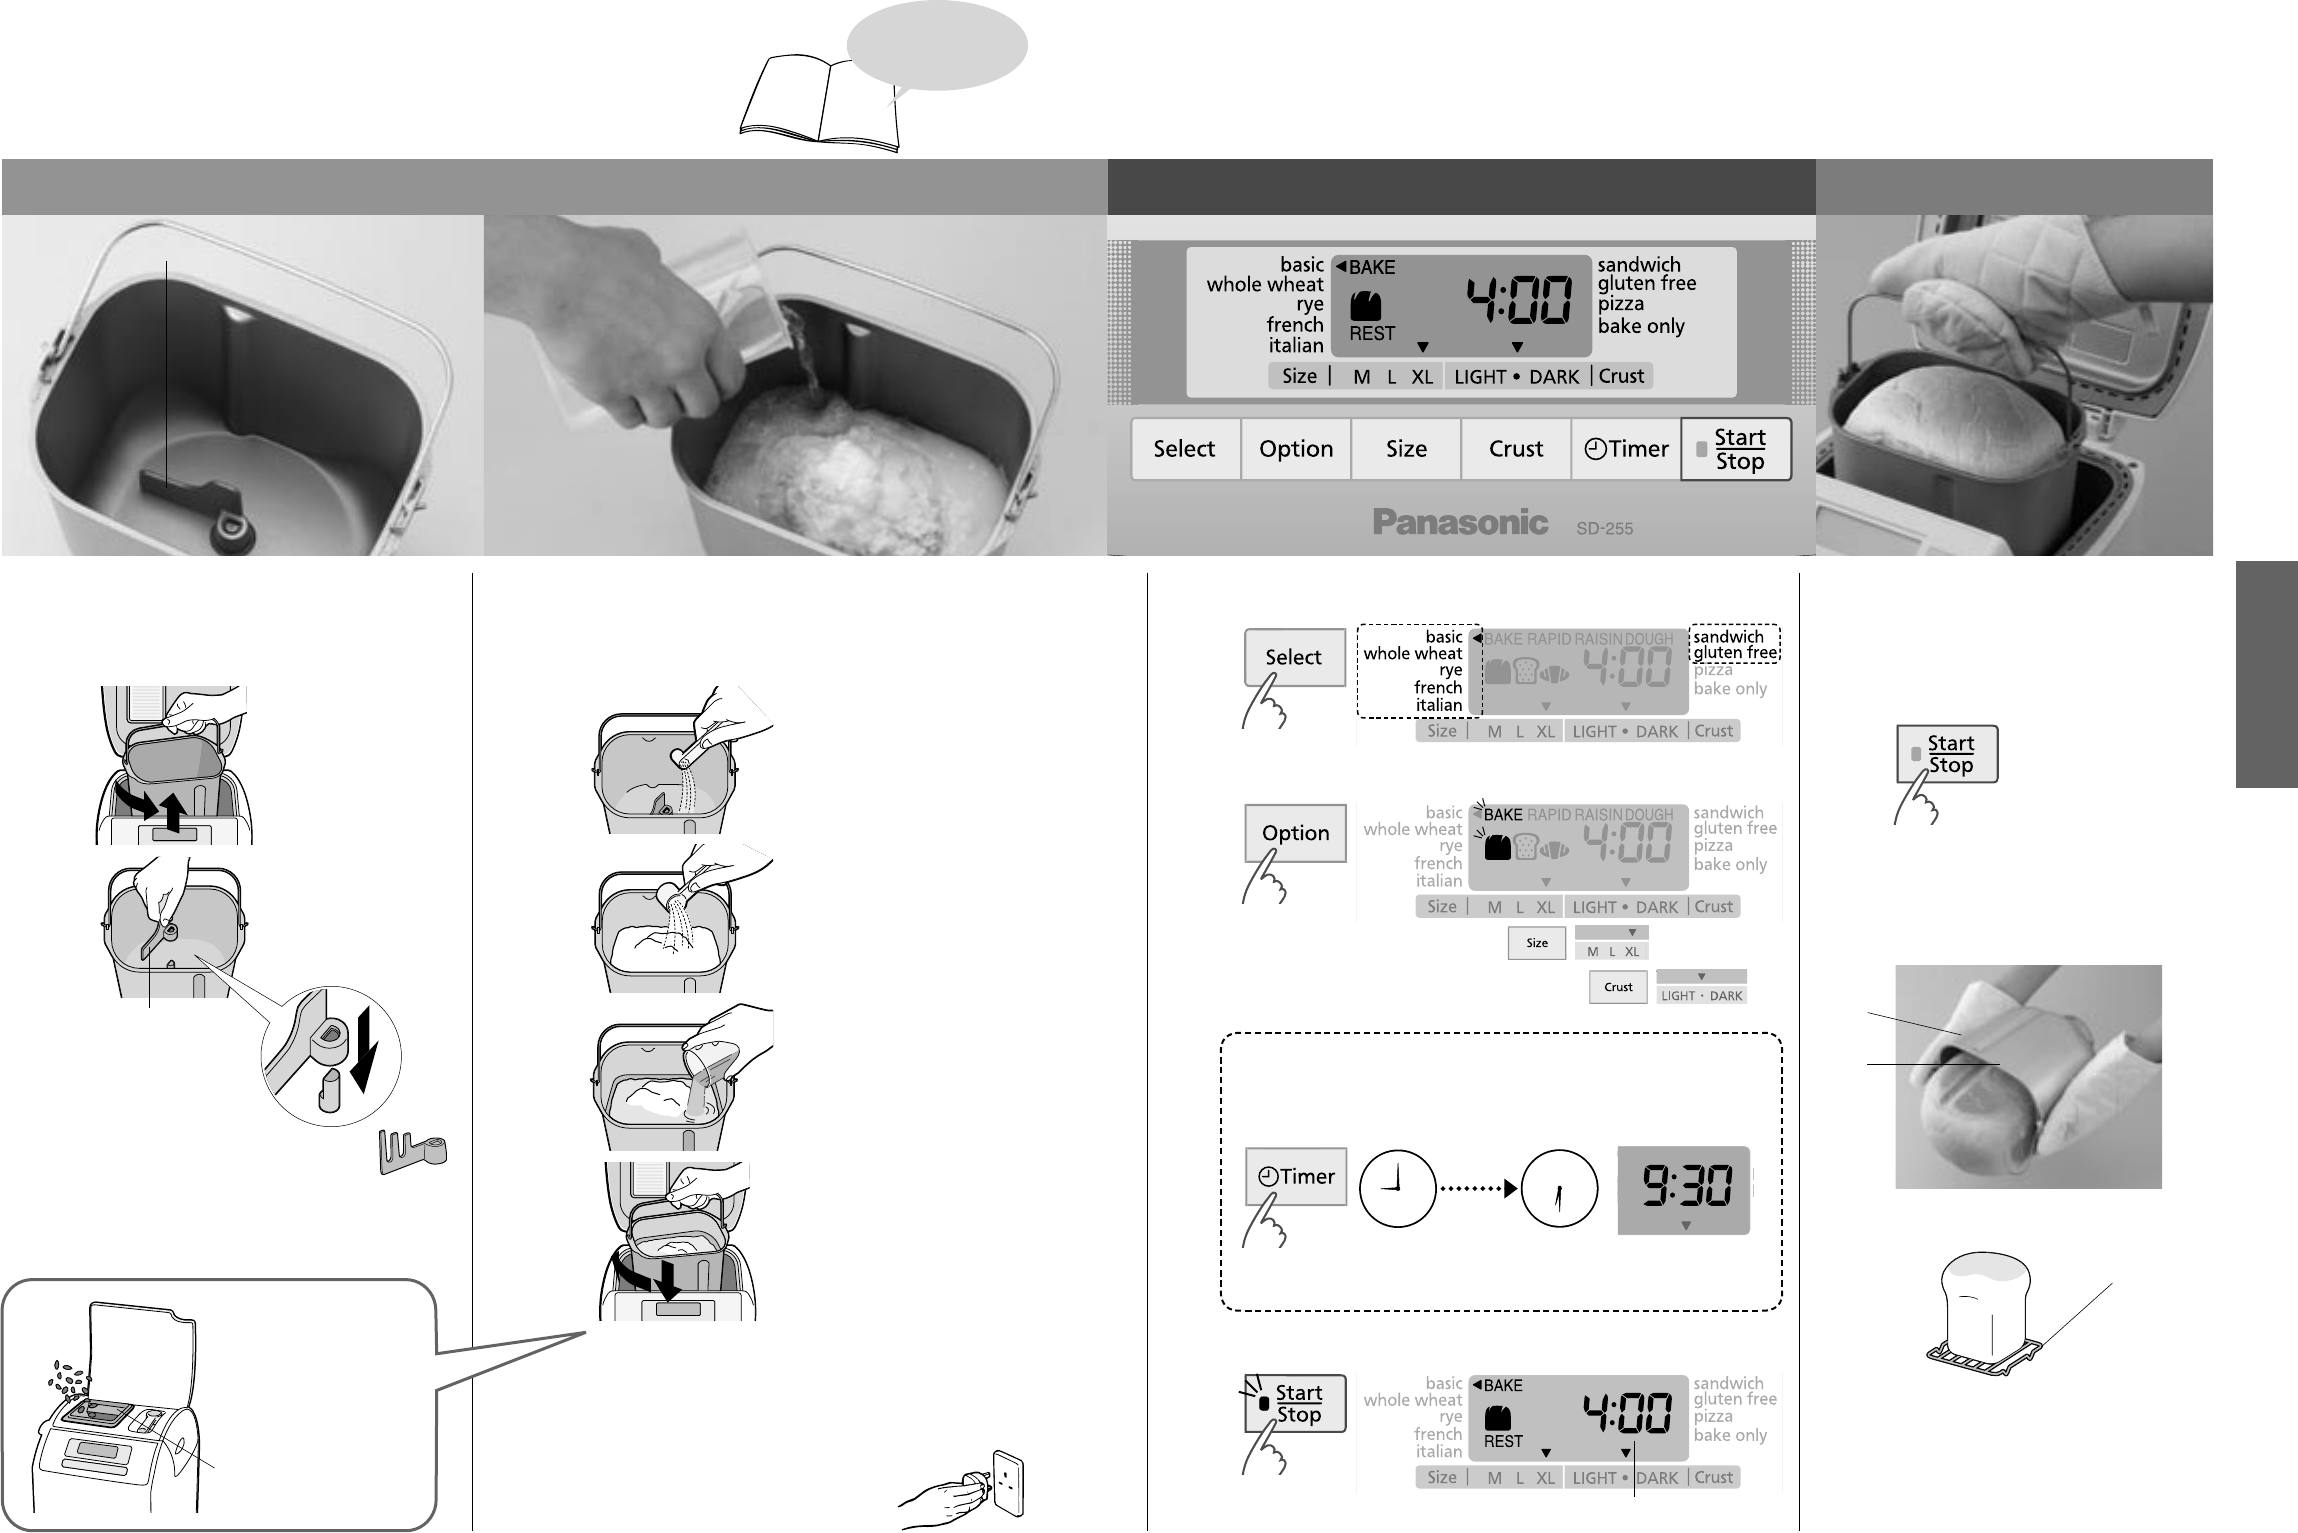
Select a bread type
Place the ingredients in the bread pan Remove the breadSet the programme and start
1 Twist the bread
pan anti-
clockwise and
lift up to remove
2 Place the
kneading blade
firmly onto
the kneader
mounting shaft
Plug the breadmaker into a
230-240V socket
6
Start the machine
Kneading blade
3
2
2 Cover the yeast with
all the dry ingredients
(flour, sugar, salt, etc.)
4 Put the bread pan into
the breadmaker and
turn slightly clockwise
5 Close the lid
3 Pour in the water and
any other liquids
• Wipe the outside of
the pan to remove any
flour or liquid
1 Place the dry yeast at
the bottom (so that it
does not mix with the
liquid until later)
Press ‘Stop’ and
remove bread
when the bread is ready
(unit beeps 8 times)
8
7
Remove the bread
immediately,
allow to cool
9h 30m
from now
Current time Ready time
● If you leave the bread to cool
down without removing it from
the pan, the finished quality of
the loaf will be affected.
● Unplug your breadmaker
(holding onto the plug) after use.
e.g. It is 9:00 PM now, and you want the bread to be ready at
6.30 the next morning.
➔ Set the timer to ‘9:30’ (9 hours 30 minutes from now).
* SD-255 display shown.
Turn to P14-21
for bread recipes
■ Baking bread
with added
ingredients
(P.11)
(SD-255 only)
Clean and dry
beforehand
• Use the specified kneading
blade when baking rye bread.
(SD-255 only)
• The blade fits loosely into place, but it
must touch the bottom of the bread pan.
● For optimum results, don’t open the lid until
bread is complete as it affects bread quality.
● Make sure the start/stop light
is off.
●
The
flashing start/stop light will go off
.
● The start/stop light will come on.
● See P.13 for availability of size and crust.