Combination of the Two Modes –
RED-EYE REDUCTION NIGHT SCENE FLASH
Prevents the typical red eyes seen in pictures when shooting at night
(see figure 7 on page 126). Both modes cannot be combined with the Spot
Metering mode. Closing the lens barrier restores the Auto Flash mode.
SETTING THE FLASH MODES
SPECIAL FEATURES
EN
9
Open the back flap and keep page 126 visible.
Red Eyes in Flash Pictures –
RED-EYE REDUCTION FLASH
When taking flash photos of persons in the dark the flashlight falls into
the wide-open iris. There the flashlight is reflected red from the retina.
The Red-Eye Reduction Flash emits a series of low-power pre-flashes
before the main flash. This gives the subject’s eyes a chance to adapt to the
bright light by making the iris smaller. Assuming that the subject looks into
the pre-flashes, the eyes will not appear red in the picture (see figure 3 on
page 126).
• Hold the camera securely. It takes about 1 second until the shutter
releases.
• Red-eye reduction may not be effective when the subject:
1. Is not looking at the flash from right in front.
2. Is not watching the pre-flashes.
3. Is too far from the camera.
The effectiveness of red-eye reduction varies depending on the individual
characteristics of each subject.
No Flash Allowed or Flash Spoils Atmosphere – FLASH-OFF
The Flash-Off is needed where flash photos are not allowed or where you
want to keep the twilight or artificial light atmosphere unspoiled (see figure
4 on page 126).
• Since a slow shutter speed (as low as 2 seconds) is selected, use a tripod
to prevent camera-shake.
• Have your subject stay still; otherwise, blurring may result.
Closing the lens barrier restores the Auto Flash mode.
Shadow on the Face – FILL-IN FLASH
When taking portrait photos in backlight or underneath a tree or roof,
the subject’s face may look too dark. The Fill-In Flash provides just the right
amount of additional light to compensate for the shadow (see figure 5 on
page 126) and for fluorescent light.
• Make sure your subject is within the flash working range (p. 7).
• Fill-in flash becomes ineffective in extremely bright conditions.
Closing the lens barrier restores the Auto Flash mode.
City at Night – NIGHT SCENE FLASH
When taking a walk in the city at night, you may want to take photos of your
subject in the foreground with the city lights in the background. The Night
Scene Flash takes care of this. The main flash lights the subject in the
foreground while the shutter stays open up to 4 seconds to capture the city
lights. You’ll need to secure the camera on a tripod or other support to
prevent camera shake (see figure 6 on page 126).
SPECIAL FEATURES
EN
8
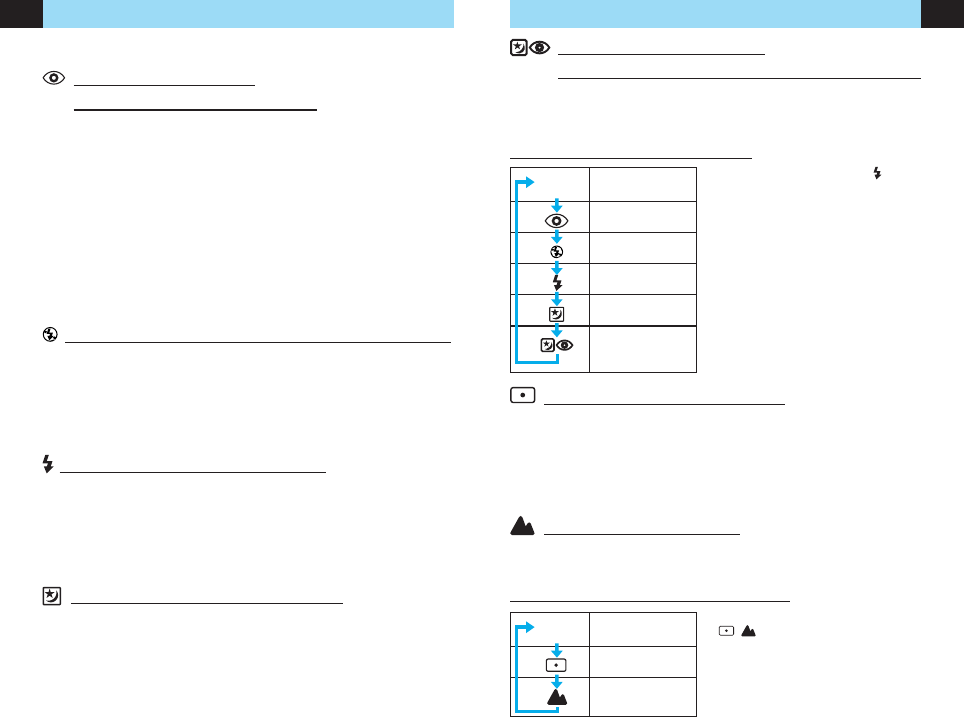
No
display
Auto Flash
Red-Eye
Reduction Flash
Flash-Off
Fill-In
Night Scene Flash
Red-Eye
Reduction Night
Scene Flash
High contrast – SPOT METERING
When taking photos in a high contrast environment (e.g. backlight portraits),
the main subject may come out too dark or too bright. To make sure that the
subject is exposed correctly use Spot Metering (see figure 1 on page 2).
Position the spot marks (A) on the area where you want to measure the
light. Press the shutter release button halfway; the green lamp lights and the
focus and exposure are locked on that area. Reframe your subject and
press the shutter release button all the way.
Shooting scenery – INFINITY
The camera automatically sets the workings distance at infinity. The flash
does not fire except in the Fill-In Flash mode (see figure 2 page 2).
SETTING THE EXPOSURE MODES
Press the flash mode button ( ).
The mode switches in the order
shown on the left. The selected mode
is displayed on the LCD panel.
Do not fire the flash right in front of
the eyes of people and animals.
Do not point the camera at a motorist
and fire the flash.
No
display
Auto Exposure
Spot Metering
Infinity
Press the exposure mode button
( / ). The mode switches in the
order shown on the left. The selected
mode is displayed on the LCD panel.
Closing the lens barrier restores the
Auto Exposure mode.