588689
4
Zoom out
Zoom in
Previous page
1/16
Next page
Zorg dat er voldoende vrije
ruimte is voor onderhoud en
dat de unit gemakkelijk
toegankelijk is. Hiervoor kan de
unit het beste op ooghoogte
worden gemonteerd. Plaats de
stoomluchtbevochtiger zo dicht
mogelijk bij de stoomverdeel-
pijpen of de stoom-nozzle. Het
hoogste rendement wordt
verkregen wanneer de unit met
een zo kort mogelijke
stoomslang wordt verbonden
met de stoomverdeelpijp.
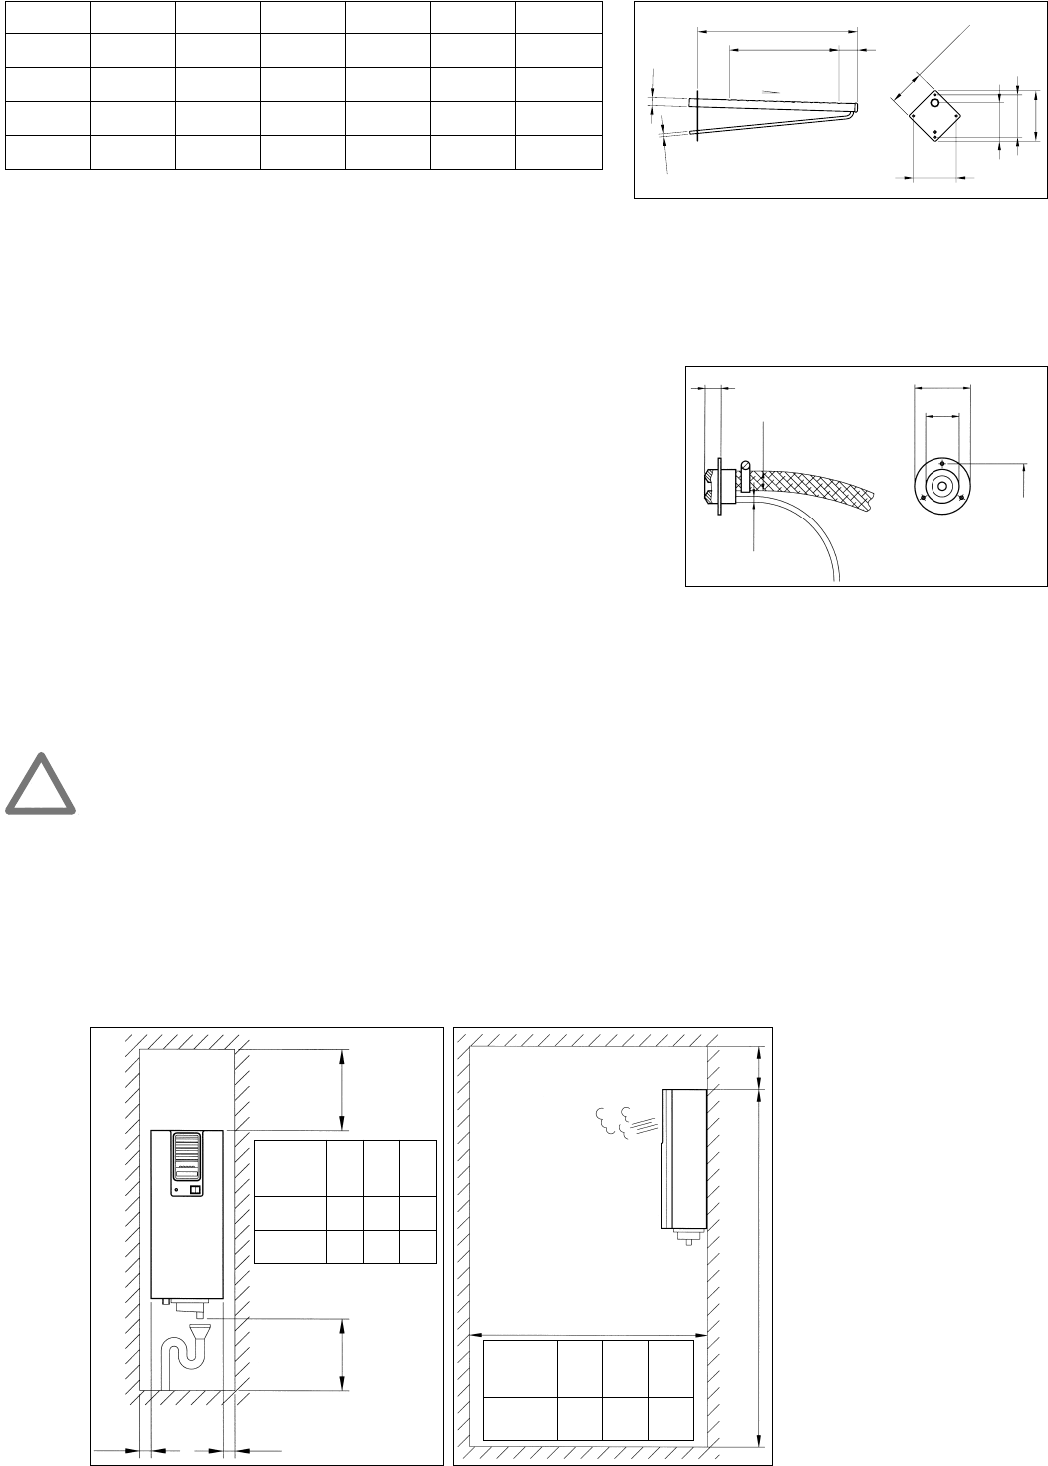
Plaatsing van de stoom-luchtbevochtiger
4
Afmetingen van de stoomverdeelpijpen
(een stoomnozzle wordt standaard met de DC 3000 meegeleverd, zie 1.2)
Type/mm A B C D Fig. Art.-Nr.
22–300 300 Ø 22 176 60 3 902 00 00
22–450 450 Ø 22 300 70 3 902 00 01
22–650 650 Ø 22 504 70 3 902 00 02
22–850 850 Ø 22 696 70 3 902 00 03
Figuur 5 Figuur 6
A
DC
B
ø8
3%
138
116
105
116
100x100
Figuur 3
A
CB
B
C
A
C
Type mm mm mm
ABC
RC 3000 280 380 40
DC 3000 320 280 40
Type mm mm mm
ABC
RC 3000 min. ca. min.
1200 2000 280
Voor stoomhoeveelheden van 2 en 3 kg/uur wordt met de DC units
een stoomnozzle meegeleverd. De stoomnozzle kan worden ingebouwd
in bijvoorbeeld luchtkanalen of worden gebruikt voor directe
ruimteluchtbevochtiging. Ook in deze gevallen dient u de voorschriften
voor de bevochtigingafstand in acht te nemen (zie 1.4).
Bij toepassing van een stoomnozzle mag de stoomslang niet langer
zijn dan 1,5 meter.
1.2 Afmetingen van de stoomnozzle
26
Ø 22/29
Ø 6/10
80
48
Ø 65
Figuur 4
Alle installatiewerkzaamheden dienen te worden uitgevoerd door vakkundig personeel.
Hiervoor is de klant zelf verantwoordelijk.
Voor wandmontage wordt het bevestigingsmateriaal meegeleverd.
Houd rekening met de diverse aangegeven minimale afstanden.
Om de deur van de bevochtiger te openen moet de schroef met een passende schroevendraaier naar links worden
gedraaid. De deur kan weer gesloten worden door deze gewoon licht dicht te drukken (zonder gebruik van
schroevendraaier).
1.3 Montage van de stoom-luchtbevochtiger
!
4


Need help? Post your question in this forum.

Forumrules


Report abuse

Libble takes abuse of its services very seriously. We're committed to dealing with such abuse according to the laws in your country of residence. When you submit a report, we'll investigate it and take the appropriate action. We'll get back to you only if we require additional details or have more information to share.

Product:

For example, Anti-Semitic content, racist content, or material that could result in a violent physical act.

For example, a credit card number, a personal identification number, or an unlisted home address. Note that email addresses and full names are not considered private information.

Forumrules

To achieve meaningful questions, we apply the following rules:

Register

Register getting emails for Nordmann RC-DC 3000 at:


You will receive an email to register for one or both of the options.


Get your user manual by e-mail

Enter your email address to receive the manual of Nordmann RC-DC 3000 in the language / languages: Dutch as an attachment in your email.

The manual is 0,79 mb in size.


You will receive the manual in your email within minutes. If you have not received an email, then probably have entered the wrong email address or your mailbox is too full. In addition, it may be that your ISP may have a maximum size for emails to receive.

The manual is sent by email. Check your email

If you have not received an email with the manual within fifteen minutes, it may be that you have a entered a wrong email address or that your ISP has set a maximum size to receive email that is smaller than the size of the manual.

The email address you have provided is not correct.

Please check the email address and correct it.

Your question is posted on this page

Would you like to receive an email when new answers and questions are posted? Please enter your email address.


Info