22226000. Replacement of the buttons for dust cover (1), cable reel (3) and on/off (4)
A-0.6.5
22226300. Replacement of the buttons for two speed regulation (6) and on/off (8)
13
218580xx. Replacement of the top housing (12)
223535xx. Replacement of the top housing King
22352900. Replacement of the On/Off button (4)
22352901. Replacement of the On/Off button two speed (8) with activator (7)
22353100. Replacement of the activator for cord reel
22353200. Replacement of the activator for On/Off
22353900. Replacement of the buttons for dust lid (1), cable reel (3) with pivots (2)
ASSEMBLY INSTRUCTIONS GM 200 / 300 / 400 & KING 500 SERIES
Instruction No. 82226401/00-08
To be performed by a skilled
or instructed person only !
Disconnect the vacuum cleaner
from the power supply before
starting the work!
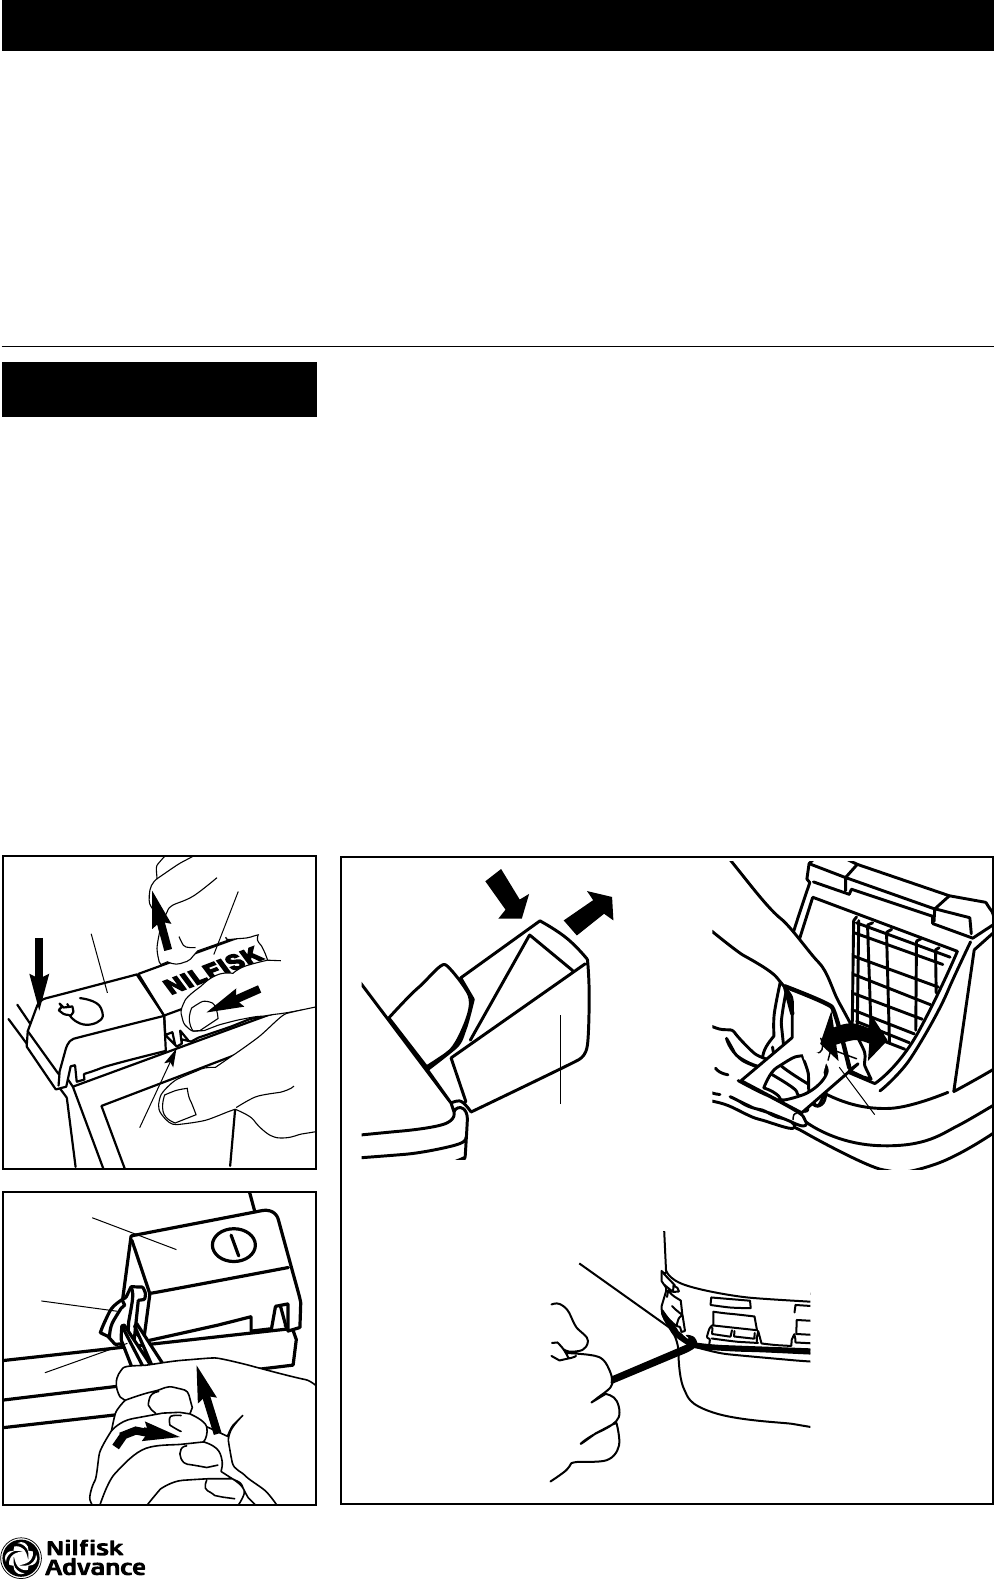
Removal of the dust cover
button (1), cable reel button (3)
and on/off button (4) for one
speed models
Open the accessory cover until it
stops and continue with a little
pressure by hand until it slides free
of the hinges and remove it.
Open the dust cover lid.
! Push down the cable release
button (a) and press by hand the
dust cover button sideways (b) to
release it, and lift it up (c).
@ Release and remove the side
pivots (2) with a pair of pliers (5). To
remove the cable reel (3) and/or
the on/off button (4), press the two
snaps on the button to release it
from the top housing & lift it away
after turning it 30 degrees.
# How to disassemble
the machine
Open the accessory cover until it
stops and continue with a little
pressure by hand until it slides free
of the hinges and remove it.
Models with bag-full indicator:
Open the dust cover (9) until it
stops and continue with a little
pressure by hand until it slides free
of the hinges.
Models with no bag-full indicator:
Open the dust cover (9) and lift it
out of the hinges.
Remove filter with dust bag.
Remove the dust bag holder (10)
by pressing bottom clip and ease
the holder out of the bottom. This
releases the hook at the container
wall.
To separate the top and bottom
housing and avoid scratches on
the parts, place tool no. 22361400
(11) under the buffer.
3
1
4
5
2
9
10
2
E
12
a
b
c
Q
W